Yoga for Coordination Improvement
Introduction
As you release the breath, bend forward from the waist while keeping your legs and spine straight. Keep your arms straight and use your fingertips to touch your toes. Gently release the position after taking a few regular breaths.
This position strengthens the legs and core and enhances body balance. Balance and coordination may be significantly enhanced with a few basic yoga positions. Improving both will lower your chance of injury and increase your endurance and strength as an athlete. Incorporate a yoga routine into your weekly routine; begin once a week and gradually increase the frequency.
This pose supports excellent neuromuscular coordination and increased awareness. Maintain a straight posture with your feet one foot apart and your hands at your sides. Raise both hands to shoulder level in front of your body, palms down, as you take a breath. Bend your knees 90 degrees over your ankles while maintaining an even weight distribution between your feet from Mountain Pose. Contract your lower abdominal muscles as you raise your arms and lower them. Proceed to the right tree pose after assuming the chair position.
Have you ever tried standing on one leg to tie your shoe and suddenly felt like the ground beneath you isn’t as solid as it was just a few seconds before? Or perhaps you’ve slipped while stepping off a curb, reaching for something above you, or turning too sharply?
Balance is a skill we usually don’t think about until it becomes difficult. Fortunately, balance may be improved with practice. Yoga for balance combines strength, awareness, controlled movements, breathing, and focus, all of which can help you become more stable in your standing and movement.
And no, the goal isn’t to stay perfectly still in an impressive one-legged pose. Wobbling is natural during the learning process. A helpful balance practice involves paying attention to what your body is doing, making small corrections, and gradually improving stability and control over time.
How Does Yoga Improve Coordination?
Yoga does not enhance balance merely because some poses require standing on one leg.
The real benefit comes from the combined practice of multiple skills at once.
Strength and Stability:
The muscles in your feet, ankles, legs, hips, and torso are used in standing positions. These muscle groups work together to keep you balanced and stable as your body’s centre of gravity shifts.
Body Awareness:
You can become more conscious of how your body weight is distributed across your feet by practicing yoga.
Are you putting more pressure on one foot?
Are your toes tightly pressing against the ground? Is one shoulder higher than the other?
By paying attention to these subtle details, you can gradually enhance your understanding of your body’s movements.
Controlled Movement:
Moving slowly into and out of a posture allows your body time to adjust properly.
Rather than moving quickly:
Position your feet → establish your posture → take a breath → concentrate → then move gradually.
Focus:
Maintaining balance becomes more difficult when your mind is distracted. Yoga encourages you to concentrate on your body, your breathing, and a fixed point of focus, rather than moving without awareness.
Mobility:
More comfortable movement can also be supported by adequate mobility in the hips, ankles, and spine. One aspect of the body may compensate while another feels constrained.
Therefore, practicing yoga poses for balance on a regular basis fosters improved coordination between movement and attention, which goes beyond simply improving the capacity to stay still.
What is the Best Yoga Pose for Neuromuscular Coordination?
One of the best asanas for the nervous system that massages the nervous system, strengthens immunity, and detoxifies the body. Sitting on the mat, cross your right leg over your left thigh. Bend your left leg until it touches your back after your right foot touches the ground.
One of the best yoga poses for students to improve their concentration and memory before an exam is Crane Pose, commonly called Bakasana. Arm strength, endurance, and spinal flexibility are all enhanced by this. Bakasana improves body awareness, tones the abdominal muscles, and regulates body weight.
The health of the body, mind, and emotions is certainly influenced by the nervous system, and overall well-being depends on balance. Here are eleven yoga poses that will effectively boost your nervous system. Vrikasana is a beautiful pose that allows you to absorb the qualities of trees and symbolises the powerful tree pose.
By enhancing body-mind coordination, this pose helps reduce stress and anxiety. It works well as an asana to strengthen the mind. The crane pose helps tone the muscles in the abdomen and strengthen the forearms.
Benefits of Practicing Yoga for Coordination
- Enhances proprioception—the awareness of where your body is in space—and balance.
- Improves movement precision and body control.
- Enables us to engage the deep muscles that allow various body parts to cooperate.
- Improves coordination.
- Raises awareness of one’s body.
- Strengthens the legs, hips, ankles, knees, and feet (in one-legged poses and twists).
- Keeps the core stable.
- Enhances posture.
- Lowers your chance of getting hurt.
- Increases tenacity and resolve.
- Improves concentration and focus.
- Sharpens and calms the mind.
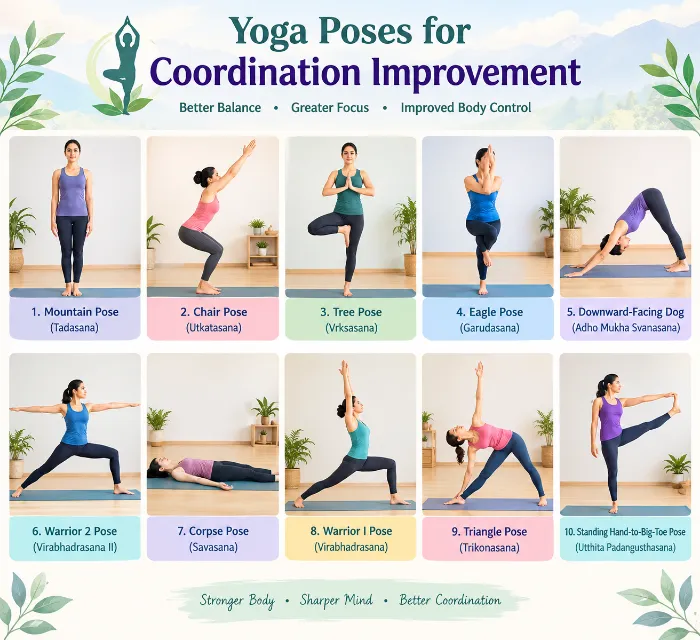
Yoga Poses for Coordination Improvement
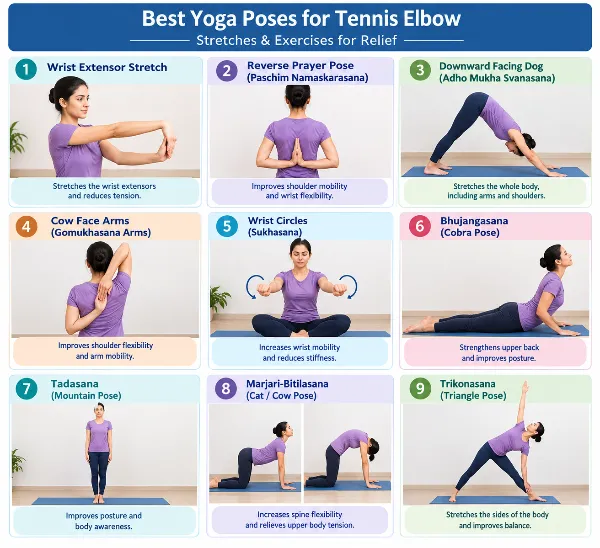
Tadasana (Mountain Pose)
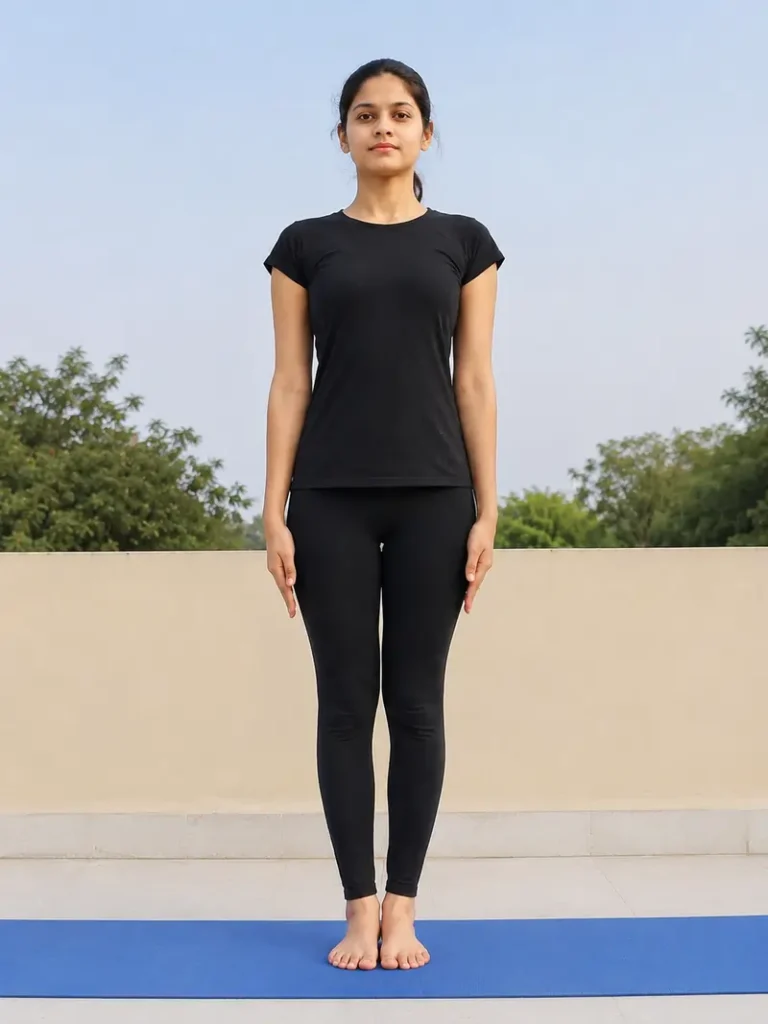
Steps:
- At the front of your mat or on any level surface, take a tall position.
- Keep the feet hip-width apart if that seems more stable, or bring the feet together with the big toes touching and heels slightly apart.
- Apply equal pressure to each of the foot’s four corners: the inner heel, outer heel, base of the big toe, and base of the little toe. Gently fan out your toes, then relax them back into their natural position.
- Gently engage the legs by lifting the kneecaps without locking the knees. Walk with a lively, steady pace while gently bringing your inner thighs toward each other.
- Gently extend the tailbone toward the floor and slightly bring the lower abdomen in to achieve a neutral pelvis. Avoid overarching the lower back or tucking the pelvis too much.
- While keeping the back’s natural curvature, extend the spine upward through the crown of the skull. Instead of pressing forward, allow the lower ribs to soften inward.
- Arms should be relaxed next to the body. Allow the shoulders to freely descend and rise without becoming rigid. The hands may be facing the thighs or placed slightly forward.
- Soften the eyes, jaw, and face. Maintain a steady, forward-looking gaze.
- Take easy, deep breaths through your nose as you settle into the pose.
- Wait for:
- 30 to 60 seconds (beginners)
- One to three minutes (intermediate)
- Five minutes or more (advanced)
- As a reset between standing positions, tadasana can also be held for three to five breaths.
Utkatasana (Chair Pose)
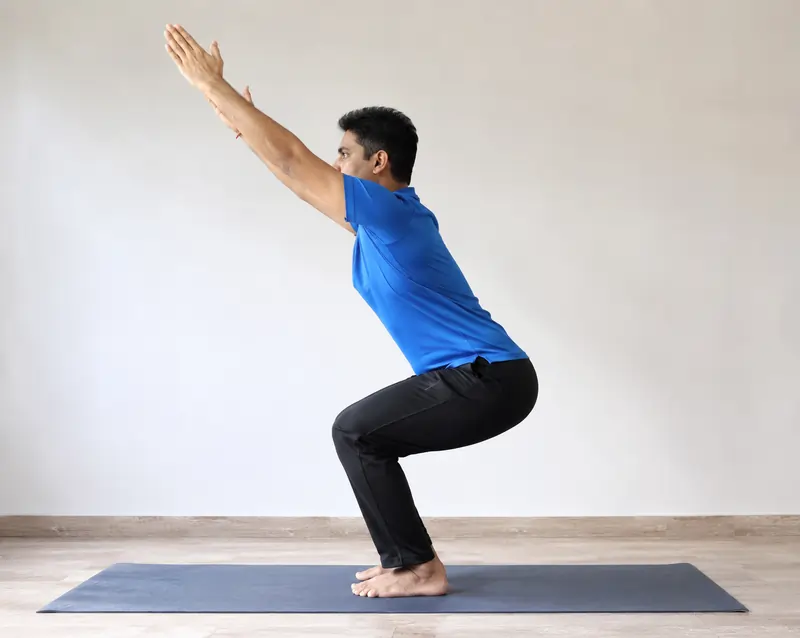
Steps:
- While standing in Tadasana, you should be positioned in the center of your yoga mat.
- As you take a deep breath in, raise your arms up and over your head.
- Now, exhale while bending your knees, keeping your legs close to one another.
- As if you were sitting in an imaginary chair, bend your knees and squat narrowly.
- Extend your spine above and flex both arms. To keep your legs balanced on the ground, maintain a tight core.
- Return to the mountain pose to gently release the pose after holding it for five to ten long breaths.
Vrikshasana (Tree pose)
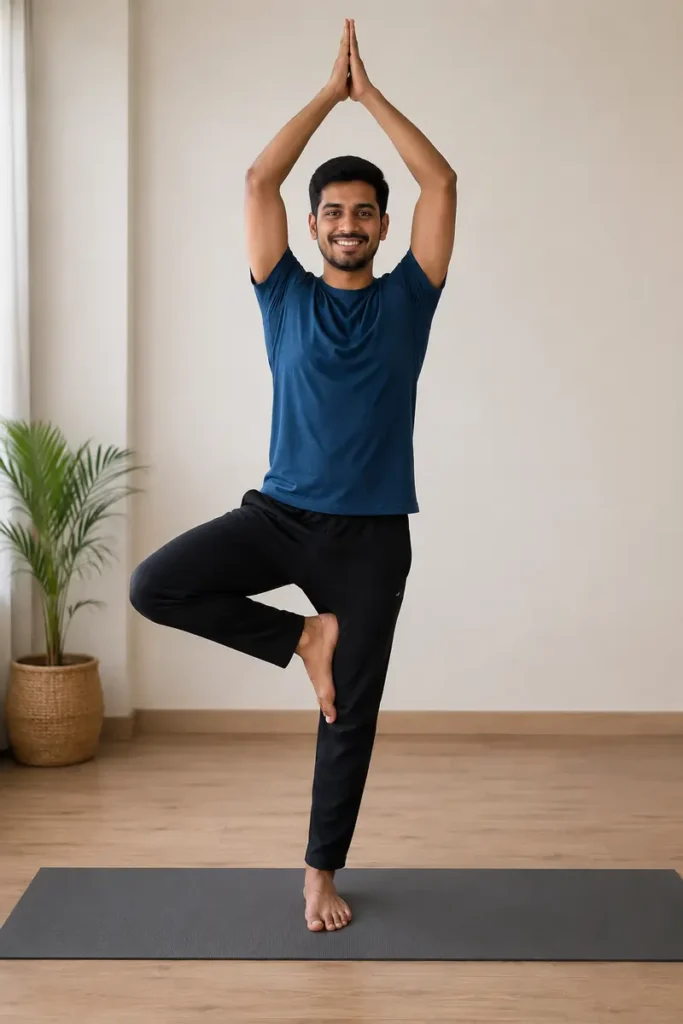
Steps:
- Start with your feet hip-width apart in Mountain Pose (Tadasana). Evenly grind your big-toe mounds, heels, and outside edges.
- Take three to five deep breaths, relax your shoulders, and stretch your spine.
- Keep your standing knee slightly bent and gradually transfer your body weight onto your left foot. Feel the leg contract from the foot to the hip, then take a moment to steady yourself.
- Focus your attention at eye level on a stable point just ahead. This stage is crucial for balance, so keep your eyes relaxed but attentive.
- Bend your right knee and raise your foot as you exhale.
- Place the foot’s sole above the knee on the inner thigh, inner calf, or inner ankle. The foot should never be placed directly on the knee joint.
- For stability, gently press the standing leg and raised foot toward one another.
- Make sure your hips are facing forward. Draw your lower stomach in to gently activate your core.
- Grow tall through the crown of the head while remaining grounded through the standing foot.
- Choose an arm pose that helps you stay balanced: one hand gently resting on a wall, arms raised aloft with palms together, hands at heart center, or arms in a gentle “V.”
- Breathe easily while you hold the pose with your shoulders relaxed.
- Beginnings: 15 to 30 seconds
- 30 to 60 seconds is intermediate.
- Advanced: up to two minutes
- Calmly move outside and start over if you lose your equilibrium.
- Bring your arms down before slowly placing your lifted foot back on the floor in a controlled manner.
- Go back to Mountain Pose, take a few deep breaths, and then switch sides.
Garudasana (Eagle Pose)
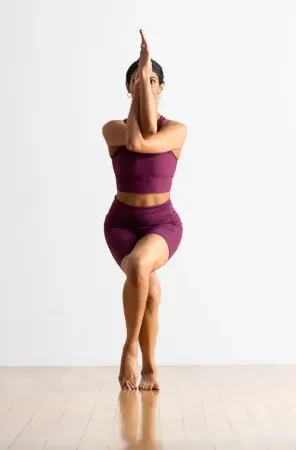
Steps:
- Take a few deep breaths while holding a straight posture in Tadasana, making sure that you allow the body to relax.
- Take a breath, put both hands on your waist, and contract your core. Raise your right foot off the mat, keeping your knees slightly bent.
- To fully lock your legs, wrap your right leg around your left leg and curl your right foot over your left calf muscle.
- Breathe out, then descend your glutes to the floor as if you were performing a narrow squat.
- As you interlock your arms by clasping both hands together and wrapping your left elbow over your right forearm, continue to breathe lightly.
- For the next five to ten deep breaths, maintain this shape by concentrating on your breath and your gaze.
- Breathe out as you unlock your arms and legs. Repeat on the opposite side after standing upright to allow your blood to return.
- Breathing Awareness
- Take a slow, deep breath as you engage your abdominal muscles and lift one foot off the mat.
- Exhale: When you eventually break the posture and descend after interlocking.
- Beginner’s Performance Duration: Hold Eagle Pose for five to ten deep breaths on each side.
- Advanced Practice Time: Hold Eagle Pose for 60 to 90 seconds on each side.
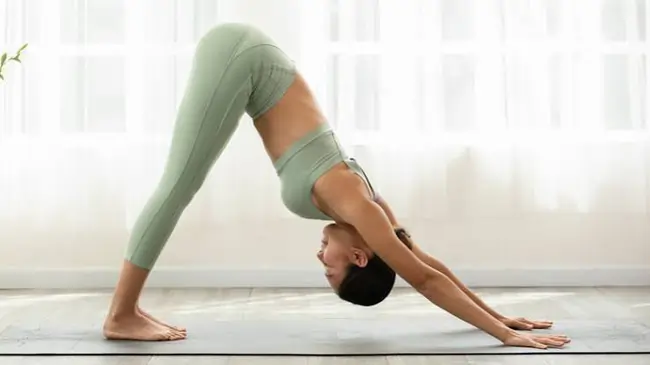
Adho Mukha Svanasana (Downward-Facing Dog Pose)
Steps:
- You fall onto your hands and knees with your wrists below your shoulders and your knees below your hips. Using your hands, push up to spread your fingers.
- Keep your elbows slightly bent instead of fully straightening them. To stabilise the shoulders and broaden the upper back, gently rotate the upper arms outward so that the biceps face slightly forward.
- As you exhale, tuck your toes under and raise your knees off the mat. To create an inverted V, raise and lower your hips. At first, keep your knees bent.
- Using your hands to push the floor away, concentrate on increasing length from the wrists through the hips. Bring the chest gently toward the thighs, being careful not to collapse the shoulders.
- To maintain proper alignment if your hamstrings feel tight, keep your knees bent. Maintain a long spine while progressively straightening the legs if flexibility permits. It is not necessary for heels to touch the ground.
- Bring the lower abdomen in slowly to avoid flaring the ribs. In addition to protecting the lower back, its core support maintains position.
- Allow the head to fall freely between the arms while maintaining a relaxed neck. Don’t try to stare forward; instead, focus on the navel or thighs.
- Maintain the position while breathing steadily:
- For beginners, take five to ten breaths.
- 10–20 breaths in the middle
- Advanced: one to three minutes
- Each inhale extends the spine, while each exhale allows the body to relax and find balance.
- Bend your knees and gently lower them to the mat, then return to Tabletop or Child’s Pose. Take a few deep breaths before you start up again.
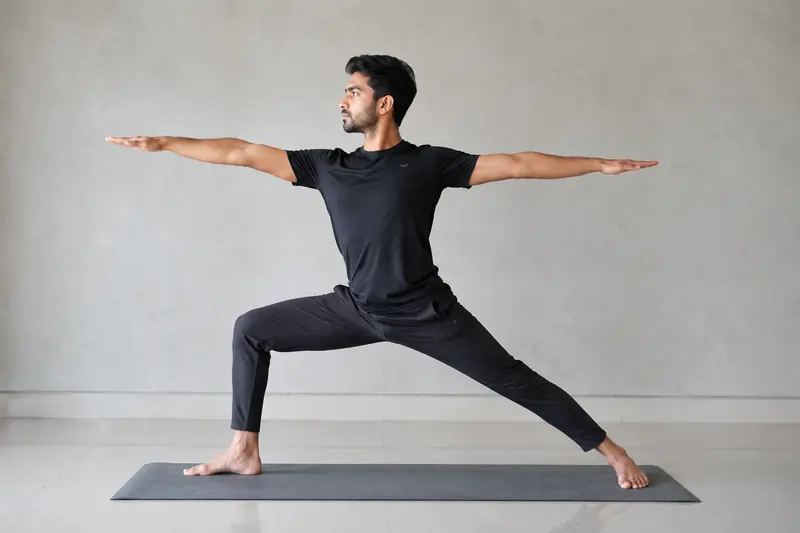
Virabhadrasana II (Warrior II)
Steps:
- Make a ninety-degree turn with the front foot. Turn your right foot so that its toes point straight at the mat’s front, or short edge.
- Rotate the rear foot by 10 to 15 degrees. The left toes should be angled slightly toward the front of the mat. The outer edge of your back foot serves as your anchor, so stay rooted.
- Align your feet. Align the arch of your left foot with your right heel. Widen your position side to side so that your heels are on two parallel lines rather than one line if you feel unstable.
- Lift and ground. Ground the outer side of your rear foot firmly while pressing the base of your front big toe into the floor. Increase the energy in your inner thighs.
- Lengthen your arms. As you inhale, raise your arms to shoulder height with your palms facing down. Put your left arm back and your right arm forward over your right knee. Keep your shoulders away from your ears because the reach comes from the shoulder blades rather than the neck.
- During an exhale, bend the front knee. Bend the right knee such that it rests precisely on the ankle and the shin is vertical. Strive for a 90-degree bend, but only as far as you can while maintaining a grounded back foot and a stacked knee.
- Track outward from the knee. Direct the right knee toward the right foot’s small toe to prevent it from sliding inward. Make sure your big toe remains visible just inside the line of your knee.
- To the long edge, square the torso. Place your shoulders on top of your hips. Avoid bending over the front leg because the crown of the head stays above the pelvis.
- Put the drishti in place. Gently turn your head to look over your front hand’s middle finger. Maintain a soft throat and jaw.
- Hold your breath. Take five to ten calm breaths. With every exhale, let the hips relax, and with every inhalation, let the spine become longer.
- Let go. Take a breath and extend your front leg. Pause, lower your arms, and align your feet. Next, repeat on the opposite side.
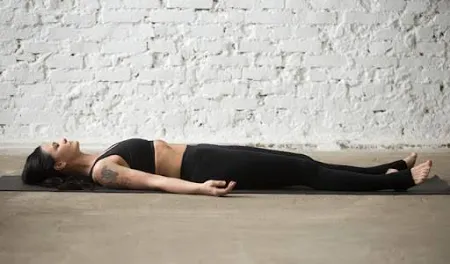
Savasana (Corpse Pose)
Steps:
- Lie on your back with your legs comfortably outstretched. Allow the feet to open effortlessly and organically.
- With the palms facing up, place your arms slightly apart from your body. Let your fingers loosen up.
- Gently stretch the back of your neck, keeping your chin slightly tucked toward your chest. Provide head support if necessary.
- Close your eyes and create a more relaxed expression. Let go of any stiffness around your eyes, your tongue, and your jaw.
- Allow the breath to return to its natural pace after taking a few calm breaths to get comfortable.
- Allow the body to grow heavy. Let go of the shoulders, hips, legs, chest, and abdomen.
- Depending on your practice, remain still for five to twenty minutes. The objective is to maintain awareness while being at ease.
- Breathe a little deeper to release it. Roll onto one side, bend the knees, and move the fingers and toes. Sit up carefully after pausing.
Virabhadrasana (Warrior I Pose)

Steps:
In Warrior I, balancing improves stability by strengthening the legs and activating the core. Maintaining good alignment and raising body awareness are two benefits of holding and balancing this position.
- Bend your right knee to a 90-degree angle while stepping your left foot back.
- To avoid strain, make sure your knee doesn’t go over your toes.
- Keeping your back leg straight, press the outside edge of your back foot against the mat or the floor.
- Raise your arms aloft, palms facing inward, and square your hips to face front.
- If maintaining your balance feels challenging, bring your feet a little closer together.
- While in this position, take three to five deep breaths, then switch sides and repeat.
Trikonasana (Triangle Pose)
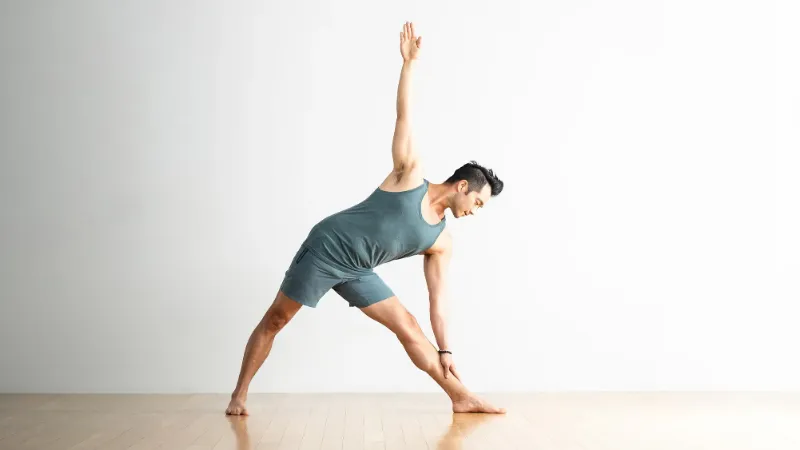
Triangle Pose’s deep twist strengthens the core and spine, improving balance and stability. Maintaining the position improves body awareness and control; the broad stance strengthens the legs.
Steps:
- Put your feet wide apart and move your left toes slightly inward and your right toes forward.
- Spread your arms to the sides, keeping them level with the floor.
- To prevent tension, extend your left arm upward while reaching your right hand down to your shin, ankle, or a block.
- Align the shoulders and toes of your forward leg to prevent any stress.
- After five deep breaths in this pose, switch to the other side.
Utthita Hasta Padangusthasana(Extended Hand-to-Big-Toe Pose)
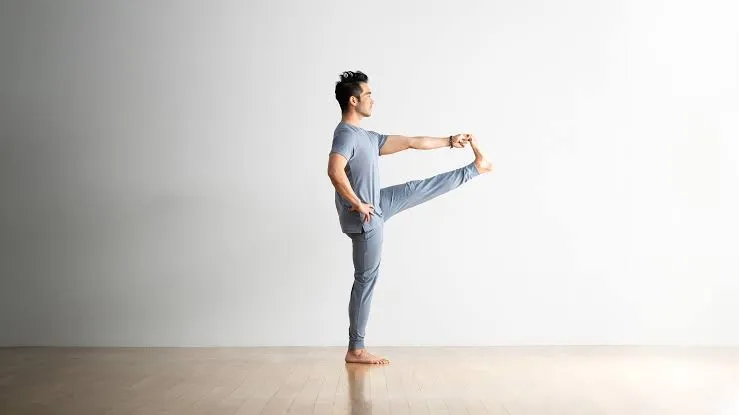
In order to increase stability, this one-legged balancing pose works the back and core muscles. Additionally, holding the pose stretches the hamstrings and improves strength.
Steps:
- Put your weight on your left foot after starting in Mountain Pose.
- With your right hand gripping your big toe, raise your right leg.
- Place a strap over your foot or keep your knee bent if you are having problems reaching your toe.
- While maintaining the strength of your standing leg, extend it forward or to the side.
- Use a wall for support if you find it difficult to balance in this pose.
- After a few breaths of holding, switch sides and repeat.
Safety precautions:
- Yoga should be performed in a clean and airy environment.
- Before doing yoga poses, it is essential to warm up.
- It is important to wear comfortable clothing.
- Yoga poses should be performed smoothly and with proper posture.
- Avoid stretching and putting pressure on the body.
- During the practice, it is critical not to hold your breath.
- To prevent slipping and injuries, it is vital to use a yoga mat.
- The practice of yoga should be supervised by a qualified instructor who will ensure correct technique.
- If a person has pain or dizziness, they should stop doing exercises.
- It is vital to practice regularly and increase the difficulty level of the poses.
Conclusion
Yoga is beneficial for training coordination, as it improves balance, flexibility, concentration, body awareness, control over movements, and fitness level. The complex of yoga poses, breathing techniques, and meditations regularly practised improves the coordination of movements and, as a result, leads to better fitness. In addition, yoga is an effective way to relieve stress, improve mood, and have a healthy lifestyle in general.
FAQs:
Which asana improves neuromuscular coordination, balance, and alertness?
Vrikshasana, also known as the Tree Pose, is a particular yoga pose that helps enhance neuromuscular coordination, balance, and mental alertness.
Which type of exercise is best for improving balance?
Practicing one-legged standing and walking in a straight line with each heel touching the opposite toes can help improve balance, strengthen the core, and develop better coordination.
Is yoga good for balance issues?
Yes, yoga helps improve balance issues by strengthening the muscles, ankles, core, and feet needed for stability.
What is the most relaxing yoga pose?
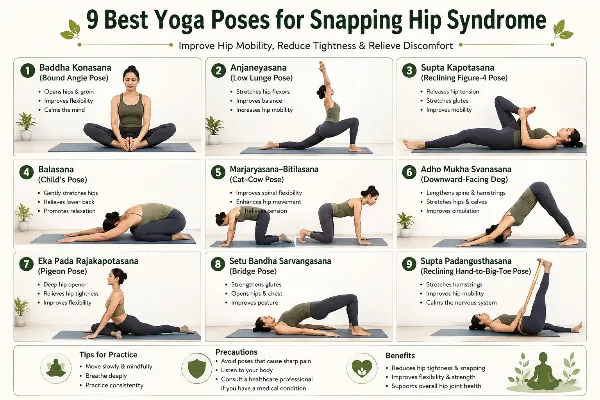
Balasana (Child’s Pose) is a soothing yoga posture that encourages relaxation, eases mental stress, and gently releases tightness in the back and shoulders.
What time of day is best for yoga?
The most suitable time for practicing yoga varies based on individual objectives and availability, although traditionally, the early morning and late evening are regarded as the best times.
References:
- Alba, P. (2024, October 3). Yoga poses for coordination – Wellness Voice. Wellness Voice. https://wellnessvoice.com/yoga-poses-for-coordination/
- The Yoga Institute. (2022, July 4). Yoga for Balance: 10 poses to improve stability and body control. The Yoga Institute. https://theyogainstitute.org/yoga-for-balance-10-poses-to-improve-stability-and-body-control
- Rushali. (2026c, September 28). Beginner-Friendly Standing Yoga Poses for Balance & Strength. https://myyogateacher.com/articles/standing-yoga-poses