Wrist-Friendly Yoga Poses
Introductions
One of the most irritating challenges in a yoga practice could be wrist pain. It may persist throughout everyday life and cause pain when typing, cooking, or lifting goods. It can creep in after repeated down dogs, planks, or even long stays in a tabletop. I’ve personally felt that persistent pain, and it made me realize how important it is to intentionally and carefully adjust my practice. I discovered safe yoga postures for wrist pain alleviation that promoted healing without sacrificing the advantages of my regimen, as opposed to pushing through pain.
Poses and sequences that actively engage the wrist joints are called wrist yoga poses. During practice, these poses either directly or indirectly improve the health of the entire upper body. The wrist is a complicated joint that joins the hand’s metacarpals to the forearm’s radius and ulna. Additionally, a network of muscles, tendons, and ligaments supports the joint, allowing for mobility and stability. Thus, it plays a vital role in hand and arm activities and is an integral element of the musculoskeletal system.
The following is a list of motions where the wrists are crucial:
- Rotation and motions (driving, playing sports), fine motor skills (writing, typing, playing musical instruments), and grabbing and gripping (holding a pen to write or a spoon to eat)
- Weight-bearing (doing weight-bearing activities or carrying a heavy object)
- Sensory feedback (hand and arm position and movement)
These exercises can include yoga and physical activity to maintain physical, mental, and emotional well-being, sports and activities to improve physical, mental, and emotional well-being, and everyday activities like typing, writing, smartphone scrolling, cooking, driving, playing, carrying objects, and personal grooming like brushing one’s teeth or hair. It goes without saying that maintaining appropriate wrist alignment, strength, and flexibility can support general health and well-being.
The hands are also prone to arthritis and damage due to their many joints. Practitioners may frequently develop wrist tiredness or pain if they are not properly cared for. The following are some instances of possible outcomes of weak wrist joints:
- Decreased ability to carry out daily tasks
- Pain and discomfort, or sprains and strains, can cause nerve compression, which can lead to symptoms like tingling or numbness; limited range of motion (to perform specific postures like Four Limbed Staff Pose); an increased risk of fractures or conditions like carpal tunnel syndrome and wrist tendonitis; and decreased athletic performance for students who depend on strong and flexible wrists, like those who play cricket, tennis, badminton, shot put, or climbing.
In order to strengthen and support the wrists and lower the chance of developing problems, it is essential to include yoga postures for the wrists. For students of all skill levels, yoga instructors may recommend a variety of wrist positions. Additionally, they may be done while sitting, standing, lying down, or even kneeling.
Props like tennis balls (like Thumb Spread Massage Tune Up Ball Table Close Up), blocks (like Mountain Pose Raised Arms Hands Thigh Block), or resistance bands (like Hands Twist Pull Resistance Band Close Up) may also be used to practice wrist postures.
Best Wrist-Friendly Yoga Poses
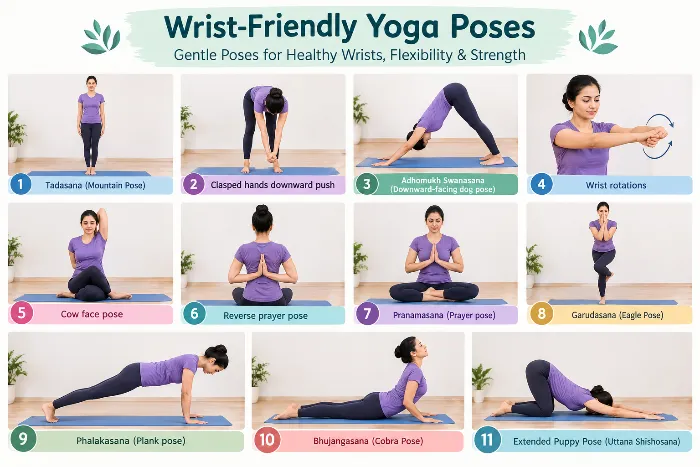
Tadasana (Mountain Pose)
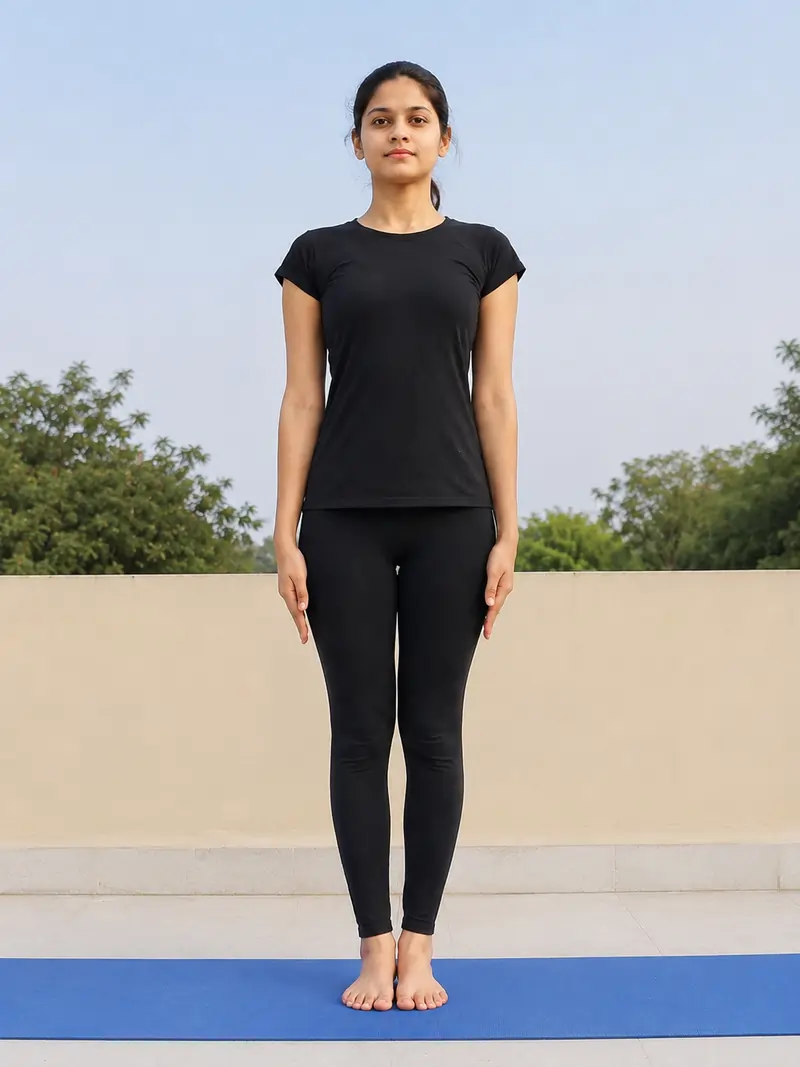
- Raise both arms in front of you to a height equal to your shoulders while standing erect.
- Turn your wrists so that the palms are facing outward and interlock your fingers.
- Extend your arms over your head and straighten them.
- Stretch your fingertips all the way to your shoulders.
- Stretch for 30 to 60 seconds, pause for a minute, and repeat five times.
Clasped hands downward push
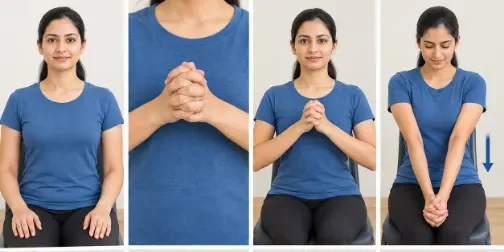
- Maintain a straight spine and relaxed shoulders whether sitting or standing.
- With the palms facing inward, bring your hands together and interlock your fingers.
- Put your hands together in front of your chest.
- With your elbows comfortably straight, slowly press both hands down toward your thighs.
- Stretch your forearms, fingers, and wrists gently.
- Maintain the posture while breathing normally for ten to twenty seconds.
- Return your hands to the starting position slowly.
- Repeat two to three times while avoiding pain and remaining within a comfortable range.
Adhomukh Swanasana (Downward-facing dog pose)
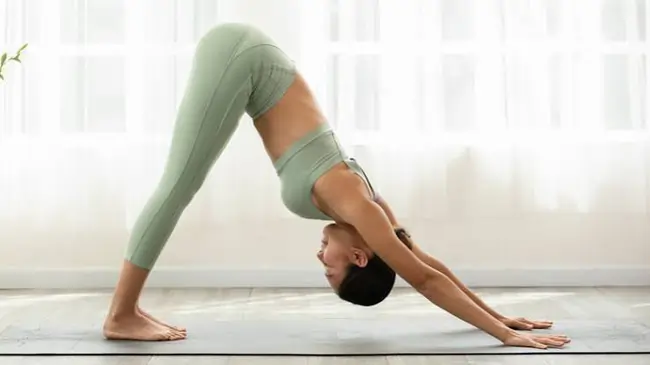
- Put yourself on all fours. Make a table with your back as the top and your hands and feet as the legs.
- Lift your hips, straighten your knees and elbows, and create an inverted V shape with your body as you exhale.
- Hands are shoulder-width apart, and feet are parallel to one another and hip-width apart. Toes point in a straight line.
- Put your hands down firmly. Through the shoulder blades, expand. Touch the inner arms to the ears while maintaining a long neck.
- Breathe deeply and slowly while holding the downward dog pose. Look at your navel.
- Inhale. Bend your knees and go back to the table yoga position. Ease up.
Wrist rotations

- Keep your elbows relaxed, close to your body, and your back upright as you sit or stand comfortably.
- Maintain a 90-degree bend in your elbows or extend your arms forward.
- Make a slow, clockwise rotation with both wrists.
- Make careful, fluid circles without pushing yourself.
- Turn the wrists in the other direction after ten to fifteen repetitions.
- Move mostly via the wrists and try to keep your forearms as still as possible.
- For one or two sets, do ten to fifteen spins in each direction. If your pain becomes severe or your symptoms worsen, stop.
Cow face pose
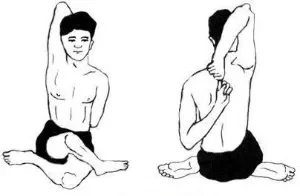
- Sit upright and cross your legs.
- Place your right knee over your left thigh. Ensure that your right thigh is under your left knee.
- With your right arm reaching for your left hand, pull your left arm behind your back while twisting your body to the right.
- As you perform the cow face pose, take deep breaths.
Reverse prayer pose
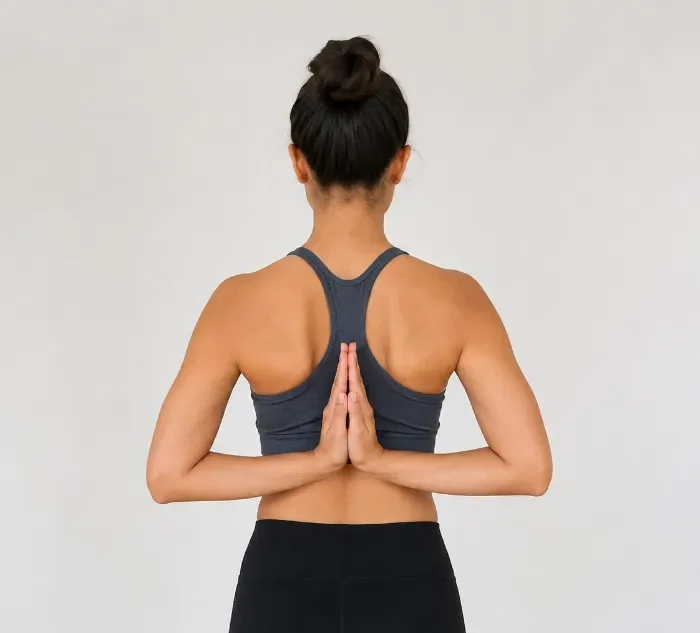
- Maintain a straight spine and relaxed shoulders while sitting or standing comfortably.
- Bend both of your arms behind your back.
- Put your palms together behind your back and point your fingers upward.
- Aim to place your palms in the middle of your back without pushing yourself.
- Maintaining an open chest, gently pull your shoulders back and down.
- Breathe gently and comfortably, keeping your head and neck in a neutral position.
- As long as it feels comfortable, hold the pose for 15 to 30 seconds.
- Release your hands gradually and put your arms back in a comfortable position.
Pranamasana (Prayer pose)
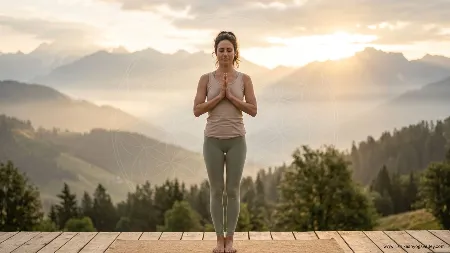
- Keep your shoulders relaxed and your spine straight as you sit or stand comfortably.
- In front of your chest, bring your hands together so that their palms contact.
- Keep your thumbs lightly pressed to your chest, and your fingers pointed upward.
- Between both palms, apply light, uniform pressure.
- Keep your wrists straight and refrain from applying too much pressure that might hurt your fingers or wrists.
- Hold for 15 to 30 seconds.
- Let go of the strain and slowly open your hands.
- As comfortable, repeat two to three times.
Garudasana (Eagle Pose)
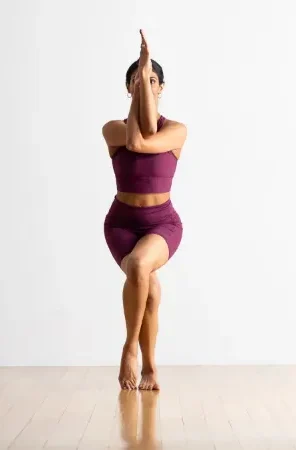
- Maintain a straight posture with your arms by your sides and your feet together.
- Take a breath and lift your arms shoulder-high.
- Breathe out, raise your left leg, and wrap it around your right.
- Join your palms, twist at the elbows, and cross your left arm beneath your right.
- Repeat on the opposite side after holding the ultimate position and releasing it.
Phalakasana (Plank pose)
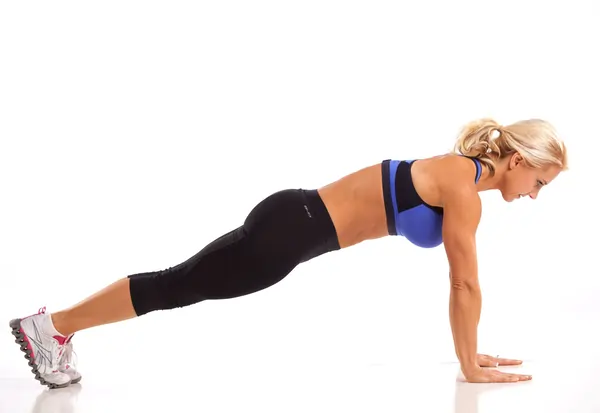
- Put your hands just below your shoulders and begin on your hands and knees.
- Put your toes on the ground and extend both legs backward, one at a time.
- From your head to your heels, maintain a straight body alignment.
- Maintain a level hip position while using your core and abdominal muscles.
- Look gently toward the floor while maintaining a neutral neck position.
- Maintain the pose while breathing normally for ten to thirty seconds.
- Release the position by slowly lowering your knees to the floor.
- As comfortable, repeat two or three times.
Bhujangasana (Cobra Pose)

- Keep your arms at your sides while you lie on your stomach. Your legs should be hip-width apart.
- Now, straighten your arms and press on the floor while arching your upper body from the hips.
- Stretch your body so your head and chest are facing forward. Always keep your stomach expanded and your chest pushed out, your shoulders relaxed and pressed down, and your pelvis touching the floor.
- Take a breath and hold it for five to seven breaths. Breathe out and return to your lying position.
Extended Puppy Pose (Uttana Shishosana)
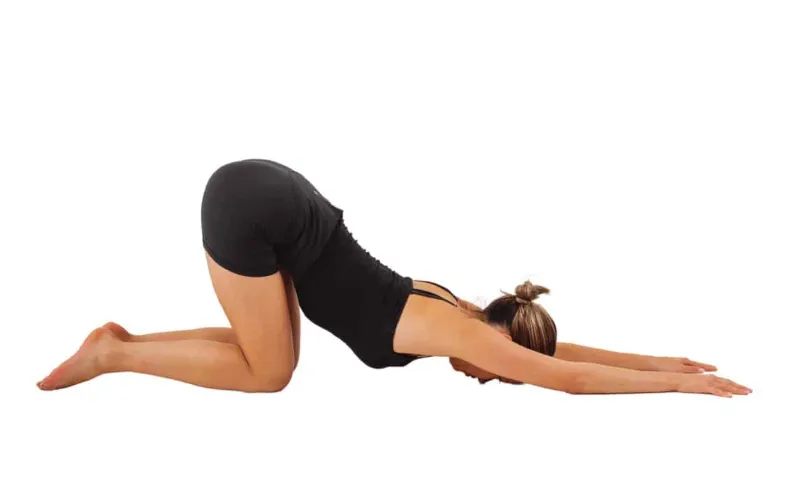
- With your knees behind your hips and your wrists beneath your shoulders, begin on your hands and knees in a tabletop posture.
- Make sure your hips are exactly above your knees.
- Keep your arms straight and move your hands forward slowly.
- With your forehead resting on the mat, gently lower your chest toward the floor.
- Don’t allow your hips to drop back into your heels; rather, keep them up over your knees.
- With your elbows up, loosen your shoulders and neck.
- Hold the posture for 20 to 30 seconds while breathing slowly and comfortably.
- Return to the tabletop by slowly moving your hands back toward your body.
FAQs:
What yoga poses are good for people with wrist pain?
You must move your body weight away from the heel of your hands and equally distribute it over your fingertips and knuckles in order to stop or prevent wrist pain and discomfort during yoga.
What are some good yoga poses for wrists and hands?
Simple stretches and motions are used in yoga for the hands and wrists to increase strength, reduce joint stiffness, and release stress.
How to support wrists during yoga?
Compared to slumping into the heel of your palm to support your wrists during yoga, evenly distribute your weight over your entire hand and use your fingers to grab the mat.
What kind of wrist support is best for wrist pain?
The ideal wrist support for wrist pain is completely dependent on your unique situation and the degree of stability you require.
How to do yoga with weak wrists?
Use appropriate weight distribution, focused warm-ups, and beneficial adjustments to strengthen and protect sensitive joints during your practice.
References:
- Rowan, S. (2026, August 14). Yoga and Wrist Pain: Safe Poses, Tips & Modifications. Golden Buddha Yoga. https://goldenbuddhayoga.com/yoga-and-wrist-pain-relief/
- Staff, Y., & Staff, Y. (2026, September 13). Yoga for wrist Pain: 7 poses and modifications for sensitive wrists. Yogajala. https://yogajala.com/yoga-for-wrist-pain-7-poses-and-modifications-for-sensitive-wrists/
- Kristina. (2025, June 30). Safe yoga poses for wrist pain relief – Yogalastics. Yogalastics. https://www.yogalastics.com/safe-yoga-poses-for-wrist-pain-relief/