Yoga for High Arches
Introduction
Many problems, such as foot pain and gait compensations, can be caused by high foot arches. It’s critical to treat your foot pain so you can resume your favorite daily activities.
What Are High Arches?
When the foot’s arch is higher than usual, it’s referred to as high arches, pes cavus, or cavus foot. This can lead to many issues and put extra strain on the foot’s ball and heel. In simple terms, flat feet are the opposite of high arches.
High Arch Foot Problems
High arches can be identified by a few specific indications and symptoms. These are:
- Foot pain or discomfort in the ball or bottom of the foot
- Foot/Ankle Instability
- Calluses on the heel, side, or ball of your foot
- Toe claw
- Pain in the arch of your foot
- Tight plantar fascia of the foot and tight calf muscles
- When examining the rear of the foot, the Achilles tendon may twist outward.
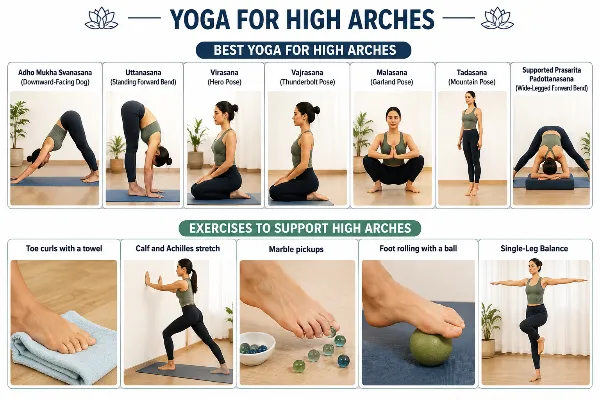
Best yoga for High Arches
Adho Mukha Svanasana (Downward-Facing Dog)
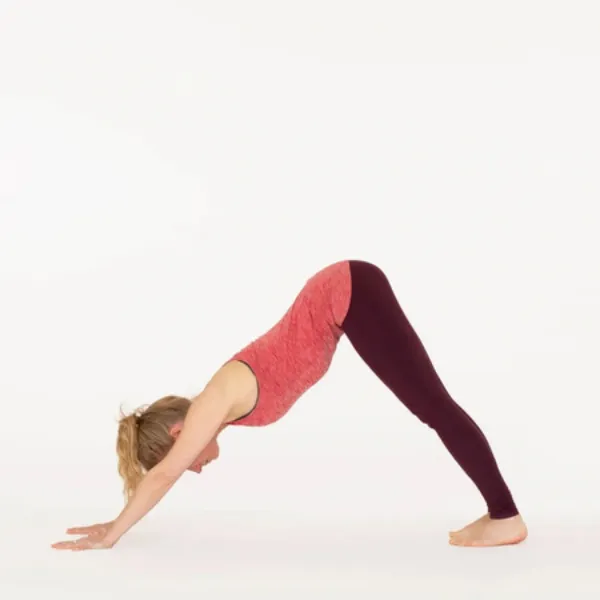
- Put yourself on all fours with your hands shoulder-width apart and your knees hip-width apart.
- Now straighten your knees and elbows while gradually raising your hips off the ground. Make sure your body is shaped like an inverted “V.”
- Now place your hands on the floor, extend your neck so that your ears are in contact with your inner arms, and look down at your navel.
- After holding this posture for five to eight breaths, return to the starting position.
Benefits: One of the best yoga poses for stretching the gastrocnemius muscle is the downward-facing dog pose. It stimulates the body and releases imprisoned energy in addition to lengthening the spine and calming the mind. Additionally, it is quite helpful for boosting heart function and general blood circulation.
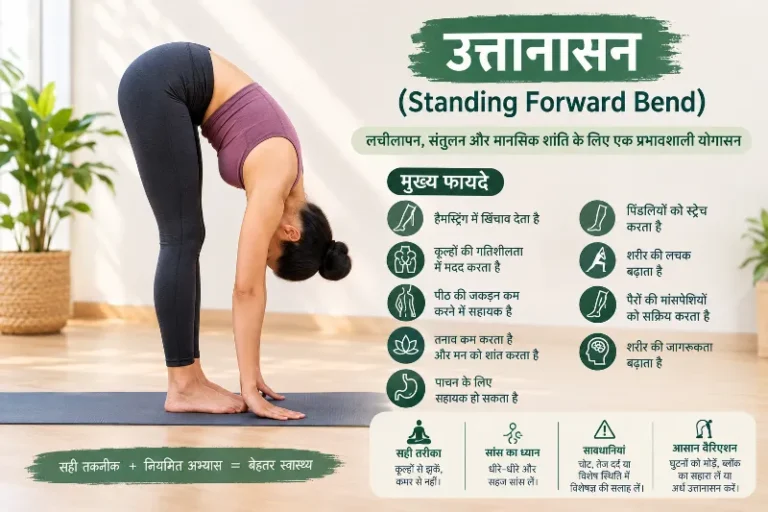
Uttanasana (Standing Forward Bend)
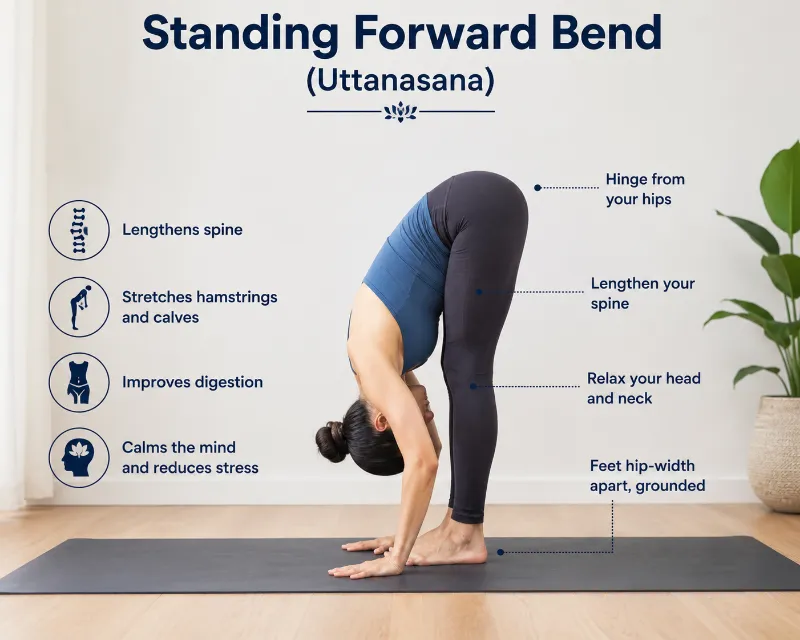
- Start with your feet hip-width apart in Mountain Pose (Tadasana).
- Evenly grind the base of the big toes, the heels, and the outside margins of the feet.
- To relax, lengthen your spine, soften your shoulders, and take two to three deep breaths.
- Gently raise your chest and make room in the front of your body when you inhale. Hinge forward from your hips rather than your lower back as you release the breath. Allow your body to shift toward your thighs and bend your knees as far as necessary.
- Depending on how flexible you are, place your hands on the floor, yoga blocks, shins, or thighs. Instead of letting the weight fall onto your hands, keep it firmly planted in your feet. Release tension in your shoulders and jaw by letting your head and neck fully relax.
- Imagine your body expanding forward as you slowly lengthen your spine with each breath. Soften further into the fold without pushing with each breath. Ease and release, not depth, are the objectives.
- Breathe evenly and gently while holding the position for 30 seconds to 2 minutes. While keeping your lower back comfortable, feel the stretch down the back of your legs and spine.
- To get out, firmly press through your feet, flex your knees, and use your core.
- One vertebra at a time, slowly roll up to standing, raising the head last. Before continuing, take a few deep breaths in Mountain Pose.
Benefits: The advantages of uttanasana extend well beyond flexibility. It is regarded as one of the most comprehensive standing positions in yoga, as it simultaneously affects the muscles, spine, neurological system, and internal organs. It promotes mental clarity and bodily relaxation when done correctly and regularly.
Virasana (Hero Pose)
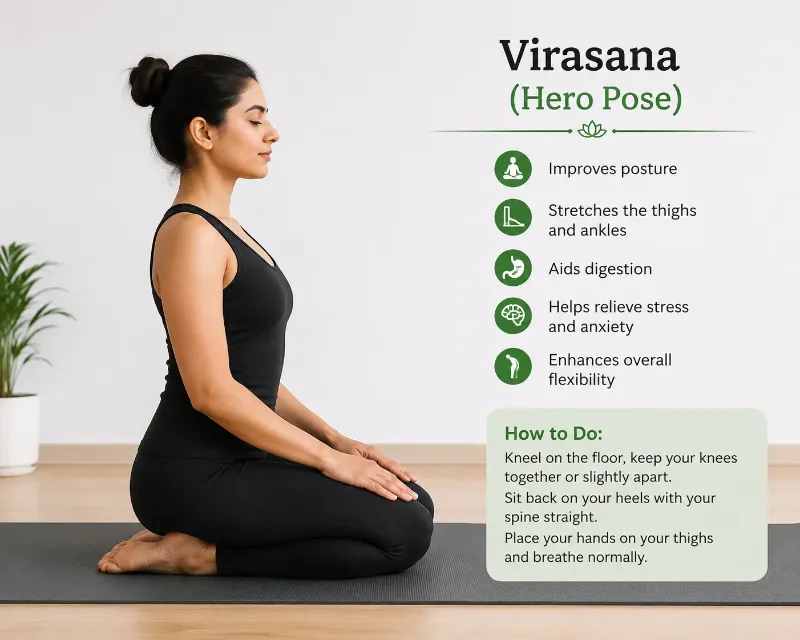
- With your legs extended forward and your back straight, take a seat on the floor. One by one, bend your knees back until you are seated between your calves.
- Shut your eyes and concentrate on straightening your spine.
- Next, focus on taking deep breaths while placing your palms on your kneecaps.
- After a minute of holding this pose, straighten your legs into the staff pose to release yourself.
Benefits: Your root chakra is activated. Promotes intestinal health and digestion. Reduces menopausal symptoms. Lengthens and fortifies the spine. Improves the lower body’s blood flow.Increases thigh, knee, and ankle flexibility. Has therapeutic effects for those with asthma and high blood pressure.
Vajrasana (Thunderbolt Pose)
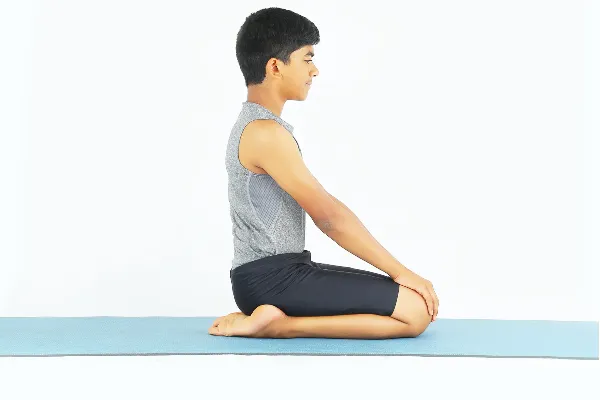
- Take a position of high kneeling. Keep your ankles together and your knees four fingers apart.
- The big toes contact and point slightly inward; the feet are facing away, and the soles are facing up.
- Slowly lower yourself to sit on your legs. Your thighs lie on your calves, and your buttocks rest on your heels.
- To appropriately distribute your weight over your sit bones, adjust your hips and pelvis. Put your hands on your knees or thighs, palms up for receiving or down for grounding.
- Alternatively, you can perform yoga hand movements like Udana Vayu Mudra or Adi Mudra with them.
Benefits: Vajrasana increases focus and calms the mind. It enhances blood flow in the lower abdomen and corrects posture. The legs, especially the thighs and quadriceps, are strengthened with Vajrasana. Back and knee pain are reported to be relieved by it. Vajrasana improves digestion and relieves gas and constipation. It reduces menstrual pain and builds up the reproductive system.
Malasana (Garland Pose)
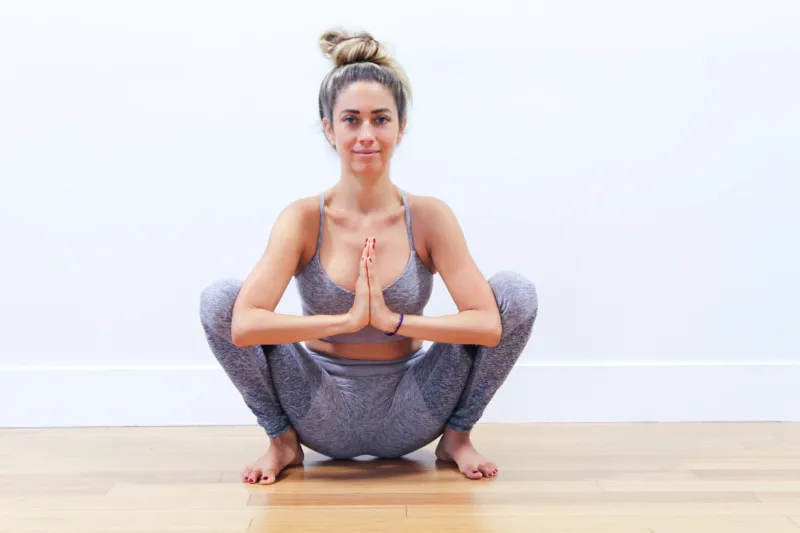
- Place your feet slightly wider than hip-width, extend your toes at a 45-degree angle, and allow your arms to hang loosely by your sides. In order to center yourself and be ready for the squat, take a few deep breaths.
- Slowly bend your knees and descend your hips toward a squat as you exhale, spreading your weight equally over both feet and maintaining a tall spine and elevated chest.
- Track in line with your toes while letting your thighs naturally split and bringing your hips as near to your heels as you can comfortably.
- Maintain a neutral spine without curving your lower back, and keep your heels anchored by utilizing a rolled blanket or block if necessary.
- In Anjali Mudra, insert your elbows between your knees and gently push them apart while forcing them inward into your elbows. Bring your palms together at your heart.
- Keeping your shoulders relaxed, raise your chest and extend your spine upward from the base to the head.
- Maintain a gentle forward look while breathing steadily and calmly. Use your pelvic floor and core muscles to sustain the position.
- Maintain a steady breath and concentrated awareness while holding the position for 30 to 60 seconds for beginners, 1 to 2 minutes for intermediate practitioners, or up to 3 to 5 minutes for expert practitioners.
- Put your hands on the ground for support, take a breath, and slowly press into your feet to get out.
- To reset your body and mind, go back to Tadasana (Mountain Pose) and take two or three deep breaths.
Benefits: There is much more to the Garland Pose, sometimes known as the yoga squat, than just a deep stretch. This age-old pose improves pelvic and reproductive health, strengthens the lower body, aids with digestion, and grounds the mind and breath.
Tadasana (Mountain Pose)
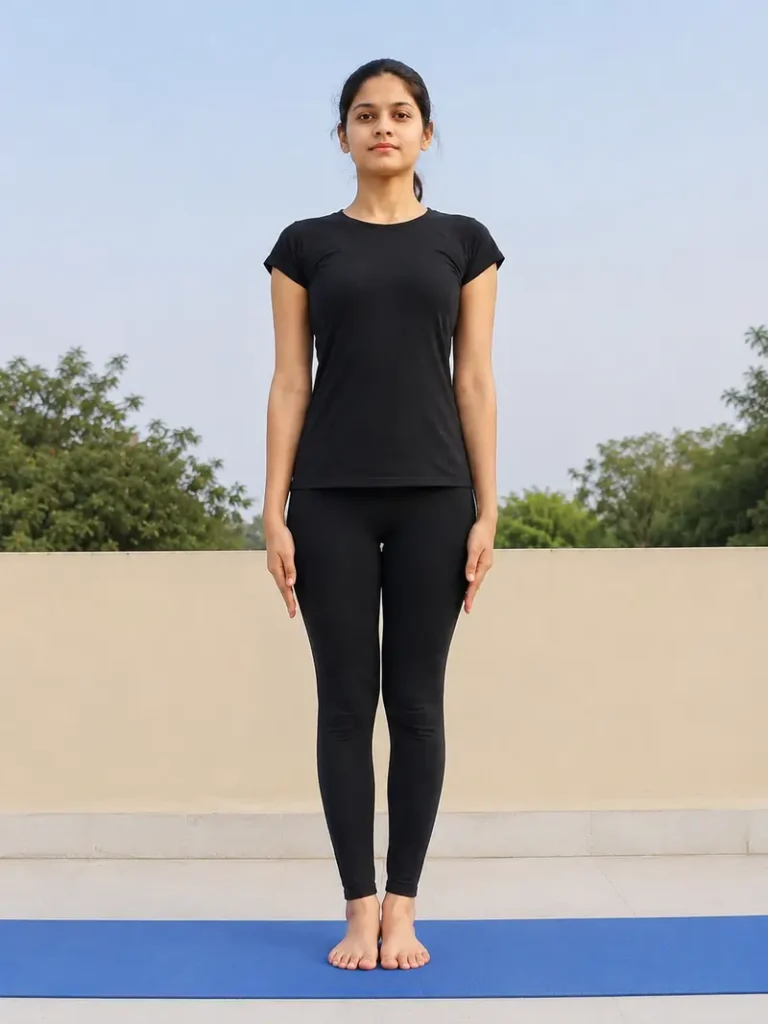
- Bring your feet together or hip-width apart, parallel, while standing. Place your head, shoulders, and hips squarely over your ankles.
- Raise the toes, spread them widely, then return them to the ground. Instead of leaning forward or backward, feel your weight equally distributed throughout the bottoms of each foot.
- Squeeze the thighs, pull up the kneecaps, and tuck the tailbone below them. Although the knees are not locked back, the legs are straight.
- Feel the long, straight spine as you breathe in and raise out of the waist, forcing the crown of the head toward the ceiling.
- Breathe out and lower your shoulders back and down until your fingers touch the ground.
- Press the sternum and chest gently in the direction of the front of the room. Draw your arms and shoulders slightly behind you.
- Draw the chin slightly closer to the middle of the neck while keeping it level with the floor.
- Hold your breath for four to eight breaths.
- To release, either inhale and bring your hands together in front of your chest or exhale and lower your arms to your sides.
Benefits: Mountain Pose is a state of mindfulness and calm that helps you find your inner stability and power. Physically, it enhances balance, core strength, alignment, and proper posture, all of which are useful for other postures and everyday motions. Additionally, it strengthens the leg muscles, stimulates the stomach muscles, improves spinal health, and aids in height gain.
Supported Prasarita Padottanasana (Wide-Legged Forward Bend)
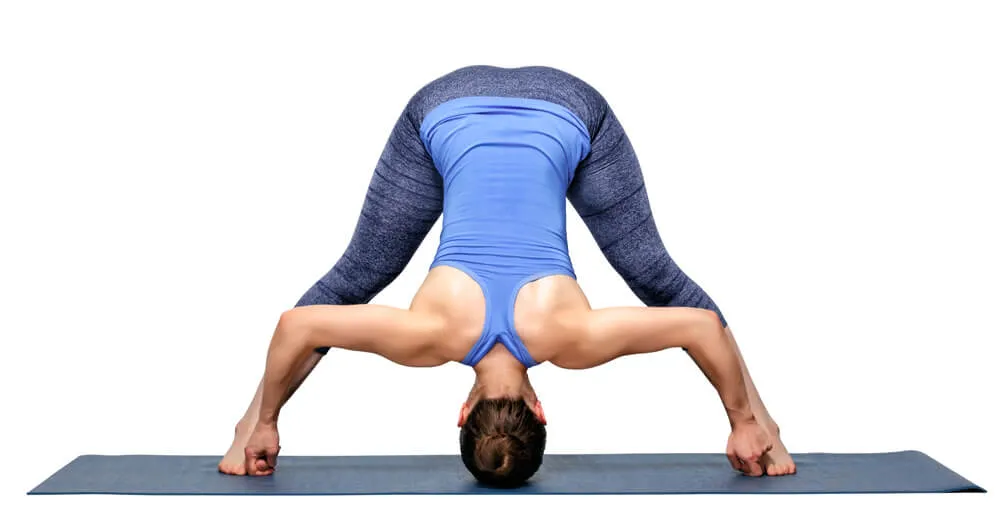
- In Mountain Pose, take a tall pose. Place your feet four to five feet apart. To get the outside edges of your feet almost parallel, turn your toes slightly inward. Press equally through both feet while engaging your thighs.
- Put your hands on your hips. Expand across your collarbones and lengthen your spine upward.
- To raise the chest, take a breath. Breathe out and keep your back long as you fold forward from the hip creases. Instead of using your head to lead, use your chest.
- Place your hands beneath your shoulders on the ground. Put them on yoga blocks at any height that maintains your spine long if they don’t reach comfortably.
- Breathe out and let your torso drop. If it’s comfortable, move your hands back a little. The head’s crown may descend toward the ground, but it should never be forced.
- Take five to ten breaths (30 to 60 seconds). Maintain equal weight on both feet, contract your quads, and, if necessary, maintain a gentle micro-bend.
- Return your hands to your hips. Take a breath and raise your torso with a long spine. Reenter Mountain Pose by stepping your feet together.
Benefits: Prasarita Padottanasana provides a powerful combination of relaxing inversion effects, spinal release, and deep lower-body stretching. For many practitioners, the wide stance remains stable and accessible while stretching areas that narrow forward folds cannot fully access, particularly the inner thighs.
Exercises to support high arches:
These easy at-home exercises are meant to develop flexibility, strengthen foot muscles, and improve balance.
Toe curls with a towel
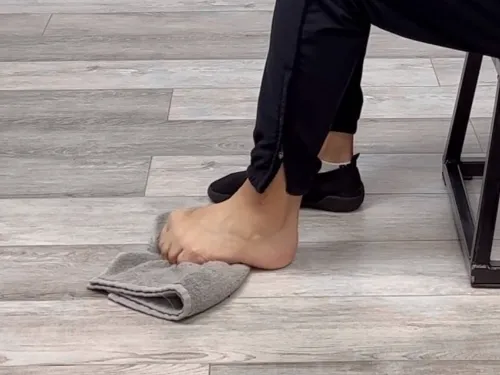
- Put a towel on the ground.
- To draw the cloth closer to you, curl your toes.
- On each foot, repeat ten to fifteen times.
Calf and Achilles stretch
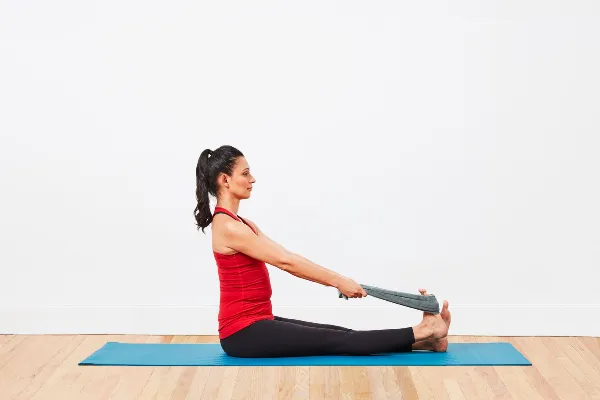
- Take a position facing a wall.
- Bend your front knee and place one foot behind you.
- Maintain your back heel on the floor.
- Hold each side for 30 seconds. Do this twice.
Marble pickups
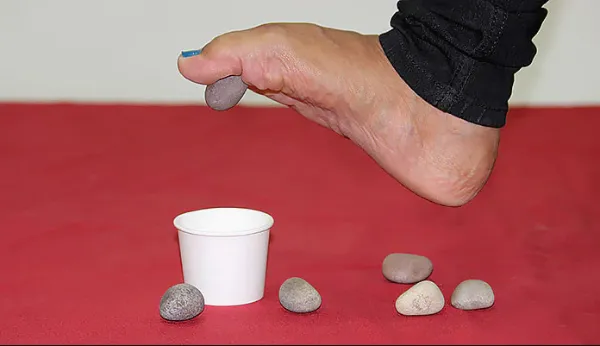
- Put marbles on the ground.
- Pick them up with your toes and drop them into a bowl.
- Try to get 10–15 repetitions per foot.
Foot rolling with a ball
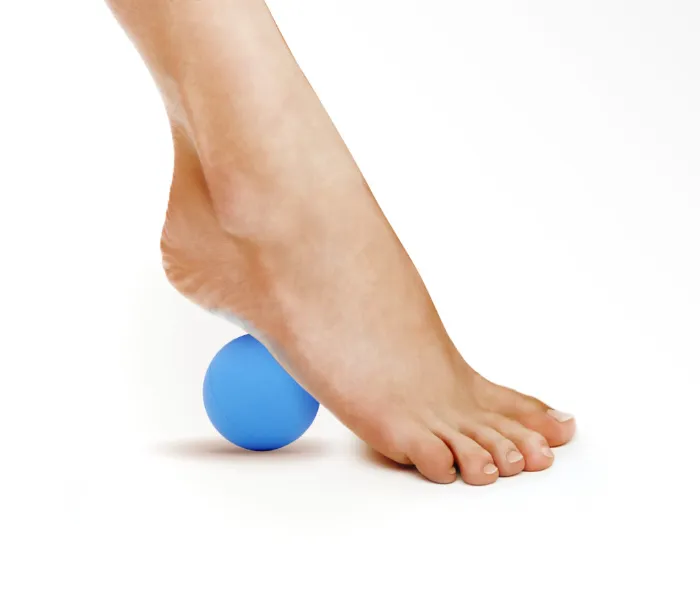
- Gently roll your foot over a massage or tennis ball.
- Pay attention to any uncomfortable areas, particularly the arch.
- Do this for one to two minutes per foot; do this.
- If the arches are hurting, apply an ice bottle.
Single-Leg Balance
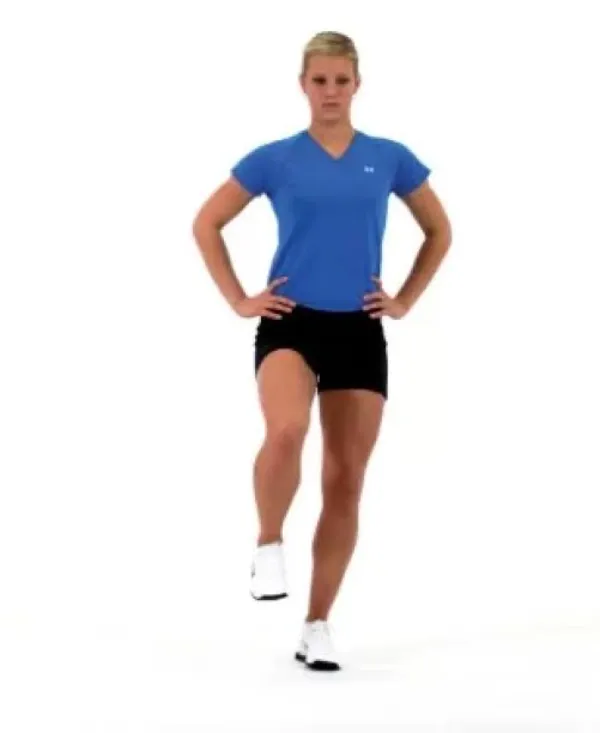
- With your knee slightly bent, stand on one foot.
- Try holding each leg for 30 seconds.
- Closing your eyes or standing on pillows will make it harder.
Precautions:
- Avoid excessive weight-bearing if painful.
- Certain parts of the foot may experience increased pressure in high-arched feet. If pain arises, minimize standing positions or use a chair or wall for support.
- Avoid overstretching the Achilles tendon and plantar fascia.
FAQs:
Are high foot arches healthy?
If high arches are a painless hereditary characteristic, they are usually normal and healthy. However, they put more strain on the heel and ball of the foot since they are stiff and absorb less shock, which over time may cause pain or damage.
What is the main cause of high arches?
High arches are mostly caused by genetics, or inheritance, which means that the foot anatomy is inherited. However, an underlying neuromuscular or neurological issue that results in foot muscle imbalances is often the source of high arches that grow or vary over time.
Do high arches worsen with age?
Yes, as you age, high arches (cavus foot) frequently result in increased pain, stiffness, and joint issues. Over time, the lack of shock absorption puts additional strain on your joints, even if the bone structure itself may not change if it is purely inherited.
What happens if high arches go untreated?
Untreated high arches can eventually result in painful toe deformities, ankle instability, and chronic foot pain. Stress fractures, painful calluses, and alignment problems in the knees, hips, and back can result from extra pressure concentrating on the heel and ball of the foot due to stiff high arches’ inadequate shock absorption.
What are the disadvantages of having high arches?
Pes cavus, or high-arched feet, are stiff and poor at absorbing shock. This places a lot of weight on the heel and ball of the foot, which can cause problems such as plantar fasciitis, ankle instability, stress fractures, and back or knee pain.
What neurological disorder causes high arches?
Underlying neuromuscular and neurological conditions such as Charcot-Marie-Tooth disease, cerebral palsy, spina bifida, and polio are often the cause of high arches, or pes cavus. The foot structure is pulled into an excessively high-arched position by these circumstances, causing muscular imbalances in the leg and foot.
References:
- Han, B. I., Song, H. S., & Kim, J. S. (2011). Vestibular rehabilitation therapy: Review of indications, mechanisms, and key exercises. Journal of Clinical Neurology, 7(4), 184. https://doi.org/10.3988/jcn.2011.7.4.184
- Sahu, P., Singh, B. K., & Nirala, N. (2021). Effect of Various Standing Poses of Yoga on the Musculoskeletal System Using EMG. In Uttanasana (Standing Forward Bend) (pp. 89–112). https://doi.org/10.1201/9781003121152-4
- Chattopadhyay, K., Mishra, P., Manjunath, N. K., Harris, T., Hamer, M., Greenfield, S. M., Wang, H., Singh, K., Lewis, S. A., Tandon, N., Kinra, S., & Prabhakaran, D. (2020). Development of a yoga program for type-2 diabetes prevention (YOGA-DP) among high-risk people in India. Frontiers in Public Health, 8, 548674. https://doi.org/10.3389/fpubh.2020.548674
- Kishore, D. M., Bindu, S., & Manjunath, N. K. (2022). Smart yoga instructor for guiding and correcting yoga postures in real time. International Journal of Yoga, 15(3), 254–261. https://doi.org/10.4103/ijoy.ijoy_137_22
- Lau, C., Yu, R., & Woo, J. (2015). Effects of a 12-week hatha yoga intervention on cardiorespiratory endurance, muscular strength and endurance, and flexibility in Hong Kong Chinese adults: a controlled clinical trial. Evidence-based Complementary and Alternative Medicine, 2015, 1–12. https://doi.org/10.1155/2015/958727
- Açak, M. (2020). The effects of individually designed insoles on pes planus treatment. Scientific Reports, 10(1), 19715. https://doi.org/10.1038/s41598-020-76767-y