Sirsasana (Headstand Pose)
What is Sirsasana (Headstand Pose)?
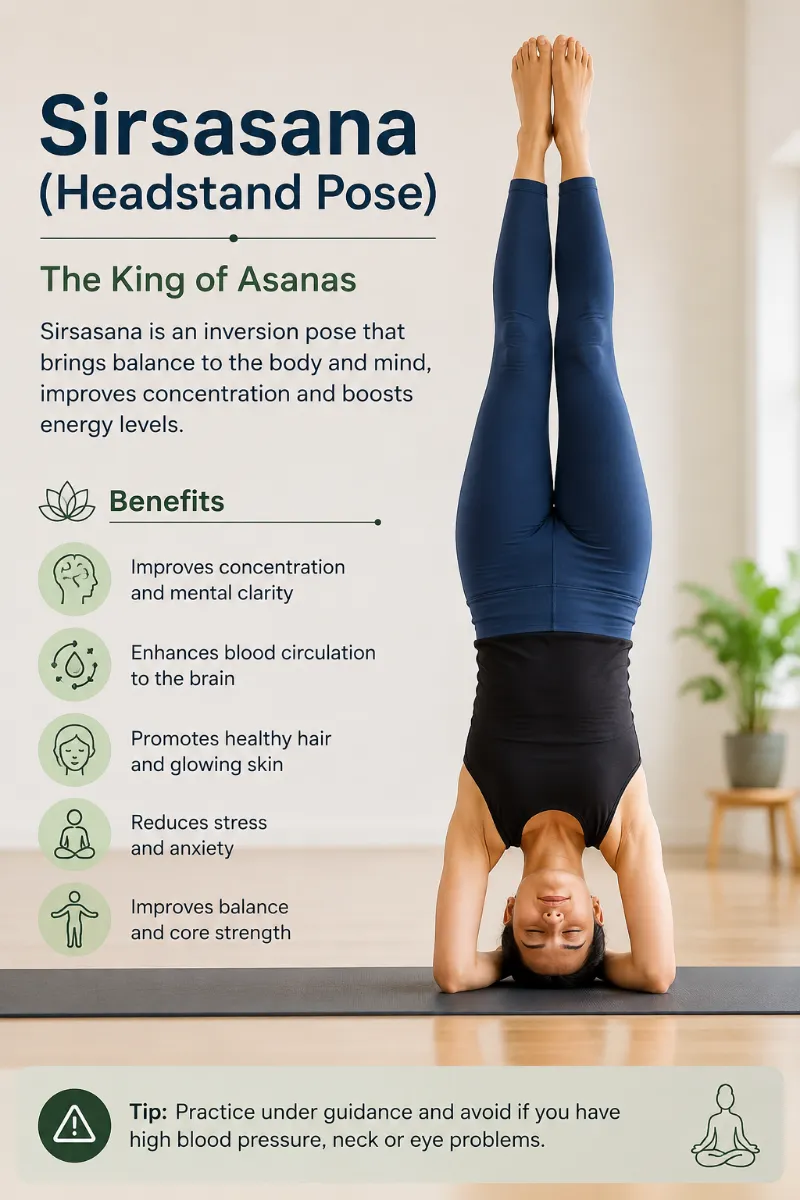
In contemporary yoga, Sirsasana (Headstand Pose) is referred to as an inverted asana. It was described under many titles as both an asana and a mudra in ancient hatha yoga. “King of Asanas” is the name given to the headstand stance.
With the top of the head gently resting on the floor, the body is fully inverted and supported by the forearms in this yoga pose. Only a certified yoga instructor should assist you in performing this challenging pose.
Overview & Etymology
Overview
The Sanskrit terms “-īrṣa, which means “head,” and Āsana, which means “posture” or “seat,” are the roots of the word sirsasana.
The term “sirsasana” is relatively recent; however, it refers to a much older pose that was formerly known by different names. It was referred to as Viparita Karani, a yoga mudra, in the Hatha Yoga Pradipika and other classical Hindu yoga books.
Hemacandra’s 11th-century Yogastra refers to it as either Kaplkarana (meaning “head technique”) or Duryodhansana (meaning “Duryodhana’s pose”). Hemacandra’s 18th-century Joga Pradipika refers to it as Kapālīkarana (head posture).
Nonetheless, Sirsasana and Kapalasana are both used in the 19th-century Sritattvanidhi.
- Sanskrit Name: शीर्षआसन
- Pronunciation: Shir-sa-asa-na
- Pose Type: Inversion
- Also known as: Headstand, Salamba Shirshasana
- Strengthens: Vertebral Column, Neck, and Shoulders
- Stretches: Upper Abdomen
Health Benefits of Sirsasana
- Improves pituitary gland functions.
- Improves lymphatic system function.
- Improves brain function and focus.
- Increases blood flow around the eyes, improving vision.
- Improved blood sugar metabolism contributes to the natural treatment of moderate diabetes.
When to Avoid Performing Sirsasana
- Avoid if you are a beginner.
- Avoid during menstruation and pregnancy.
- Avoid if you’ve had surgery or an injury to your neck or spine.
- Avoid during cerebral haemorrhage, back injury, or chronic glaucoma.
- Steer clear when you have high blood pressure, arteriosclerosis, or cerebral or coronary thrombosis.
- If you have headaches, heart palpitations, excessive perspiration, or dizziness, avoid practising.
Sirsasana for Beginners
Dolphin plank or Makara adho mukha svanasana, high plank or Phalakasana, downward-facing dog or Adho Mukha Svanasana, one-legged headstand or Eka Pada Sirsasana, and headstand against the wall are some ways to prepare your body for this inverted pose.
You should pay attention to these pointers if you’re new to yoga:
- When doing the Sirsasana, make sure a qualified yoga instructor is around.
- For stability, balancing poses are best performed close to a wall or other support. Again, the best security is a yoga instructor.
- Keep a blanket or cushion for your head to provide comfortable support.
- One by one, raise each leg off the ground after completing Step 8 above. In a similar manner, descend one leg at a time.
- Start by holding the pose for just a few seconds, then gradually increase your endurance and work your way up while paying attention to your comfort level.
How to do Sirsasana (Headstand Pose)
A headstand can be performed by anyone who wishes to get better at advanced yoga poses. Although it is difficult to verify whether the pose is held symmetrically when practising on one’s own, it is strongly advised that novices only practice with a trained yoga instructor.
Therefore, beginning your Sirsasana practice involves four steps.
Part 1 – Preparatory Poses for Sirsasana
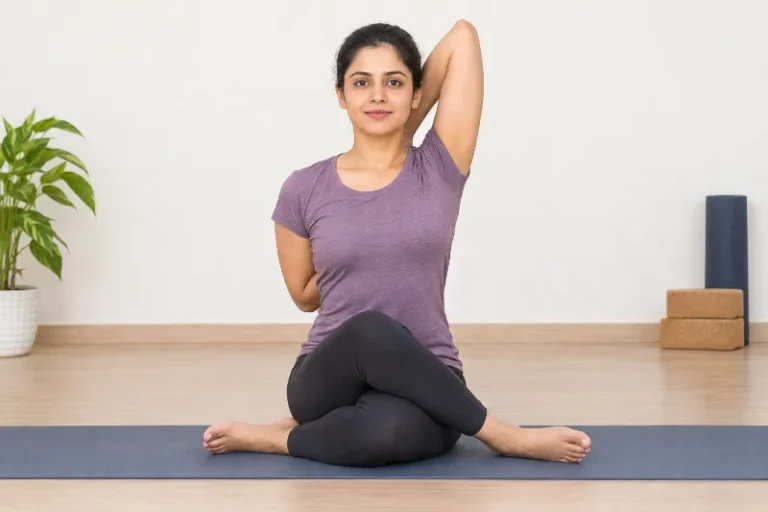
Tadasana Gomukhasana (Standing Cow Face Pose)
- Sirsasana heavily strains the shoulders, arms, elbows, and upper abdomen. When you begin doing Tadasana with Gomukhasana, your arms will strengthen your legs and encourage upper arm extensions and external rotation.
The cow face pose can help you build a solid upper body platform and a feeling of lightness during Headstand practice as you move weight away from your neck and head in Sirsasana.
Adho Mukha Svanasana (Downward Facing Dog Pose)
- It involves spreading the feet and bending forward when standing. This is a close preparation for Sirsasana, which stretches the leg muscles by placing the bodyweight on the head and extending and splitting the feet widely apart.
Prasarita Padottanasana (Intense Leg Stretch Pose)
- Your Sirsasana practice will benefit from the power, stability, and balance of the Downward Facing Dog pose. In order to improve core stability in the inverted pose, the legs are extended here, strengthening the hamstrings and hip muscles.
Part 2: Step-by-Step Instructions to Perform Sirsasana
- Step 1: If you’re a newbie, kneel close to a yoga mat and spread it out fourfold on the ground.
- Step 2: Press your wrists into the mat and interlock your fingers while keeping your elbows, forearms, and knees flat.
- Step 3: Put your palms in a cupping position. Now position the back of your head against your palms and the top of your head on the mat.
- Step 4: To create an inverted V with your body, raise your knees off the surface and move your feet toward your torso.
- Step 5: Use your shoulder and core muscles to keep your toes pointing on the mat for a while.
- Step 6: Bend your knees while lifting them toward your chest, walk your feet even closer to your torso (so that your back is straight), and apply pressure through your forearms.
- Step 7: Squeeze your core firmly and engage through your shoulders and forearms to keep your balance.
- Note: Until you are able to maintain your balance with your knees bent and drawn toward your chest, you may need to repeat these two movements several times.
- Step 8: Extend your legs gently and simultaneously toward the sky once you feel balanced. Take your time and move slowly.
- Step 9: Hold this inverted position for 3 to 5 deep breaths, only if you feel comfortable breathing.
- Step 10: Return to the beginning position by releasing the neck, shoulders, and head off the floor after bending the knees and sliding them down to the floor in reverse order while exhaling.
Part 3: Things to Keep in Mind
Sirsasana is an advanced position that demands flexibility, strength, and alignment. This position can result in severe spine injuries as well as back, shoulder, and neck pain if done carelessly. You’ll need to overcome your fear of failure to do it safely. Here are some things to consider:
Coordinate with a spotter: The best choice is to work with a spotter. This could be a knowledgeable yoga friend, a fitness expert, or a professional yoga instructor.
Being upside down makes it difficult to sense or examine your body’s alignment.
Therefore, a spotter can help you align and support your body correctly. Additionally, they will assist you in safely entering and exiting the asana.
Use the wall instead of falling. Relying on a wall is acceptable as long as you don’t depend on it. Keep in mind that you don’t have to rely too much on the wall or grow overly accustomed to it. If you’re scared of falling, it’s great to have the wall there to provide emotional support.
Make use of safety props by surrounding yourself with folded cushions or blankets. You can gradually advance until you are able to perform a headstand in the centre of the room as your strength increases. Spread some folded blankets or cushions on the ground around you if you’re doing this alone at home. This will provide a soft landing in the event that you do lose your balance.
Part 4: Relaxing Poses After Sirsasana
After performing Sirsasana, the muscles in the neck and shoulders require some time to relax and contract. After Sirsasana, the following poses must be performed right away to properly relax the spine:
- Take a step back from Sirsasana, sit on your heels, extend your arms, and maintain your body light and relaxed by placing your face and forehead close to the floor. In the child’s stance, the stretched spine and neck muscles are at ease. The hip muscles are likewise at ease in this position.
Paschimottanasana (Seated Forward Bend):
- After unwinding in Balasan, stand up and take a seat in Dandasana. To draw your lower abdomen in and your spine upward, gently press your sitting bones into the floor. Extend your spine as you take a breath.
Lengthen your spine as you inhale. Fold forward from the hips as you exhale. Keep your back straight and simply flex your spine as far as you can. From the belly button to the ribs, chest, forehead, and legs, maintain length in the front of the body.
Keep your arms on the ground. If your hands reach your feet, wrap your thumbs and first two fingers around your big toes. With each inhalation, raise your head slightly and stretch the front of your torso to deepen the position. After holding this stance for a few minutes, let your upper body relax.
Savasana (Corpse Pose):
- In Savasana, make sure the head, trunk, and limbs are all relaxed and near the mat while breathing calmly. Keep your breathing under control and relax your whole body. For twelve breaths, maintain this posture.
Breath Awareness:
The headstand pose helps you find greater stability and strength in your inversion by requiring numerous inhalations and exhalations during the pose. Therefore, pay close attention to the following points:
- When you inhale, bring your torso close to your palms; when you exhale, bring your head’s crown close to your palms.
- Take another breath, lift the knee off the mat, and release it while raising the spine and lower back.
- To prepare your body for the posture, take a breath, walk with your toes close to your chest, and then release it by using your shoulders, knees, and core. At this moment, relax your breathing while continuing to engage.
- Inhale deeply, lift both feet off the mat or floor, and raise your legs to a 90-degree angle as you exhale.
- As you inhale, raise your body upward while applying additional pressure to your shoulders and core. As you exhale, assume the ultimate posture.
- As you reach the last posture, start breathing steadily and maintain a calm mind.
- Breathe out as you release the pose, bringing one leg near to the floor at a time, and then breathe in as your whole body settles into the pose.
- Duration of Performance for Novices: For 20 to 60 seconds, hold the stance.
- Advanced Performance Time: Maintain the stance for three to five minutes.
Sirsasana Variations to Consider
A yoga pose could be easy for one student but challenging for another since different students have different skill levels. Therefore, for novices who are struggling with this challenging stance, present these simpler alternatives to the headstand pose:
- Tripod Headstand with Elbow on Knees: Bend your knees while keeping your head on the ground. Your elbows should be bent at a ninety-degree angle, and your palms should be on the floor. By moving your weight to your head and hands, you can raise your feet off the ground.
- Inverted Staff Pose: Urdhva Dandasana, also called Ardha Sirsasana, is a pose that beginners in headstand stance can perform. You may improve your headstand practice by using the core muscles (drawing the belly in), shoulders, arms, chest, diaphragm, and pelvis.
Sirsasana Precautions and Contraindications
Sirsasana has some precautions and contraindications. These include:
- High blood pressure
- Glaucoma
- Cervical spine injuries
- Active migraines
- Pregnancy beyond the first trimester
- Before performing any headstand yoga practice, anyone with neck problems should obtain medical clearance.
Final Thoughts
For many yoga practitioners, the Sirsasana stance represents an inspiring turning point. Beginners can safely work toward mastering this traditional inversion by adhering to safety regulations, gaining strength gradually, and following the correct Sirsasana techniques. The confidence and abilities acquired along the road make the journey worthwhile, even though it could take some time.
Are you prepared to proceed from basic steps to complex inversions? At Rishikesh’s Ekam Yogashala, develop genuine alignment and strength. Enrol in our accredited multi-style teacher training programs along the sacred Ganges to safely learn positions like Sirsasana under the tutelage of a professional. Get your time slot now!
FAQs
Is the Sirsasana yoga pose safe for beginners?
Yes, given the right direction, preparation, and a wall for support. Don’t do it if you have high blood pressure or neck problems.
What are the key features and wellness benefits associated with Sirsasana?
Sirsasana is a head balance inversion. It is worthy of its name since it simultaneously challenges, soothes, and strengthens the entire body.
How can a beginner gradually work toward mastering Sirsasana?
Three to six months of regular daily practice with the right preparation poses and technique is the norm.
What safety guidelines should beginners follow before practising Sirsasana?
Three to six months of regular daily practice with the right preparation poses and technique is the norm.
Is it possible to perform Sirsasana safely without using a wall for support?
Only after practising consistently for at least 4 to 8 weeks and developing a strong balance with wall support.
References
- Dr.Kruti Sorathiya. (2024). Sirsasana Yoga Pose: Health Benefits, How to do? – Mobile Physio Clinic. Mobile Physiotherapy Clinic. https://mobilephysiotherapyclinic.in/sirsasana-yoga-pose/
- Allen, W. (2025i, August 26). Sirsasana. https://myyogateacher.com/yoga-asana/sirsasana
- Stephen. (2023b, March 31). How to do Sirsasana – Benefits & Yoga Pose Tutorial. Adventure Yoga Online. https://adventureyogaonline.com/sirsasana-benefits/
- Rakshak, & Rakshak. (2024b, August 23). Shirshasana (Head Stand pose) | Benefits of Sirsasana – The Art of Living. The Art of Living – Making Life A Celebration. https://www.artofliving.org/in-en/yoga/yoga-poses/sirsasana-headstand-pose