
12 Best Chair Yoga for Seniors
Introduction
Seniors’ independence and quality of life are threatened by a variety of health issues that come with aging, such as decreased mobility, weakened muscles, chronic pain, and an increased chance of falls. Yoga may have major health advantages, according to several studies, yet many older persons with physical limitations may not be able to practice traditional forms.
Chair yoga has been demonstrated to enhance older individuals’ mobility, strength, balance, flexibility, and general mood. It is a flexible and safe substitute for traditional yoga.
For instance, you can even do yoga while seated. Chair yoga can give the benefits mentioned above in addition to providing a steadier, more comfortable sitting platform for activity.
What is chair yoga?
Chair yoga is a mild variation of conventional yoga in which practitioners hold poses while seated or supported by a chair. Chair yoga, which has its roots in Hatha yoga, keeps the physical poses, breathing exercises, and meditation concentration of yoga while making them more flexible and approachable.
Why Chair Yoga Matters After 50?
Our bodies change significantly as we approach our late 50s and early 60s. According to research, adults lose 1% to 2% of their muscle mass annually after 50, which results in decreased strength and flexibility. Additionally, joints may stiffen, making commonplace motions like bending, reaching, and walking more difficult.
Additionally, falls, mobility problems, and a general lack of confidence in day-to-day tasks may become more likely as a result of these changes. Seniors may find it challenging to get on the floor and utilize a yoga mat, even though a general yoga exercise can be beneficial.
Chair yoga, on the other hand, provides all the advantages of traditional yoga in a method that is accessible to people of all mobility levels and easy on the joints. Chair yoga can help seniors remain active and consistent because it enhances mental health, avoids discomfort, and improves balance.
Chair Yoga Poses
- Seated Mountain (Tadasana)
- Seated Cat-Cow(Bitilasana Marjaryasana)
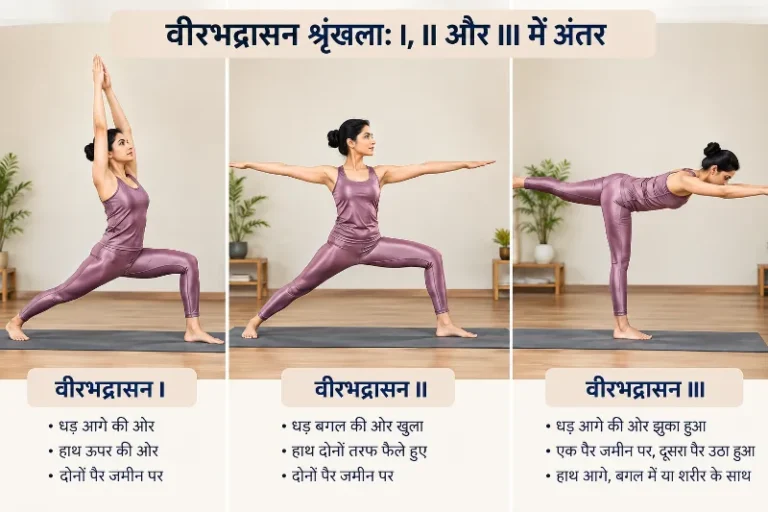
- Seated Warrior I (Virabhadrasana I)
- Seated Warrior II (Virabhadrasana II)
- Seated Forward Bend (Paschimottanasana)
- Eagle Arms (Garudasana Arms)
- Reverse Arm Hold
- Simple Seated Twist (Parivrtta Sukhasana)
- Single-Leg Stretch (Janu Sirsasana)
- Seated Spinal Twist
- Seated Triangle Pose
- Seated Savasana
Seated Mountain (Tadasana)
Alignment and posture can be enhanced by sitting in the mountain standing position.
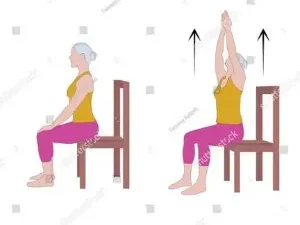
How To Do:
- When sitting on a chair, the soles of your feet should be in contact with the floor.
- Your knees and ankles should line up.
- Lengthen your spine from top to bottom to extend your vertebrae.
- As you inhale, raise and extend your shoulders.
- As you release the breath, roll your shoulders back and forth.
- Do this as often as you’d like.
Seated Cat-Cow (Bitilasana Marjaryasana)
This pose lessens neck and back stiffness and increases spinal flexibility.
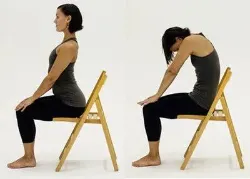
How To Do:
- Sit on the chair with your feet flat on the ground and your hands on your knees.
- Inhale, elevate your chest toward the ceiling, arch your back, and allow your belly to drop forward (Cow Pose).
- Pull your belly button in, tuck your chin into your chest, round your back, and exhale (Cat Pose).
- For 5–8 breaths, repeat.
Seated Warrior I (Virabhadrasana I)
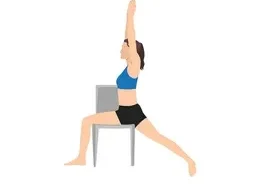
How To Do:
- Settle in near the front of your chair.
- Turn your torso to the right and go closer to the left edge of the chair to give your right thigh additional support.
- Extend your left leg back as far as you can to straighten it.
- Verify the alignment of your hips.
- Make sure both hips are squared in order to gaze forward.
- If it feels comfortable, tuck your back toes under in a lunge.
- Your foot can stay flat on the ground otherwise.
- You are able to extend your arms directly above your head while
Seated Warrior II (Virabhadrasana II)
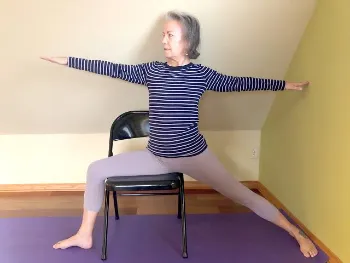
How To Do:
- With your back to the left, take a sideways seat in the chair.
- Holding onto the back of the chair, rotate your torso to the left for a spinal twist.
- After shifting your legs to the opposite side of the chair, repeat the twist to the right side.
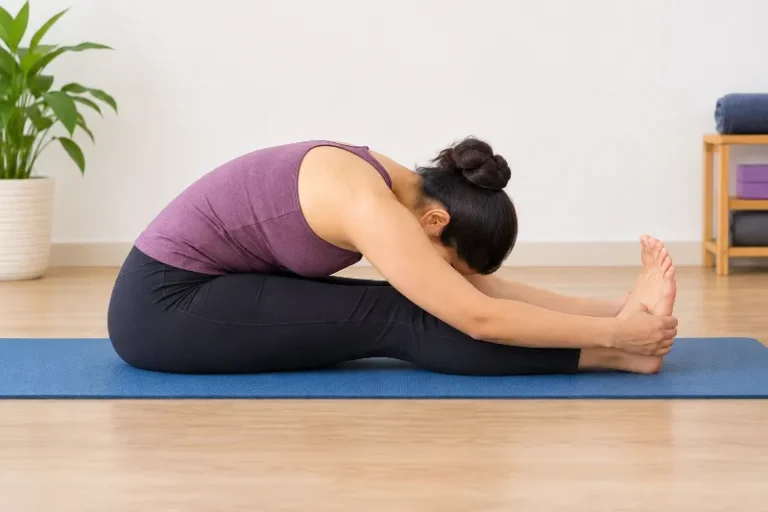
Seated Forward Bend (Paschimottanasana)
Tension in the lower back is released, and the hamstrings are stretched in this pose.
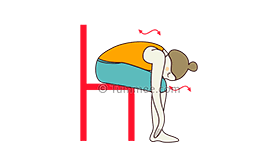
How To Do:
- With your knees bent and your feet flat on the floor, take a seat near the chair’s edge.
- With your toes pointed up and your heels on the ground, extend your legs straight in front of you.
- Take a breath and extend your back.
- Exhale, then gradually begin to fold your hips forward.
- Reach for your feet, ankles, or shins by bringing your torso close to your legs, depending on how flexible you are.
- Maintain a straight spine and hold the position for a few breaths, increasing the stretch with each breath.
- Take a breath and slowly sit back up.
Eagle Arms (Garudasana Arms)
By holding this position, stress in the shoulders and upper back can be relieved.
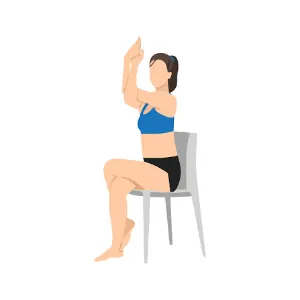
How To Do:
- Cross your right thigh over your left, if you can. If you can, circle your calf with your right foot.
- Fold your left arm across your right at the elbow.
- Bring your palms together while bending your elbows.
- Raise your elbows as you lower your shoulders away from your ears.
- Breathe deeply while holding the pose for five seconds.
- On the opposite side, repeat.
You can alter this position by leaving your feet level on the floor and only doing the arms if you are unable to cross your legs or find that it strains your lower back.
Reverse Arm Hold
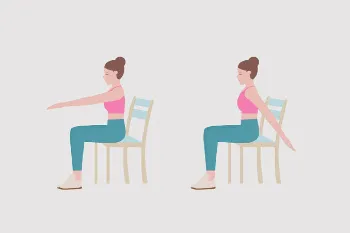
How To Do:
- Sitting toward the edge of the chair, keep your back straight and set your feet flat on the floor.
- Take a breath, then extend your arms to your sides.
- Breathe out slowly and bend your elbows slightly as you stretch your arms behind your back.
- Arch your back slightly to increase the intensity of the stretch.
- Hold the position for a short while.
- Return slowly to the beginning.
Simple Seated Twist (Parivrtta Sukhasana)
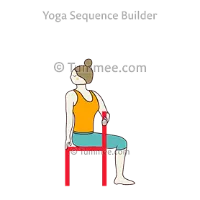
How To Do:
- Sit close to the front of the chair with your back straight.
- Place your right hand on your left knee and your left hand on the back of the chair.
- To extend your spine, take a breath.
- As you slowly spin to the left and look over your left shoulder, exhale.
- Hold for two to three breaths.
- Inhale, then slowly return to your starting position.
- Continue on the opposite side.
Single-Leg Stretch (Janu Sirsasana)
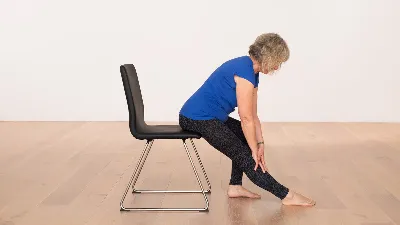
How To Do:
- With your left foot flat on the ground, take a seat at the front edge of the chair.
- In front of you, extend your right leg.
- Breathe in and extend your back.
- Breathe out, then carefully fold forward over your extended leg.
- Take a few breaths and hold the stretch.
- After a few breaths of relaxation, switch to the opposite side.
Seated Spinal Twist
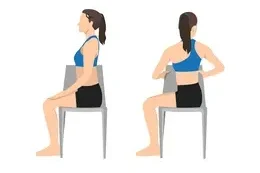
In addition to improving spinal mobility, the seated spinal twist facilitates digestion.
How To Do:
- Maintain a straight back while sitting in the chair’s front.
- Put your left hand on the back of the chair and your right hand on your left knee.
- Take a breath to stretch your back.
- Breathe out as you gaze over your left shoulder and slowly turn to the left.
- Take two or three breaths to hold the stance.
- Breathe in, then slowly go back to the beginning.
- Repeat with the opposite side.
- It’s very important to avoid forcing your body into a deeper twist by using the chair’s back.
- Only twist to the point when your body naturally stops.
Seated Triangle Pose
This pose helps maintain balance and stretches the sides of the body.
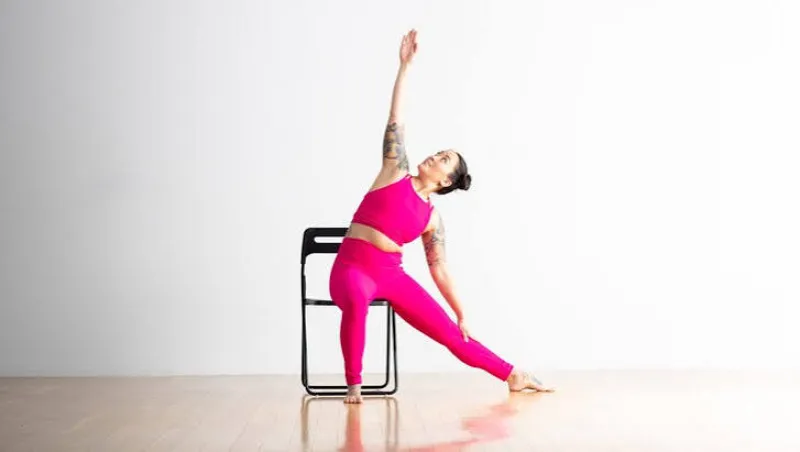
How To Do:
- With your right leg outstretched and your left knee bent at a 90-degree angle, take a sideways seat on the chair.
- Raise your left arm above your head while placing your right hand on your outstretched leg.
- Feel the stretch along your left side as you slowly lean toward your right.
- Change sides after holding for five breaths.
Seated Savasana
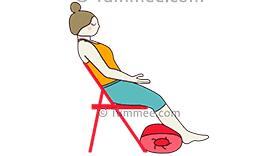
How To Do:
- After your practice, spend a few minutes sitting with your hands in your lap and your eyes closed.
- As you transition into the rest of your day, this seated savasana will assist your body in absorbing all the beneficial impacts of the poses you have performed.
Benefits of chair yoga
- Enhanced pliability and decreased rigidity
- Increased stability and strength
- Improved alignment and posture
- Decreased anxiety and tension
- Improved blood flow
- Diminished fear of falling
- Relieve Joint Pain
- Assist people who have arthritis
Safety tips for chair yoga
- Before working out, make sure your chair is secure and solid. Your chair shouldn’t tip, sway, roll, or move about a lot.
- Select a chair without armrests to give yourself more space to move around.
- As with any new exercise, start out slowly to give yourself time to get used to the movements and see how your body reacts.
- Never perform chair yoga poses that cause you to strain or hurt yourself.
Are there any risks?
- Chair yoga carries some possible hazards, just like any other type of exercise.
- While completing seated poses reduces the chance of falling to the ground, it is still possible.
- It is crucial to select a chair that is highly solid.
- Overexerting oneself or straining a muscle can also result in injuries.
How often should you do chair yoga?
- The frequency of chair yoga practice is not strictly regulated.
- person’s objectives, present fitness level, and the amount of activity they can perform before becoming fatigued may all influence the appropriate frequency.
- Starting with a small amount of chair yoga and working up to two or three sessions per week could be beneficial. If they are able, they can also consult a physical therapist about how much is appropriate for them.
Some Advice to Start
- Chair yoga is an easy practice to incorporate into your everyday routine.
- Make sure your props are appropriate: Locate a sturdy chair that is low enough for you to sit with your feet flat on the floor.
- Certain poses, such as the high lunge, require an armrestless chair.
- Begin slowly: Try just one or two positions at a time when you first start doing chair yoga.
- Grow the number of poses and practice time gradually as your strength and flexibility grow. Ten.
- Pay attention to your body: You shouldn’t be in an insecure position or in pain. Stop the stance or change your body if you feel pain or think you might fall.
FAQs
Does chair yoga actually benefit older people?
Indeed, elders can benefit greatly from chair yoga. It provides a mild and safe method to increase joint mobility, strength, flexibility, and balance without taxing the body. Older persons may gradually experience improved posture, easier mobility, and increased general well-being with consistent practice.
How frequently should elderly people practice chair yoga?
The frequency of chair yoga practice is determined by each person’s mobility and general health. Most seniors can benefit from chair yoga if they do it two or three times a week. As their strength and flexibility improve, beginners can start with shorter sessions (15–20 minutes) and progressively increase the frequency and duration. A healthcare professional should always be consulted before beginning a new workout regimen.
Does chair yoga help with arthritis?
Of course, chair yoga is especially helpful for arthritis since it offers mild joint mobility that can improve circulation and lessen pain and stiffness. The range of motion is maintained stress-free thanks to the regulated movements.
Is it possible to practice chair yoga at home without a teacher?
Indeed, many individuals prefer it that way. If you know the basics of alignment, it’s a really simple procedure. Put on some music you enjoy, move at a tempo that suits you, and make sure you’re in a clear area where you won’t bump your hands on a table.
References:
- MyYogaTeacher. (2026). Chair Yoga for Seniors: 7 Safe and Easy Poses (2025 Guide). MyYogaTeacher. https://myyogateacher.com/articles/chair-yoga-for-seniors
- Bria Horne. (2023). Chair yoga for seniors: Benefits and poses for beginners. Medical News Today. https://www.medicalnewstoday.com/articles/chair-yoga-for-seniors#does-it-work
- Gretchen Stelter. (2025). Chair Yoga for Seniors: Seated Poses. Healthline Media. https://www.healthline.com/health/fitness-exercise/chair-yoga-for-seniors#single-leg-stretch
- (2026). Chair Yoga Exercises For Beginners And Seniors. puregym.com. https://www.puregym.com/blog/chair-yoga-exercises-for-beginners-and-seniors/