Improve Hip Mobility with These Simple Yoga Poses
Introduction
Tight hips can cause discomfort in the legs and lower back by limiting mobility through the pelvis. Yoga postures are provided in this article to help you move more easily and gradually by releasing tension and regaining flexibility.
One of the most frequent causes of limitation in the body is tightness in the hips. The muscles around the hip joints may become less flexible over time due to prolonged sitting, restricted mobility, and repeated daily routines. The symptoms of this limitation are frequently felt more extensively as it progresses, especially in the knees, pelvis, and lower back.
Restoring balanced mobility in this area may be accomplished effectively and practically with yoga.
Identifying Signs of Limited Hip Mobility
If routine tasks start to feel quite challenging, you may find that your range of motion has reduced. A lack of hip flexibility sometimes manifests as a noticeable limitation during a basic walk or discomfort while getting up after extended durations of sitting. Early detection of these signals enables you to modify your regular yoga practice and maintain your range of motion over time.
Benefits of Hip Mobility Yoga
- Improves Hip Flexibility and Range of Motion: By gradually lengthening the hip flexors, adductors, and external rotators, regular yoga practice for hip flexibility restores the natural range of motion that sedentary lifestyles eventually lose. Once-restricted movements, such as deep squatting, sitting cross-legged, and ascending stairs, become more effortless and natural. The lower back and knees, which often carry the weight of what tight hips are unable to absorb, have less compensatory strain as a result of this increased mobility.
- Strengthens the Glutes and Hip Stabilisers: Poses that expand the hips are more than just passive stretches. The gluteus medius and minimus are actively used in poses like Warrior II, Chair Pose, and Malasana to keep the pelvis stable. In addition to protecting the sacroiliac joint, strengthening these stabilizing muscles lowers the possibility of imbalances that cause long-term pain. Additionally, a well-supported hip girdle improves posture across the whole spine.
- Eases Tightness and Discomfort in the Lower Back: One of the most ignored causes of lower back stress is tight hips. Shortening the hip flexors causes the pelvis to tilt anteriorly, which increases lumbar spine compression. Instead of just extending the back, regular hip-opening exercises attack this at its root. After establishing a regular morning practice, practitioners frequently see a progressive alleviation of that well-known low-grade pain within a few weeks.
Essential Poses to Improve Mobility
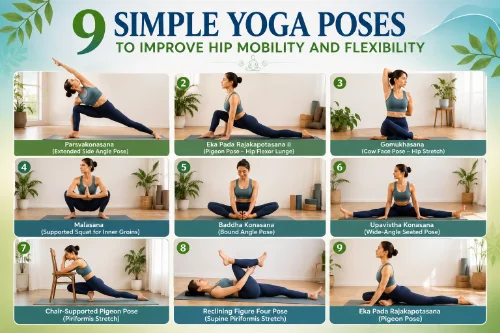
Parsvakonasana (Extended Side Angle Pose)
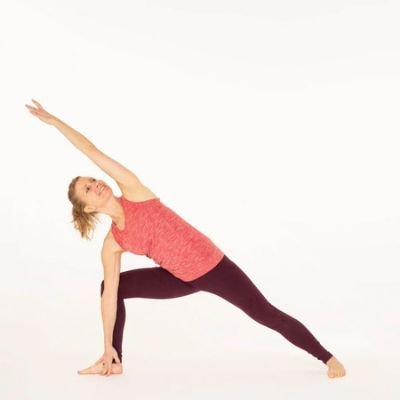
A great standing position for increasing hip mobility and opening up space in the inner groin is parsvakonasana. In this form, the hand is supported by a block, and the lower arm is positioned within the bending leg. The arm can stabilize the knee in this posture, facilitating a more efficient opening of the front hip. As the posture progresses, the wall support serves to stabilize the back leg, allowing the hips and pelvis to function better.
- Stand with your back heel on the wall and step your front foot out a significant distance.
- To position the front knee directly over the ankle, bend it.
- Put a block next to the front foot’s inner heel, then drop your lower hand onto it.
- To stabilize the knee and maintain its alignment over the ankle, place the arm firmly against the inner knee.
- Bring the hip socket closer to knee height by grounding the front heel and letting the front thigh bone drop.
- Firm the back thigh and press the back heel into the ground to stabilize the back leg.
- To promote hip opening, contract the front leg buttock and pull the outer hip further into the body. Rotate the upper body away from the front leg by turning the chest upward.
- Raise the hand and look at it while extending the upper arm vertically over the shoulder.
Eka Pada Rajakapotasana II (Pigeon Pose)
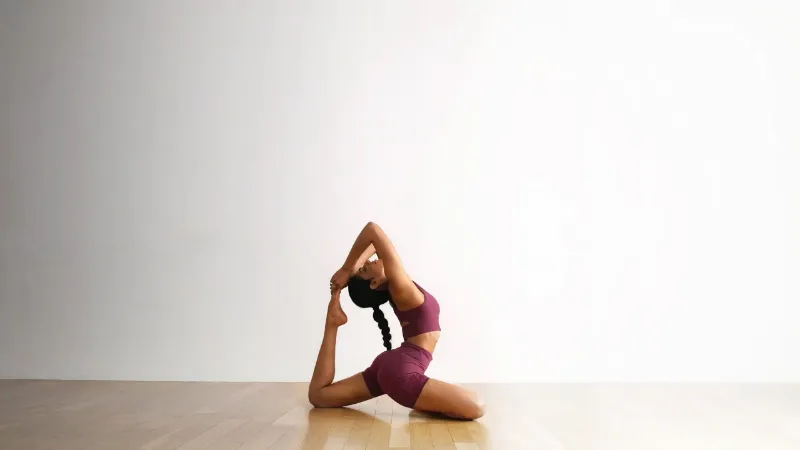
The goal of this lunging version of Eka Pada Rajakapotasana is to release the lower leg’s hip flexors, a region that frequently gets tight during extended sitting. The posture generates a deep opening through the front of the hip and upper thigh by dropping the back knee to the floor and allowing the pelvis to go forward and downward. By supporting the hands with blocks, the body weight may be partially transferred via the arms, allowing the hips to relax into the posture more easily and gradually.
- Take a wide lunge position, about the same distance as Parsvakonasana, by moving the front foot forward.
- Put two blocks next to the front foot. Lower the back knee to the ground while bending the front knee.
- As your hips move forward and downward, use your hands on the blocks to support your body weight.
- Keep the big toe base grounded while allowing the front knee to shift slightly in front of the ankle.
- Release the front leg’s quadriceps gradually, softening from the knee to the groin crease.
- Avoid forcing the back knee down; rather, soften its contact with the floor. Let the pelvis fall upwards by releasing the muscles at the front of the rear hip. Roll the shoulders back and raise the chest after walking the blocks back a little to bring them closer to the hips.
- To deepen the opening through the front of the back hip and thigh, keep the hips moving forward while the chest raises.
Gomukhasana (Cow Face Pose – Hip Stretch)

The outer hips and gluteal muscles are deeply stretched by this first variant of Gomukhasana. Strong internal rotation of the hips is produced by crossing the legs such that the knees are immediately above one another. This motion helps alleviate tension around the rear of the hips by lengthening the gluteal muscles, especially on the side of the upper leg. For those who practice with stiff hips, the posture can be made more accessible by sitting on a folded blanket.
- With your feet together and knees elevated, take a seat on a folded blanket.
- Bring the heel next to the opposing hip by sliding one leg under the other.
- Raise the other leg over the top so that the knees are exactly on top of each other.
- Turn both feet’ tops toward the ground and their soles upward.
- Try to uniformly place both sitting bones—especially the sitting bone of the upper leg side—on the blanket.
- Stay straight and let the muscles surrounding the hip progressively relax if the outer hip stretch is already rather powerful.
- Walk the hands forward while maintaining a long spine and an elevated chest to deepen the position.
- To maximize the stretch in the outer hip and gluteal muscles of the upper leg, keep the sitting bones stable while the body moves.
Malasana (Supported Squat for Inner Groins)
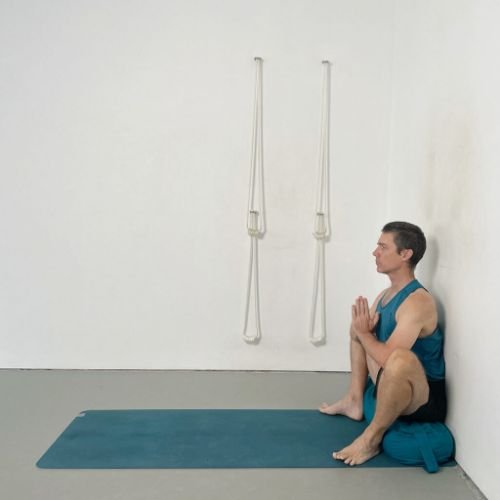
This supported version of Malasana opens up the adductor muscles and inner groins deeply. The body may progressively relax into the position without undue effort by squatting with the back of the pelvis against the wall and the pelvis supported on a bolster. To extend the muscles along the inner thighs and make room via the hip joints, push the knees apart while the inner feet stay stable.
- Stand with your feet wide apart, about the width of the mat, and place a bolster against the wall.
- With the backs of your heels in contact with the bolster, lean your shoulders and pelvis on the wall.
- With the toes pointing diagonally away from the body, turn the feet outward.
- Bend your knees and slide down the wall until your hips touch the bolster while keeping your heels firm.
- Press the elbows into the inner knees while bringing the hands together at the chest.
- To stabilize the feet, firmly press the inner heels and bases of the big toes into the ground.
- To make room via the inner groin, gently squeeze the knees apart with the elbows.
- While keeping the knees spreading, roll your shoulders back and raise your chest.
Baddha Konasana (Bound Angle Pose)
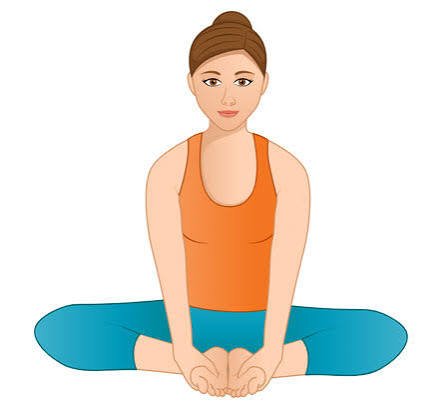
A traditional sitting position for increasing hip and inner groin mobility is Baddha Konasana. The position softly lengthens the adductor muscles along the inner thighs by placing the soles of the feet together and opening the knees outward. People with tight hips can maintain an open chest and spinal lift by sitting on a bolster and utilizing the wall for support.
- With your knees spread wide and your foot soles together, take a seat on a bolster.
- Bring the heels closer to the pelvis.
- Encourage the knees to drop toward the floor by actively pressing the heels against each other.
- Draw the shoulders back while bringing the hands to the ankles or shins.
- To support the lower back lift, grind the front of the sitting bones into the bolster.
- While keeping your spine straight, roll your shoulders back and raise your chest.
Upavistha Konasana (Wide-Angle Seated Pose)
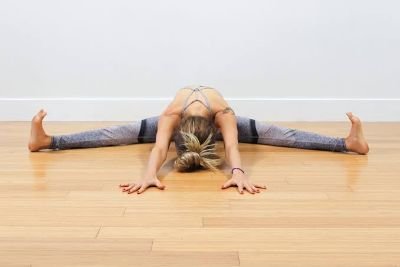
The wide-legged sitting position known as Upavistha Konasana works the adductor muscles and inner thighs. The position promotes the inner groins to release toward the floor by spreading the legs wide and grounding the backs of the thighs. Maintaining an upright spine while sitting on a bolster with the pelvis pressed against the wall allows the hips to expand without straining the lower back muscles.
- Extend your legs wide apart, around the length of one leg or slightly wider, while sitting on a bolster.
- Adjust the pelvis so that its back just touches the wall.
- To maintain straight legs, firmly press the backs of the knees toward the floor.
- Activate the big toe bases and extend the heels out from the body.
- The inner groins should be rolled in the direction of the floor.
- Apply pressure on the upper thighs in the direction of the floor, paying particular attention to the area nearer the pelvis.
- To support the lower back lift, grind the front of the sitting bones into the bolster.
- Raise the chest, roll the shoulders back, and press the hands into the bolster.
Chair-Supported Pigeon Pose (Piriformis Stretch)
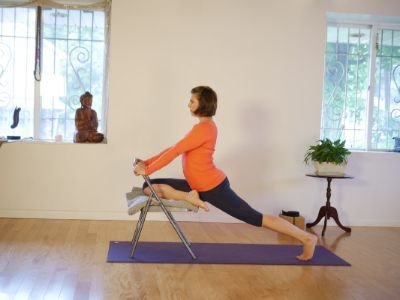
The gluteal muscles and deep hip rotators, especially the piriformis, are specifically stretched in this chair-supported version of Pigeon Pose. The position produces a controlled external rotation of the hip by putting the ankle of one leg across the opposing thigh while keeping the spine erect. The chair’s support helps concentrate the stretch toward the back of the hip by keeping the hips still while the spine rises.
- Take a seat with your feet level on the floor and your hips slightly above your knees.
- Place one leg’s outside ankle near the knee on the other thigh.
- Make sure your shin stays parallel to the wall in front of you.
- To prevent damage to the knee joint, flex the foot of the raised leg.
- Lift the inner thigh and turn the outer leg downward by rotating the thigh outward with your hands.
- To raise the chest and spine, press your hands against the chair.
- As the knee relaxes downward, keep the elevated foot moving.
- Keeping your posture straight and your spine long, walk your hands up the wall in front of you.
- As the stretch increases through the gluteal and back of the hip muscles, maintain a stable pelvis.
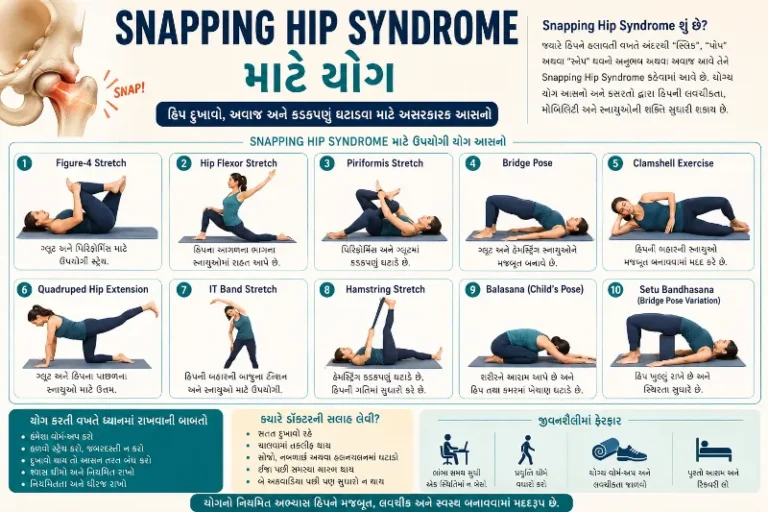
Reclining Figure Four Pose (Supine Piriformis Stretch)
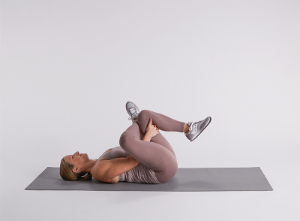
The gluteal muscles and deep hip rotators, especially the piriformis, are gently yet effectively stretched by this reclining version. The position produces a controlled external rotation in the hip while keeping the back supported on the floor by pulling the legs nearer the chest and crossing one ankle across the opposing thigh.
- While lying on your back, keep your knees exactly above your hips by bending them.
- Just below the knee, place the outer ankle of one leg across the opposing thigh.
- To protect the knee joint, flex the elevated foot.
- Raise the head a little and put one arm through the gap between the legs.
- Connect the fingers behind the shin while encircling the outside of the supporting leg with the other arm.
- To bring the legs closer to the chest, bend the elbows.
- To drive the stretch into the hip, let the elevated leg’s elbow gently guide the knee away from the shoulder.
- As the stretch progresses, keep the elevated leg’s outer hip moving away from the body.
Eka Pada Rajakapotasana (Pigeon Pose)
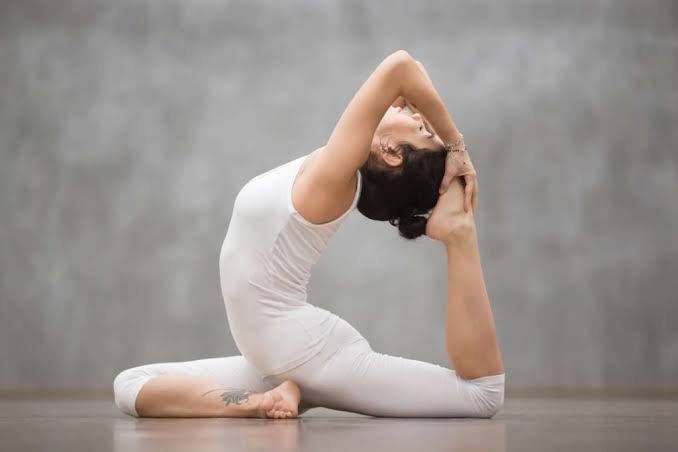
A popular yoga practice for expanding the hips and releasing tension in the gluteal and deep hip rotators is Eka Pada Rajakapotasana. In this variation of the pose, the front leg rotates outward as the back leg stretches behind the body, stretching the hip flexors of the back leg and creating a strong stretch through the buttock and outer hip of the front leg.
The pelvis can be supported by placing a folded blanket under the sitting bone, allowing the hips to fall equally on both sides as the posture progresses.
- Start with your dog facing downward and move one knee in the direction of the front of the mat.
- At a roughly 45° angle, place the front shin diagonally across the mat.
- With the back leg resting on the top of the foot, extend it straight behind.
- As your hips drop, place your hands next to your hips and use your arms to support your body weight.
- To provide support, tuck a folded blanket under the hip if the front sitting bone does not reach the floor comfortably.
- Allow both hips to fall equally toward the floor rather than lifting one side of the pelvis.
- Reduce the contact between both knees and the floor so that the hips may gradually release.
Precautions for Yoga for Hip Mobility
- Before beginning any hip mobility exercises, allow your body to warm up for five to ten minutes.
- Don’t push your hips into deep stretches; move slowly.
- If you get severe or acute discomfort, stop right away.
- To avoid unnecessary tension on the lower back, knees, and hips, maintain appropriate alignment.
- Throughout each posture, take steady breaths; do not hold your breath.
- If your flexibility is limited, use supports like pillows, belts, or yoga blocks.
- Before practicing, receive medical advice if you have arthritis, a hip injury, recent surgery, or chronic discomfort.
- As your mobility increases, progressively increase the intensity.
- During stretches, avoid bouncing since this might cause damage to your muscles or ligaments. Practice in a safe, comfortable area.
FAQs
Can yoga help with hip mobility?
Yes, yoga is a great way to improve hip mobility. It lubricates the hip sockets, increases flexibility, and strengthens joint stability. To relieve stress, certain poses focus on the adductors, hip flexors, and glutes.
What is the best exercise for hip mobility?
The 90/90 hip stretch, which safely addresses both internal and external rotation, is the best overall exercise for hip mobility. The best benefits come from combining rotation, extension, and deep flexion since the hip joint moves in many directions.
What causes lack of hip mobility?
Prolonged sitting, weak stabilizer muscles, and joint or structural problems are the major causes of hip immobility.
Does walking improve hip mobility?
Yes, walking is a great way to improve hip mobility. It functions as a low-impact workout that activates the hip flexors, promotes joint lubrication, and enhances blood flow to the joint. Short, frequent walks are a great way for sedentary people to combat the stiffness and muscle shortening caused by prolonged sitting.
Why improve hip mobility?
Your hips serve as the body’s primary physical hub, so hip mobility is essential. When engaging in daily tasks or exercise, healthy mobility keeps the knees and lower back from overcompensating. A healthy range of motion ensures that you can walk, run, and bend with ease, protects delicate joints from damage, and helps to reduce chronic stiffness.
References:
- Bloem, B. R., Okun, M. S., & Klein, C. (2021). Parkinson’s disease. The Lancet, 397(10291), 2284–2303. https://doi.org/10.1016/s0140-6736(21)00218-x
- Cheng, W. (2016). Just vibrations. In University of Michigan Press eBooks. https://doi.org/10.3998/mpub.9293551
- Vizcaíno, M. (2017). The effect of yoga practice on glucose control, physiological stress, and well-being in type 2 diabetes: exploring a mechanism of action. Scholarworks – UTEP (the University of Texas at El Paso). https://digitalcommons.utep.edu/open_etd/778