Yoga for Urinary Incontinence
Introduction
Urinary incontinence (UI) is common in elderly individuals. It involves leaking urine due to a lack of bladder control. Although this condition affects men and women, it is believed to affect women more. It can occur when there are weak or overactive muscles in the bladder, which can be caused by injuries, pregnancy, menopause, obesity, age, recurrent UTIs, depression, and poor quality of life.
Many case studies have shown that practicing yoga poses, pranayama, and meditation can reduce the symptoms of urinary incontinence. An effective treatment for this illness can be clinical therapy with yoga. Yoga can help with reducing stress levels, increase confidence, strengthen your hip muscles and pelvic floor muscles, and improve stability and flexibility.
This sequence is an easy yoga flow that has taken age into consideration. As we are mainly focusing on the pelvic floor and inner thigh muscles, it is helpful to have some support for the different yoga poses to reduce any strain on the sacrum/lower back.
8 Major Causes Of Poor Bladder Health
Ageing: As we age, there are many issues that can occur; however, sadly, this can affect our bladders too. The pelvic floor muscles and bladder can become weaker.
This can cause urgency and lack of control. Hormone changes can have a huge effect on the bladder, meaning menopause isn’t helpful either.
Constipation: You may be surprised to find out that constipation can affect the bladder. As the bowel is full, the bladder will become compressed.
This can cause you to feel like you have to pee more often and may cause some leaking. Your toilet routine may become more important than you thought if you are experiencing bladder problems.
Diabetes: Diabetes is one of the most common reasons that someone will suffer from poor bladder control. High sugar levels can cause negative effects on your bladder.
Over time, diabetes can damage nerves in your body, including those responsible for helping to control your bladder. This can lead to you going to the toilet more often, feeling you need to go more urgently, or struggling to empty your bladder.
Kidney stones: If you have ever had a kidney stone, then you know how much your body will try to hurt you from the inside. These tiny rock-like structures can cause irritation to your bladder. This causes blockage of urine flow, which can cause severe pain. They can also make you feel like you always need to pee.
Obesity (Overweight): Excess weight, particularly around the abdomen, can put more strain on the pelvic floor and bladder. Your bladder must work harder to do its function when there is more weight bearing down on it. Over time, this pressure may cause urgency, leaks, and even incontinence.
Urinary Tract Infection (UTI): Women are more susceptible to UTIs. A UTI causes pain, urgency, and sometimes even a temperature due to irritation and inflammation of the lining of the bladder. These very common infections are caused by bacteria.
Caffeine: The morning cup of coffee may wake you up. However, you will also feel the need to urinate. Caffeine acts as a diuretic and a stimulant for the bladder. Caffeine can irritate the lining of the bladder, increasing the frequency of urination.
There we have it; you now know why you are using the toilet frequently after that favourite iced cappuccino.
Pregnancy: Your bladder can get very uncomfortable. As your baby gets bigger, your bladder will get smaller, meaning you will need to rush to the toilet almost every 5 minutes. Added to that, your pelvic muscles become weaker due to hormonal changes, which isn’t great for bladder control.
5 Major Benefits Of Yoga Asanas For Urinary Incontinence
Strengthens the pelvic floor: Many yoga postures will automatically tighten and strengthen your pelvic floor muscles.
Having a strong pelvic floor will ensure you have good bladder control and prevent incontinence, especially when aging or after giving birth. Poses such as Setu Bandhasana and Malasana will help to strengthen your pelvic floor.
Boosts blood circulation: The bladder will really benefit from the increased blood flow to the pelvis that yoga provides. Good circulation means that more oxygen and nutrients are delivered to the muscles around the bladder, aiding overall health and helping speed up recovery if you are suffering from any irritation or infection.
Poses such as Supta Baddha Konasana can be very relaxing and encourage gentle blood flow.
Reduces stress: You may have noticed that when you are stressed or anxious, you tend to have more of a need to pee. This is not a coincidence! The bladder is affected by stress, so when your nervous system is on high alert, your bladder may become more sensitive.
By practicing restorative poses such as Viparita Karani and Balasana, your whole system will become relaxed. This will cause your bladder to relax and act with more consistency.
Reduces bladder pressure: If you sit all day at a desk job, have tight hips or a low back, your bladder can be put under extra stress. Practicing yoga will help your body to release tension in your hips, lower stomach, and back. This helps to relieve pressure on your bladder.
Improves digestion: A backed-up bowel can prevent you from fully urinating. Many patients will suffer from some degree of constipation.
Yoga will help everything work well together by stimulating the intestines to get things moving, reducing pressure on your bladder.
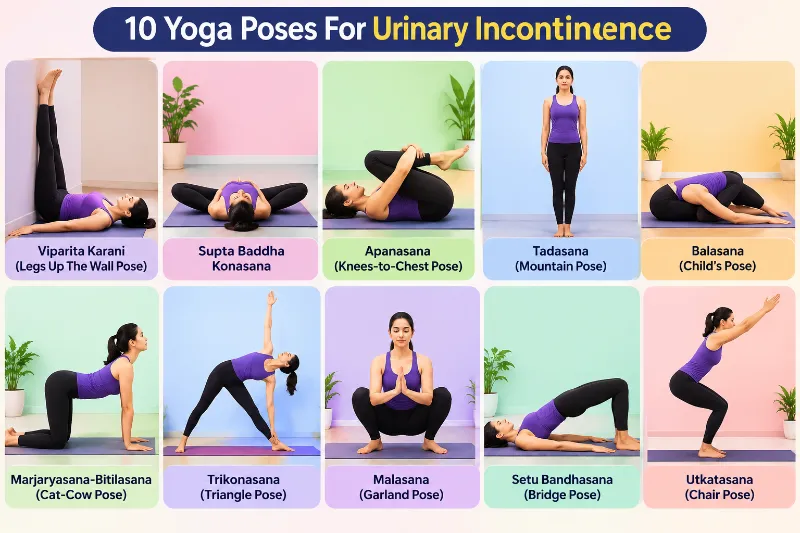
10 Yoga Poses For Urinary Incontinence
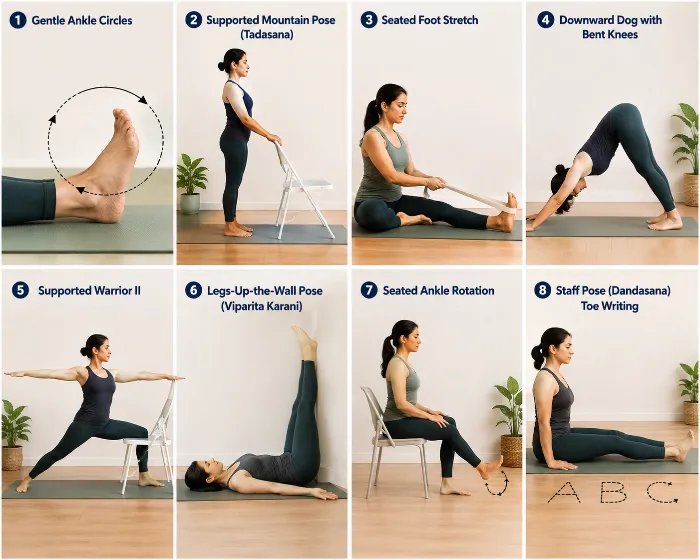
Viparita Karani(Legs Up The Wall Pose)
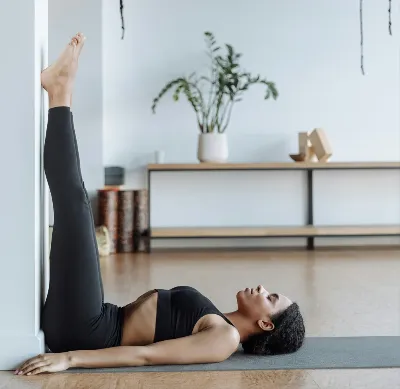
Legs up the wall is a relaxing position that will help strengthen your pelvic muscles and relieve tight muscles. It also improves circulation of your blood. Try doing this yoga pose regularly to experience the benefits.
How to:
- Place your mat perpendicular to the wall. If using a bolster, place it between six and twelve inches from the wall.
- Ensure your right hip is against the wall. This will give a smooth transition.
- Allow your legs to gently lift up as you lower your torso down towards the floor. Lean back onto your forearms.
- Adjust your hips slightly in either direction so that you feel comfortable in this stance.
- If using a bolster, support your sacrum rather than your lower back. Your legs should feel nicely supported by the wall.
- Arm position: Hold your arms loosely in a goal-post position, with your palms facing up or above your head. Keep your chin slightly tucked to avoid discomfort.
- Reduces mental stimulation and helps to relax your nervous system.
- Use a nice warm blanket to wrap yourself up if holding the position for longer periods of time.
- Take 5-10 deep breaths to help calm your body. Then allow your breathing to return to normal.
Supta Baddha Konasana
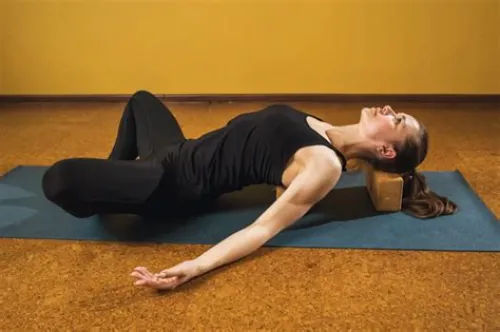
How to:
- Begin by sitting in dandasana. This is a seated pose where you stretch your legs out and bring your feet together with your toes up.
- Bring your feet closer to your pelvis, bend your knees, and make your legs into a diamond shape. The soles of your feet should be touching.
- Grab hold of your feet with your hands. Try to bring your heels towards your genitalia. Place your hands underneath your feet to help support.
- Take a deep breath and attempt to gently align your spine and chest.
- Lie down and allow your back to rest against the floor. Rest your arms on your inner thigh.
- Now, whilst in this position, allow your muscles to relax. Take 5 – 10 deep breaths.
- Either allow yourself to relax for a few minutes or lift your legs. Turn onto your right-hand side and slowly sit up by using your hands.
Apanasana (Knees-to-Chest Pose)
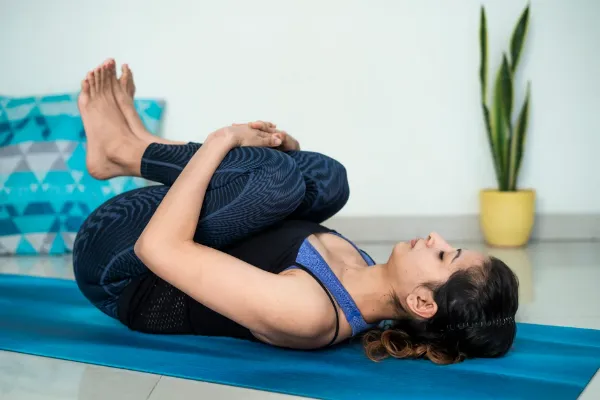
How to:
- Lie on your back, arms at your sides and legs straight. Relax your body by bringing your shoulders down and take a few deep breaths.
- Lower your lower back onto the mat to create a neutral spine. Ensure that your shoulders and pelvis are both. Exhale whilst you place your back on the ground.
- Inhale and bring your right knee up so your heel moves towards your seat. Repeat using your left knee.
- Position your hands under your knees or wrap your arms around your shins. Ensure that your shoulders are still on the mat and that your elbows are loose. Exhale and slowly move your knees closer together.
- Whilst in Pavanamuktasana, your knees are separated, so ensure they are together. Your lower back should be fully in contact with the mat.
- Relax your jaw and face. Let your thighs be pulled towards your chest by gravity. Do not force or pull.
- Time: 30-60 seconds to warm up
- Gentle practice: 1-3 minutes
- Restorative: 5-10 minutes. You can use props.
- Move your knees in small circles and/or gently rock if it feels comfortable to give your spine a massage.
- Exhale and release. Slowly lower your feet back onto the mat. Hold this position with your knees bent for 2-3 breaths.
- Allow your body to relax by straightening your legs and fully relaxing.
Tadasana (Mountain Pose)
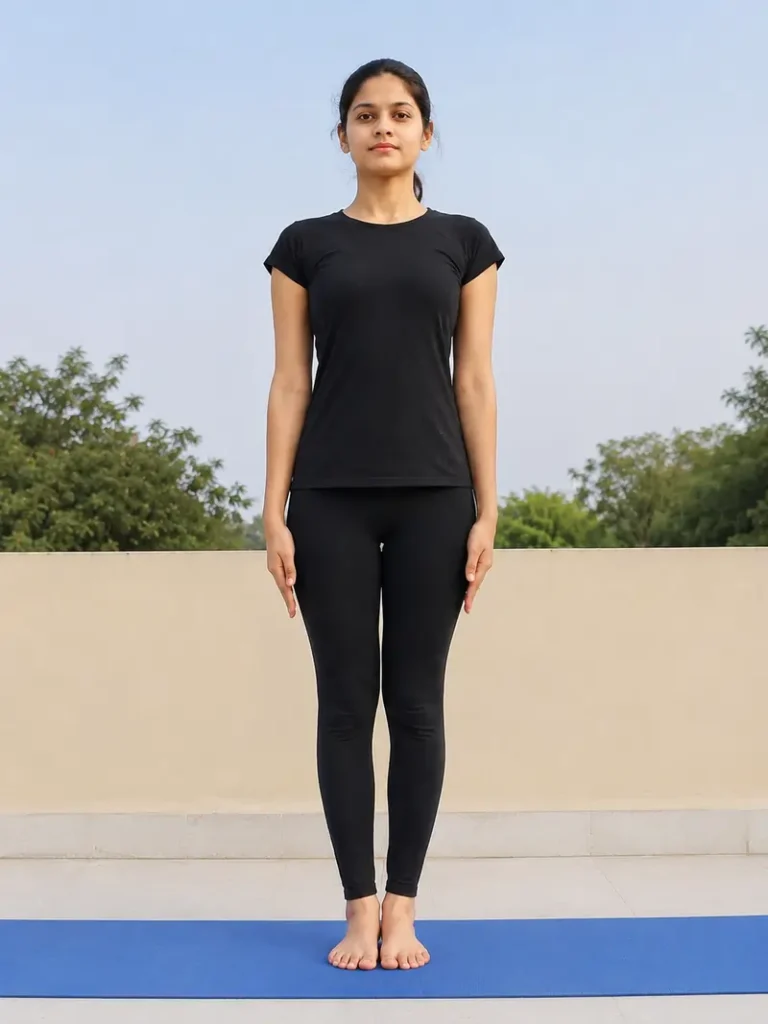
How to:
- Stand tall at the front of your mat or on a flat surface.
- Feet can be hip-distance apart or together, big toes touching and heels slightly apart.
- Ensure even pressure is placed on the base of the big toe, the base of the small toe, the inside heel, and the outside heel. Slightly splay your toes and allow them to return to neutral.
- Raise your kneecaps without locking your knees to gently engage your legs. Ensure you are moving your legs. Bring your inner thighs together slightly.
- Gently lower your tailbone towards the floor and draw in your lower abdominal area to create a neutral pelvis. Avoid overarching through your lower back.
- While keeping the natural curve of your back, lift your spine so that it is long with the crown of your head. Gently let your lower ribs sink into your body.
- Your arms should remain loose along the side of your body. Let your shoulder blades relax and move easily up and down. Your palms may be facing slightly forward or your thighs.
- Relax your eyes, jaw, and facial muscles. Keep your gaze steady and forward.
- Breathe slowly and deeply through your nose.
- Hold for:
- 30-60 seconds (beginner).
- 1-3 minutes (intermediate).
- 5 minutes or longer (advanced).
- Tadasana can be held for three to five breaths to use as a neutralising posture between standing positions.
Balasana (Child’s Pose)
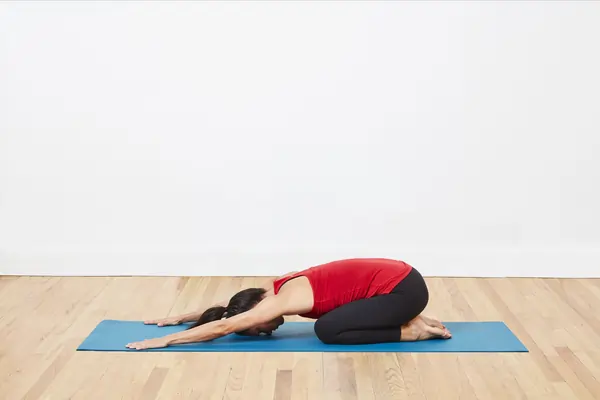
How to:
- Raise your heels off the ground. Lower your head until it touches the floor – keeping your hips balanced on your heels.
- Place your hands on the ground with your palms facing upwards. Your arms should be at your sides. If you are uncomfortable, then simply place your head on both fists.
- Gently press your chest into your thighs.
- Pause. Slowly uncurl your spine vertebra by vertebra to sit on your heels.
Marjaryasana-Bitilasana(Cat-Cow Pose)
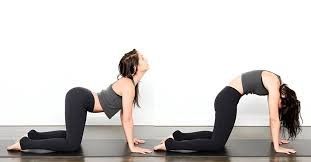
How to:
- Come onto hands and knees. Ensure that your knees are below your hips and your wrists are below your shoulders. Spread out your fingers. Be sure to keep a neutral spine and lengthen your neck. Breathe deeply into your belly.
- Exhale as you lower your belly towards the floor and lift your chest. Open your collarbones, push your shoulders away from your ears, lift your sitting bones, and gently lift your gaze. Inhale through your nose (Cow Pose).
- Take a moment to feel the openness in your chest and the natural curve of your spine at the top of your inhalation. Be prepared to do the opposite movement.
- Move with the rhythm of your breath, flowing from your tailbone to the crown of your head. Breathe in and move into Cow, breathe out and move into Cat.
- Focus on the flow. Complete 5-8 rounds (1-2min), 8-12 rounds (2- 3 min), or 15-20 rounds (3- 5 min), keeping your breath smooth. If your breath becomes uneven, stop.
- Finish with a neutral tabletop pose. Take two to three deep breaths. You can stay in Child’s Pose for a short time if you wish.
Trikonasana(Triangle Pose)
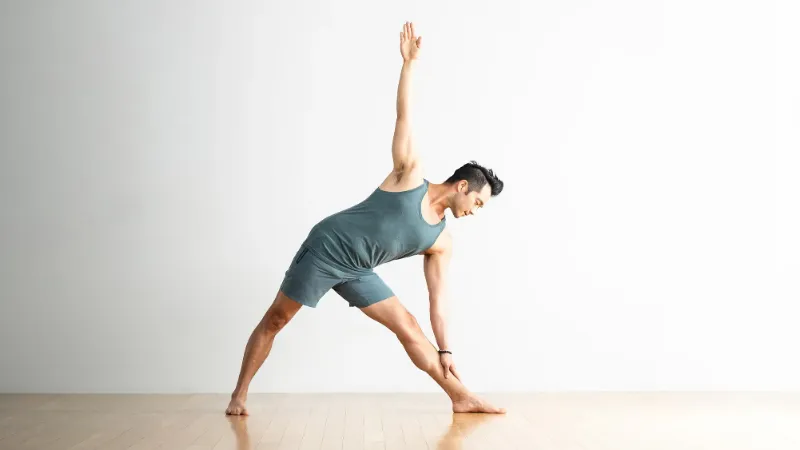
How to:
- Stand at the top of the mat, arms by your side with your weight evenly distributed between your feet.
- Slowly slide one of your legs backwards to create a wider stance. Keep your back and neck straight.
- Take a deep breath in and stretch your arms out so that they are parallel to the floor. This will be very similar to your Warrior I position.
- Relax your neck and use your shoulders.
- Keep your legs moving and keep your weight evenly distributed across your feet. Keep your knees slightly bent.
- Ensure that the front foot faces forward and the rear foot is parallel with the edge of the mat.
- Bend at the hips and exhale. Extend the fingers of your forward arm around the outside of your forward foot.
- Slowly twist your torso and bring your back arm up so that it is parallel to your left arm.
- Stay here for 3-5 full breaths, and to come out of the pose, go into Prasarita Padottanasana and take a deep breath in and out.
- Take a few deep breaths and slowly move back up into Tadasana. Repeat on the other side.
Malasana (Garland Pose)
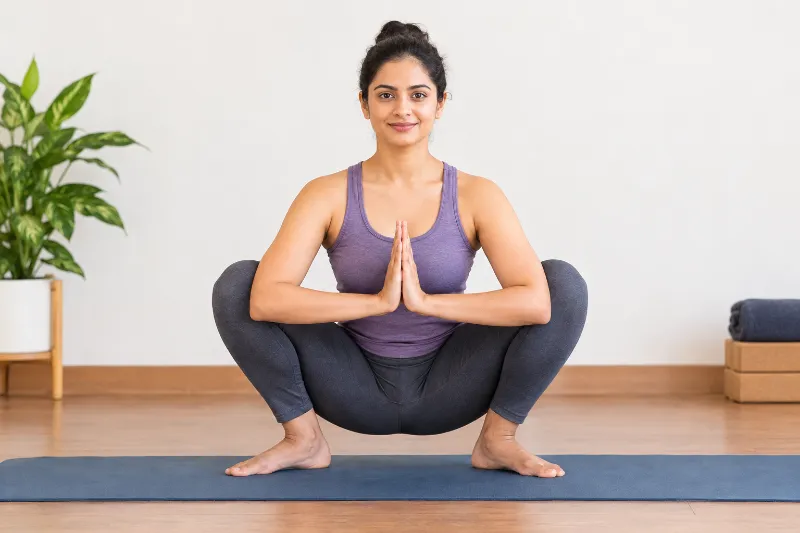
How to:
- Stand with your feet just wider than shoulder-width apart, pointing your toes out to 45 degrees, and let your arms rest at your sides. Take some deep breaths to centre yourself before moving into the squat.
- Begin to bend your knees and lower your hips down into a squat position. As you do this, exhale and make sure you are keeping your weight evenly distributed across your feet, keeping your back straight and chest up.
- Keep your gaze aligned with your toes, allowing your legs to open and lowering your hips so they are as close to your heels as you can.
- Keep your back neutral, so you are not arching your lower back. If needed, you can use a rolled-up blanket or block to help keep your heels grounded.
- With your elbows tucked into your knees, gently open them while pushing them into your elbows. Bring your palms together at your heart.
- Allow your shoulders to drop and lift your chest up. Lengthen your spine by engaging from the bottom up to your head.
- Look slightly forward with steady and calm breathing. Engage your pelvic floor and core muscles to hold the pose.
- Hold this pose for 30-60 seconds if you are a beginner, 1-2 minutes if you’re an intermediate, and up to 3-5 minutes if you’re advanced. Keep breathing steadily throughout and keep your concentration.
- Place your hands on the floor, breathe in, and gently push down through your feet to come out of the pose.
- Come back to Tadasana (Mountain Pose) to realign your body and mind. Breathe in deeply 2-3 times.
Setu Bandhasana (Bridge Pose)
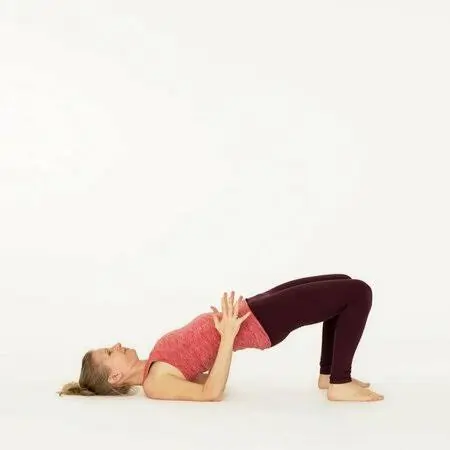
How to:
- Lie on your back.
- Place your knees together so that they are in a straight line with your ankles. Place your feet hip-distance apart on the floor. Make sure your feet are 10-12 inches away from your pelvis.
- Place your hands palm down by your side.
- Breathe in and lift your upper, middle, and lower back off the floor. Gently roll your shoulders. Bring your chest towards your chin, but do not bring it down. Support your weight with your shoulders, arms, and feet. This should cause your bottom to become tight. You will notice that your two thighs are parallel to the floor.
- You can rest your hands against your back if you want, or cross your fingers and press them into the ground to lift yourself.
- Keep breathing calmly.
- After holding this yoga pose for one or two minutes, exhale and carefully come out of the pose.
Utkatasana (Chair Pose)
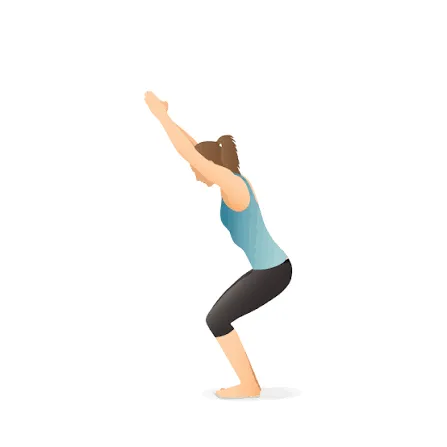
How to:
- Stand with feet hip-width apart.
- Bring your hands forward with palms facing down. Don’t bend your elbows.
- Bend your knees as if you were sitting in a chair, and gently tuck your pelvis under.
- Relax or try your best! Imagine you are going to sit there and read a newspaper or type on your laptop so you can get a good understanding of this pose. Make sure your hands are parallel to the floor.
- Keep your hands parallel to the ground.
- Sit up tall and stretch your back mindfully. Relax.
- Inhale and exhale as you flip through the newspaper and enjoy the local and world news.
- Ensure that your knees do not go past your toes.
- Lower yourself further into the chair.
- Continue to lower yourself carefully and sit into Sukhasana (cross-legged). You can lie on your back to relax if you wish.
Safety Precautions:
Choose gentle poses: Try some beginner poses and gradually build up to a level that is comfortable for you.
Avoid over-straining: Avoid holding your breath or overstraining whilst doing yoga, as it can cause extra strain on your pelvic floor.
Breathing: Try to breathe gently and naturally throughout your poses. Try not to hold your breath when using your pelvic floor or abdominal muscles.
Pelvic floor relaxation: It is important to be able to fully relax your pelvic floor muscles. If they are constantly engaged without being relaxed, some people may get worse symptoms.
Conclusion:
Yoga can improve body awareness and promote general pelvic health and relaxation. Gentle yoga postures, pelvic floor exercises, and proper breathing techniques can help manage urine incontinence and keep your bladder in control. Due to individual factors and causes, there may be varying benefits of practicing yoga.
It is not proven as a treatment for urine incontinence. Yoga should be practiced regularly with guidance from an expert to receive the best results. If your symptoms do not improve, visit your doctor. Overall, with correct practice, yoga can be a useful addition to a complete urinary health routine.
FAQs:
Can yoga cure urine incontinence?
Absolutely! Hyperactive bladder and other types of incontinence can be treated using yoga. Pairing yoga with other Kegel exercises can help decrease your symptoms of incontinence.
How can I reverse urinary incontinence naturally?
Do some pelvic floor exercises every day. This can help reduce leakage. You must make sure you are doing them correctly with a combination of long and short squeezes. Imagine trying to stop yourself from farting and peeing, and you will feel your pelvic floor muscles.
What is the best cure for urinary incontinence?
Pelvic floor muscle exercises such as Kegel’s may help strengthen the muscles. When doing these exercises, you will be contracting and relaxing muscles that control the flow of urine. Research found that women who exercised their pelvic floor muscles had fewer leaks throughout the day.
Which deficiency causes frequent urination?
Vitamin D supplements reduce the occurrence of urinary incontinence, and vitamin D deficiency increases the risk of overactive bladder and incontinence.
Can you live a normal life with incontinence?
It is feasible to lead a normal life with appropriate management. Make lifestyle changes and consult a doctor. Examine products for incontinence. Put your emotional health first.
References:
- Singh, A. (2025, June 9). 10 asanas for bladder health: Strengthen pelvic muscles. iDiva. https://www.idiva.com/health-wellness/well-being/best-yoga-asanas-for-bladder-health-strengthen-pelvic-floor/18091681
- Sweta, K., Godbole, A., Awasthi, H. H., & Pandey, U. (2020). Mulabandha yoga therapy and its utility in cases of urinary incontinence in females: A randomized clinical trial. Yoga Mimamsa, 52(1), 12–19. https://doi.org/10.4103/ym.ym_3_20