Yoga for Forearm Pain
Introduction
Everyday activities like carrying luggage up a flight of stairs or opening a glass jar require the use of the forearm muscles. They are also utilized in a variety of sports, including basketball, racquetball, hockey, and golf.
Repetitive hand motions, extended computer or smartphone usage, sports, lifting, overuse of the muscles, or inflammation of the tendons and muscles surrounding the wrist and elbow can all cause forearm pain. Mild yoga poses can assist in maintaining comfortable wrist and forearm mobility, reduce muscular tension, and increase flexibility.
Grip strength, which is linked to upper body strength, function, and mobility, is increased by strengthening your forearms.
Benefits of Yoga for Forearm Pain
- Improves wrist and forearm flexibility: Maintaining flexibility in the wrists, fingers, and forearm muscles through regular practice of mild yoga postures and stretches can make daily tasks more comfortable and easier.
- Reduces muscular stress: Repetitive activities like typing, writing, using a computer, playing sports, or doing manual labor can cause excessive tension and stiffness in the forearm muscles, which yoga may help relieve.
- Allows for smooth movement of the wrists and fingers: Correctly performed yoga poses can help reduce stiffness and maintain comfortable mobility without putting excessive stress on the joints.
- Increases upper-limb mobility: Yoga poses that target the hands, wrists, elbows, and shoulders can increase the general flexibility and movement of the upper limbs, which may help those who have stiffness or pain in their forearms.
Best yoga poses and stretches for forearm pain
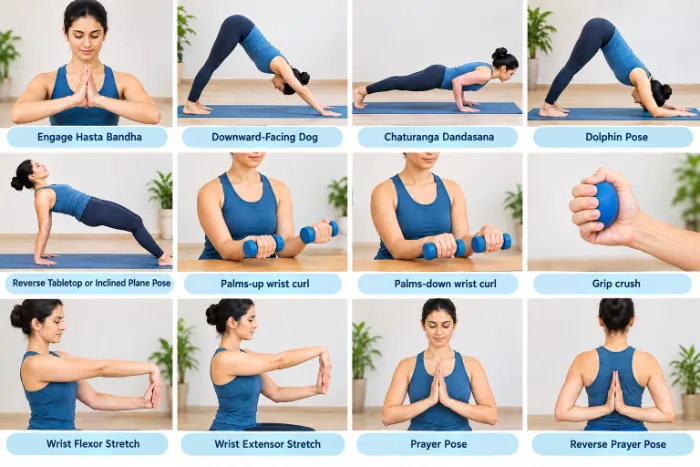
Engage Hasta Bandha
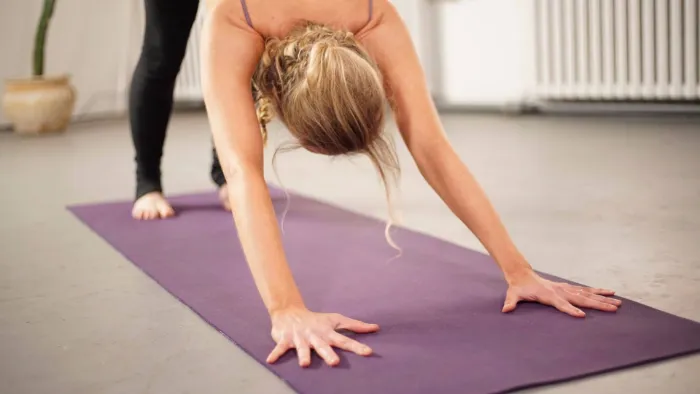
The hand lock, also known as hasta bandha, is a subtle muscle exercise that significantly strengthens the hands, wrists, and forearms. Press the weight out through the fingers and joints while making a little upward drawing through the middle of your palm to do Hasta Bandha in any yoga posture where the weight is bearing into the hands.
The majority of the strain on your wrists should be released by this exercise, which also helps activate your arm muscles and pulls energy up your arms. Before utilizing your hasta bandha in more difficult yoga poses, table posture is an excellent way to begin exploring and honing it.
- Maintain a straight posture while sitting comfortably in Sukhasana, or cross-legged.
- Put your hands on your thighs, palms facing up, and let your shoulders drop.
- Keep all five fingers relaxed and slowly spread them.
- As you softly grasp or squeeze the air, gradually engage your fingers and palms.
- Avoid overly tense forearms and maintain straight wrists.
- While breathing normally, maintain the moderate engagement for five to ten seconds.
- Relax your hands and slowly let go of your fingers.
- Depending on comfort, repeat 5–10 times.
Adho Mukha Svanasana (Downward-Facing Dog)
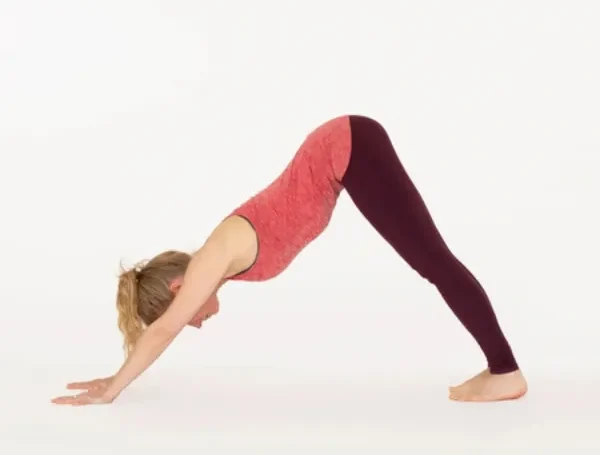
You may strengthen your upper back and fingers by doing this well-known yoga pose. To move the focus of the muscular activity onto the upper body and make holding a down dog simpler, you can bend your knees or spread your legs wide apart.
- Start on your hands and knees, placing your knees behind your hips and your hands beneath your shoulders.
- Press your palms firmly against the mat while spreading your fingers wide.
- Gently raise your knees off the ground while tucking your toes beneath.
- Make an inverted “V” shape with your body by pushing your hips up and back.
- As much as is comfortable, softly straighten your legs while maintaining a long spine.
- With your eyes fixed on your knees or feet, maintain a calm head position between your arms.
- Without pushing them down, press your heels into the floor.
- Breathe gently and slowly while holding the stance for 20 to 30 seconds.
- To get back to the beginning position, bend your knees and slowly lower them.
Chaturanga Dandasana
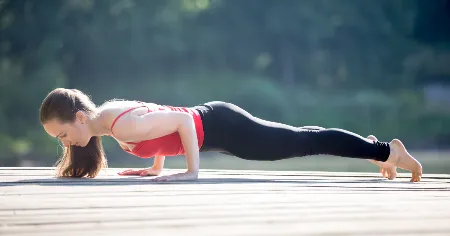
Chaturanga Dandasana is a safe yoga practice that needs precise alignment. To avoid joint tension, make sure your elbow, wrist, shoulder, and floor are all at a 90-degree angle. To make it simpler to perform repetitions, you can lower your knees to the floor or hold the stance for a little while.
- Begin with your body in a straight line and your hands directly behind your shoulders in Plank Pose.
- Firmly push your fingers into the mat while spreading them. Use your gluteal, thigh, and core muscles to maintain your body’s stability.
- Move your shoulders a little forward of your wrists.
- Bend your elbows slowly, keeping them near your ribcage.
- Your elbows should roughly form a 90-degree angle as you lower your body toward the floor.
- Without lowering your chest, maintain your shoulders at or slightly above your elbows. Maintain your head and heels in a straight line, and keep your neck neutral.
- Breathe deeply while holding for five to ten seconds.
- Either go back to Plank Pose or go to Upward-Facing Dog by applying pressure through your palms.
Makarasana (Dolphin Pose)
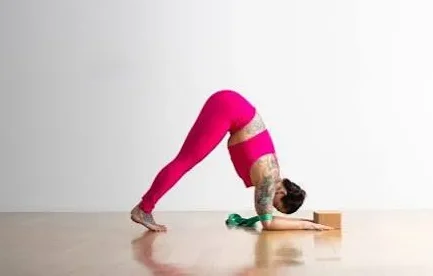
If you want to strengthen your shoulders or have sensitive wrists, Dolphin Pose is an excellent alternative for Downward Dog. To draw attention to the upper body, you might bend your knees or spread your legs wide. You may switch between dolphin and forearm planks to truly test your upper body strength.
- Place your forearms on the mat and begin on your hands and knees.
- Keep your forearms parallel and place your elbows just behind your shoulders. Keep your palms flat on the mat or interlace your fingers.
- Lift your knees softly while tucking your toes beneath. Make an inverted “V” shape by pushing your hips up and back.
- Move your chest softly toward your thighs while maintaining a long spine.
- Don’t put any weight on your head; rather, keep it loose.
- Hold for 20 to 30 seconds while breathing comfortably and gently.
- To get back to the beginning position, bend your knees and slowly lower them.
Reverse Tabletop or Inclined Plane Pose
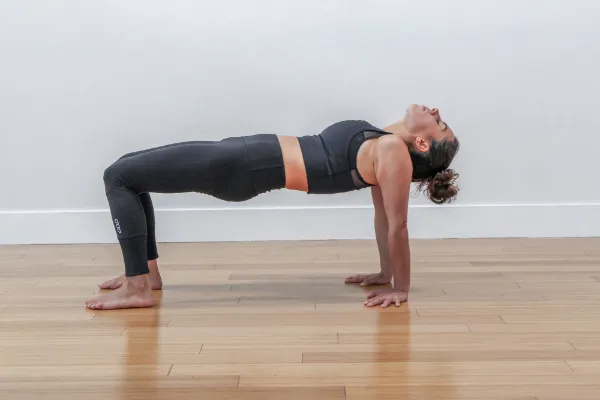
Reverse tabletop pose is a good place for beginners to start before moving on to inclined plane pose. Although difficult, these positions are great for strengthening the arms, core, hamstrings, and glutes.
At the conclusion of practice, these two postures are an excellent way to go on to supine poses. If your wrists are sensitive, try making fists or adjusting the orientation of your fingers to change the position.
- Place your feet hip-width apart or together and stretch your legs forward while sitting on the mat.
- With your fingers pointing in the direction of your feet, place your hands behind you, shoulder-width apart.
- Put your feet firmly on the ground and bend your knees slightly if necessary.
- Raise your hips while pressing your hands and feet into the mat.
- Maintain a straight line from your shoulders to your knees or heels by using your gluteal and core muscles.
- Look slowly upward without overextending your neck while maintaining a neutral posture.
- Breathe normally while holding the stance for 15 to 30 seconds. Return your hips to the floor slowly and relax.
Palms-up wrist curl
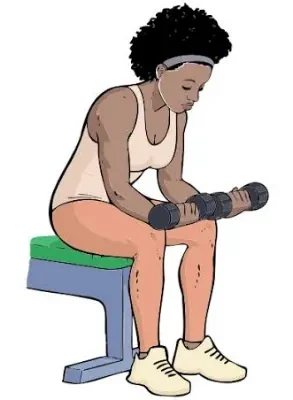
- When seated, place your wrists with your palms facing up on your knees or another level surface.
- Raise your hands as high as you can while keeping your arms motionless, holding a dumbbell in each hand. Your wrists shouldn’t lift off the surface they are on.
- Lower your hands to the starting position after a brief pause.
- Do eight to fifteen repetitions in two to three sets.
Palms-down wrist curl
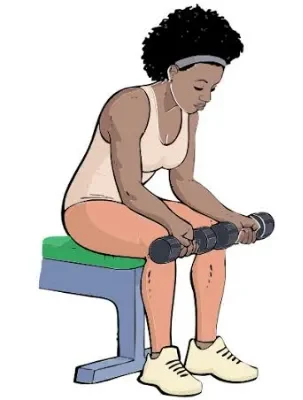
- While seated, lay your wrists on your knees or a flat surface with your hands facing down.
- Holding a dumbbell in each hand, lift your hands as high as you can, maintaining your arms motionless.
- Your wrists should not lift off the surface they’re resting on.
- After a little pause, restore your hands to the beginning position.
- Do two or three sets of eight to fifteen repetitions each.
Grip crush
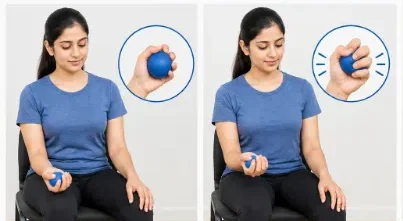
- Holding a ball, place your left wrist on your knee or another level surface while seated.
- The dumbbell will drift toward your fingers if you relax and open your hand.
- Squeeze the weight as firmly as you can while tightening your hand and curling your wrist.
- Repeat on the other side after completing 8 to 15 repetitions.
- Do two or three sets on each side.
Wrist Flexor Stretch
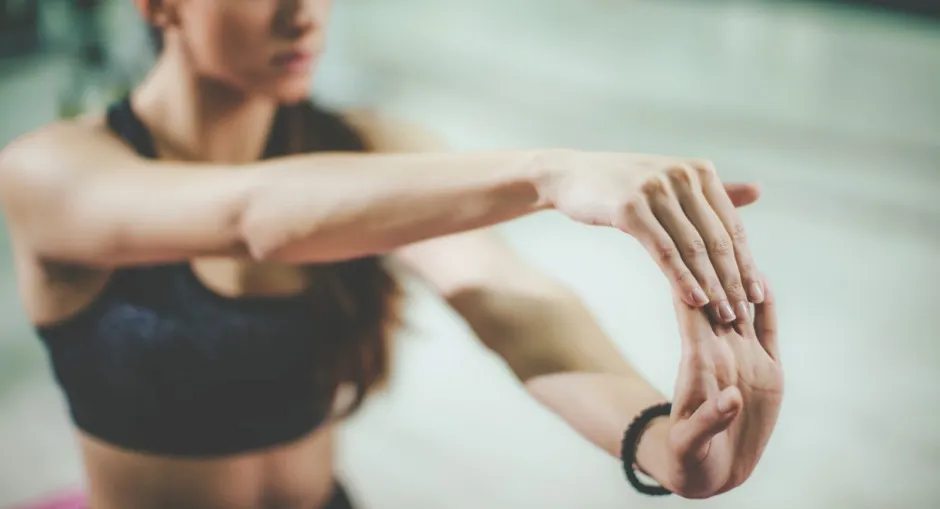
The muscles on the palm side of the forearm are gently targeted by the wrist flexor stretch.
- Maintain a straight back while sitting or standing.
- Extend one arm forward.
- Maintain a comfortable straight elbow.
- Gently draw the fingers backward and downward with the other hand.
- When you see a slight stretch along your forearm, stop.
- Hold for 15 to 30 seconds.
- On each side, repeat two to three times.
Wrist Extensor Stretch
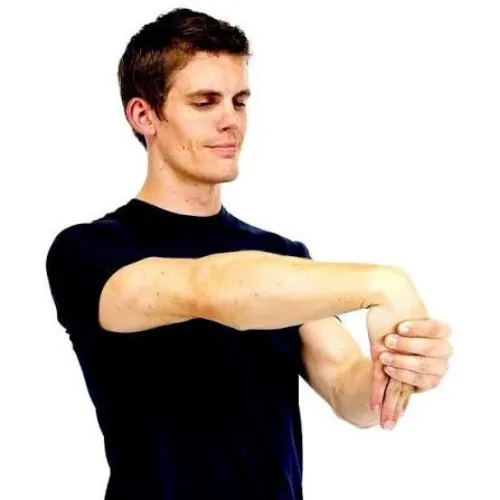
The muscles on the back of the forearm (wrist extensors) are stretched in this exercise.
- Keep one arm in front of you with the palm down.
- Make sure your elbow is comfortably straight.
- Pull the fingers of the other hand slightly toward the direction of your body.
- Don’t strain your shoulder.
- 15–30 seconds should be held.
- Repeat two to three times on each side.
Prayer Pose
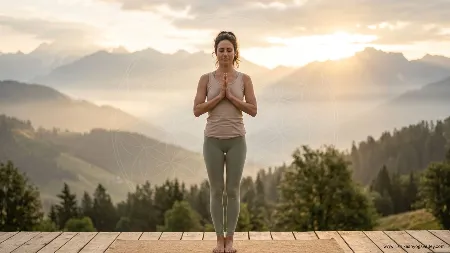
The wrists and forearms are gently stretched during prayer pose.
- Stand or sit up straight.
- In front of your chest, bring your palms together.
- Make sure your fingers are pointing up.
- Keeping your palms in touch, slowly drop your hands.
- When you reach a comfortable stretch, stop.
- Hold for 15 to 30 seconds.
- Do this two or three times.
Reverse Prayer Pose
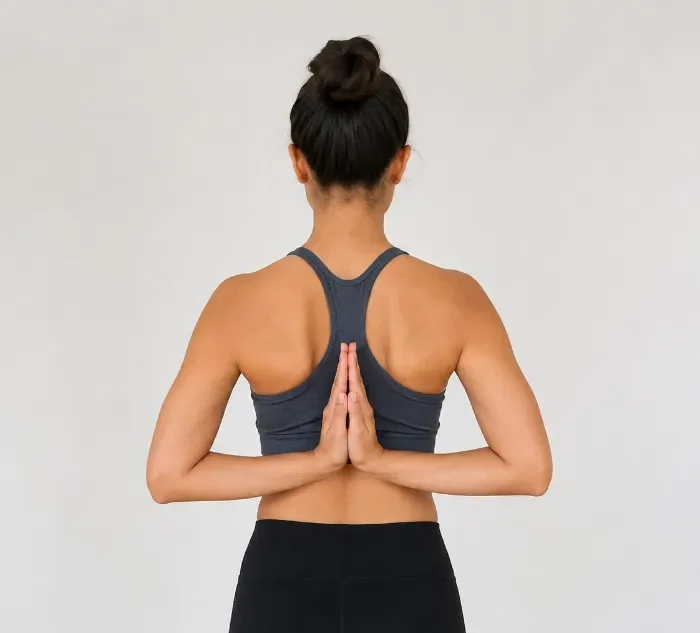
Although it requires more wrist movement, reverse prayer can gently stretch the forearms and wrists.
- Stand or sit up straight.
- Put your arms behind your back.
- If it feels comfortable, put your hands together.
- Maintain your fingers pointed up.
- Let your shoulders drop.
- Hold for ten to twenty seconds.
- Release the posture gradually.
Do’s and Don’ts:
Do’s:
- Start gently: Begin with comfortable movements and avoid forcing the forearm, wrist, or elbow.
- Warm up first: Perform gentle wrist circles, finger movements, and elbow movements before yoga.
- Keep the wrist neutral: During weight-bearing poses, avoid excessive wrist extension if it increases pain.
- Gradually increase the intensity: Only increase the length and difficulty when the symptoms are still tolerable.
- Breathe normally: When stretching or holding a position, don’t hold your breath.
Don’ts:
- Avoid pushing the forearm more than is comfortable or forcing a stretch.
- Avoid placing too much weight on forearms or wrists that hurt.
- When symptoms worsen, avoid prolonged weight-bearing positions.
- Avoid suddenly increasing the length or intensity of your yoga practice.
FAQs:
How to get rid of forearm pain fast?
Apply an ice pack for 15 to 20 minutes, take the arm off of repeated activities, and gently stretch tight muscles to quickly ease forearm pain.
What is the number one forearm exercise?
The wrist curl is usually regarded as the best exercise for strengthening the primary wrist flexor muscles and immediately increasing forearm growth.
What are sore forearms a symptom of?
The most common causes of sore forearms include tendinitis, overuse, or muscular strain caused by frequent gripping, typing, or lifting.
How long does it take for forearm tendinitis to heal?
It usually takes two to six weeks for moderate cases of forearm tendinitis to recover, and three to six months for severe or chronic cases.
What causes a weak forearm?
Lack of direct training, grip fatigue during compound exercises, or muscular injury without enough recovery can all contribute to your forearms feeling weak.
Which nerve causes forearm pain?
Depending on the location and type of pain, several nerves can produce forearm pain, although the radial, median, and ulnar nerves are the most frequently responsible.
References:
- Author: Yb. (2020, June 11). The best 7 yoga poses to strengthen your forearm • Yoga Basics • Yoga Basics. Yoga Basics. https://www.yogabasics.com/connect/yoga-blog/yoga-poses-strengthen-forearm/
- McPhillips, K. (1970, January 1). 7 forearm stretches to include in your cooldown (or whenever you need to release tension). https://www.onepeloton.com/blog/forearm-stretches