Power Yoga for Weight Loss
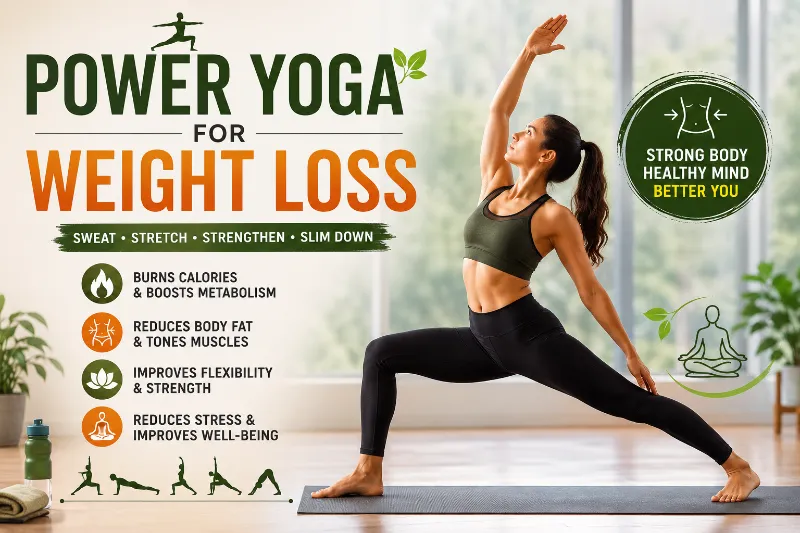
Power yoga focuses on movement, strength, and endurance. Whether you’re new to the mat or want to improve, the following positions lay the groundwork for a well-rounded Power Yoga practice.
Benefits of Power Yoga for Weight Loss
- Effectively Burns Calories
- Power yoga classes involve constant movement through challenging poses. In contrast to static yoga techniques, this keeps your heart rate high throughout, requiring your body to burn more energy. When paired with mindful eating, regular practice may eventually help with calorie intake
- Increases Lean Muscle Mass
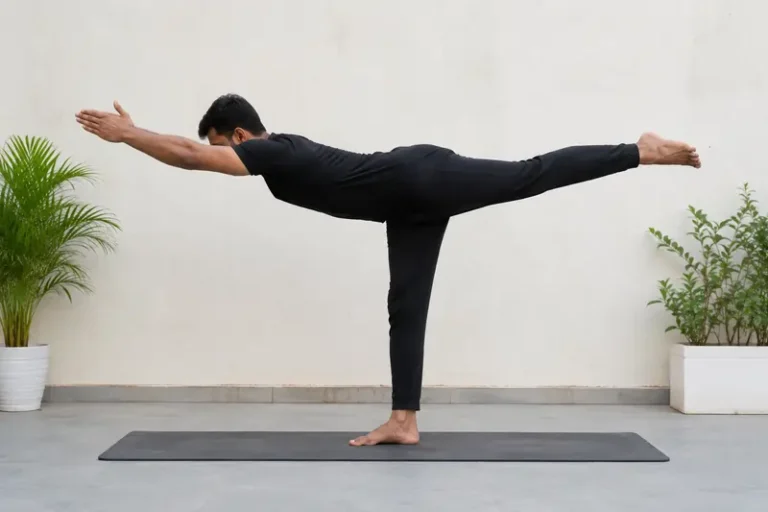
- Your own body weight is used in several strength yoga postures, such as Plank, Warrior III, and Chaturanga. This gradually increases the amount of functional muscle you have, which can promote a leaner body and increase your resting metabolism. To fully comprehend how this works, learn more about yoga for strength.
- Decreases Cortisol and Stress
- Fat accumulation, particularly around the belly, is directly associated with elevated cortisol levels. Power yoga incorporates awareness and breathwork, which actively help control stress reactions. Over time, regular practice may promote improved hormonal balance.
- Enhances Mobility and Flexibility
- Your range of motion is restricted by tight muscles, which can make other types of exercise more difficult. Power yoga improves daily mobility and lowers the chance of injury by methodically lengthening and strengthening the entire body.
- Strengthens the Core
- Core activation is required for almost all power yoga poses. Deep abdominal stability is developed by this steady, low-impact core exercise, which lays the groundwork for improved posture and less lower back pain. Encourages
- Better Sleep
- Lack of sleep interferes with appetite hormones, making fat loss more difficult. Power yoga’s physical exertion and nervous system modulation may help you fall asleep more quickly and recuperate more fully during the evening.
- Develop the Daily Movement Habit
- Consistency, not intensity, is what truly propels any bodily transformation. In the end, power yoga is what makes a difference since it is captivating enough to keep you returning. Yoga for weight reduction provides a more comprehensive view if you’re wondering how yoga compares to traditional workouts.
How to Get Started with Power Yoga for Weight Loss
- What You Must Start
- You don’t need pricey equipment or a gym. All you need for a guided session is a non-slip yoga mat, cozy clothes, and a reliable internet connection. Power yoga employs your body weight as resistance, and many individuals practice barefoot at home without any equipment at all.
- Realistic Goal-Setting
- For the first month, try to do 20 to 30 minutes of power yoga four to five days a week. Avoid aiming for spectacular outcomes in the first week. Instead, concentrate on being comfortable with the sequences and regularly showing up. Progress that is sustained and gradual is always more effective than brief spurts interspersed with lengthy pauses.
- High-Intensity Calorie Burners
- These postures and movements are intended to increase body temperature, work several muscle groups, and encourage weight reduction.
Best Power Yoga Poses for Weight Loss
These postures and movements are intended to increase body temperature, work several muscle groups, and encourage weight reduction.
- Surya Namaskar
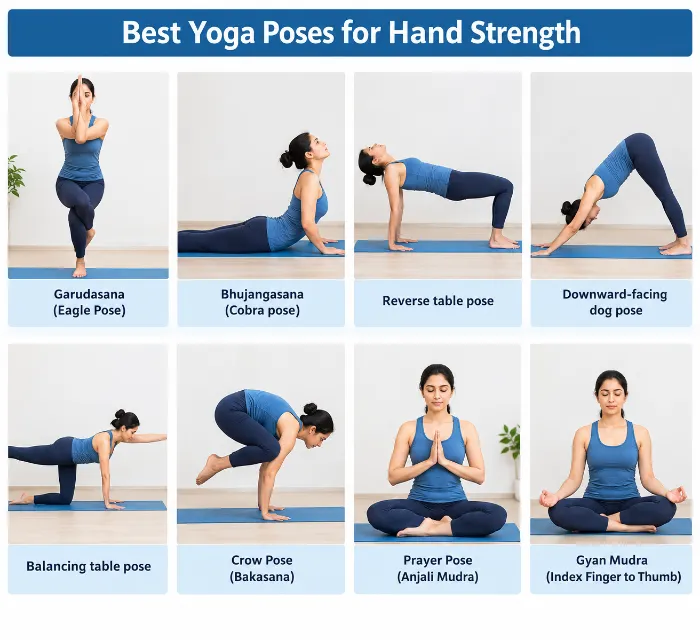
- Adho Mukha Svanasana (Downward-Facing Dog)
- Utkatasana (Chair Pose)
- Virabhadrasana I (Warrior I)
- Virabhadrasana II (Warrior II)
- Chaturanga Dandasana (Four-Limbed Staff Pose)
- Anjaneyasana ( Low Lunge)
- Twisted Chair Pose (Parivrtta Utkatasana)
- Boat Pose Variations
- Bhujangasana (Cobra Pose)
Surya Namaskar
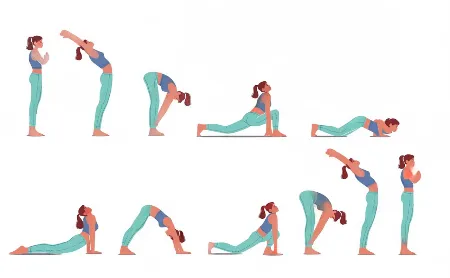
How to do
- Place your feet and legs together while standing in Tadasana.
- Take a breath and perform Hasta Uttanasana (Standing Back Bend) by extending your arms above.
- Breathe out and perform Uttanasana by folding forward.
- Breathe in and return your right leg to Ashwa Sanchalanasana (Low Lunge Pose).
- Breathe out, return to Phalakasana, and descend into Ashtanga Namaskara.
- Take a breath and raise yourself into Bhujangasana.
- Breathe out into Adho Mukha Svanasana.
- Take a breath and perform Ashwa Sanchalanasana (Low Lunge Pose) by stepping your right leg forward.
- Breathe out and advance into Uttanasana.
- Take a breath, get up, and perform Hasta Uttanasana by bending back.
- Breathe out and go back to Tadasana.
Adho Mukha Svanasana (Downward-Facing Dog)
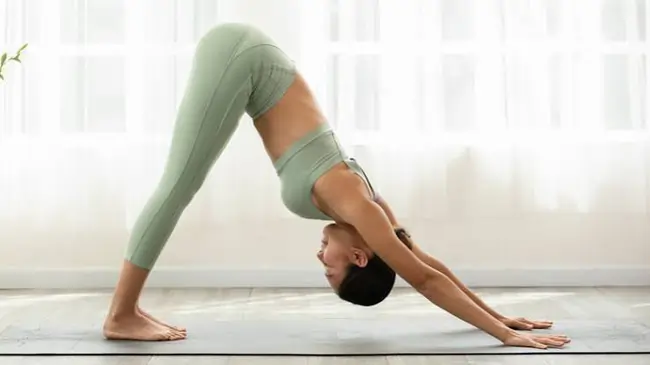
How to do
- Make sure your knees are below your hips, and your palms are beneath your shoulders as you begin on all fours.
- Make an inverted “V” shape by raising your hips and straightening your knees and elbows.
- Now point your fingers forward while keeping your hands shoulder-width apart.
- Press your palms together while opening your shoulder blades.
- Make an effort to lower your heels to the ground.
- Pay attention to your toes.
- Hold for eight to ten breaths. Make sure your knees are below your hips, and your palms are beneath your shoulders as you begin on all fours
Utkatasana (Chair Pose)
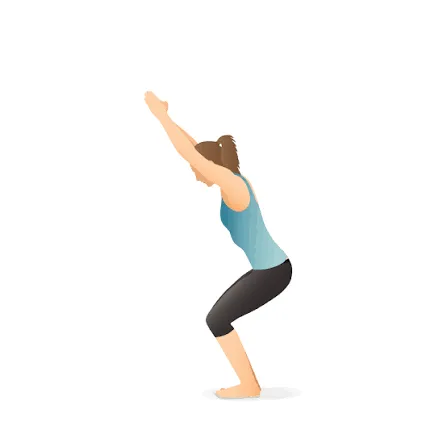
How to do
- Take a Tadasana stance. Take a breath, then lift your arms above your head until your biceps are almost in front of your ears. Either connect the palms or maintain the arms parallel with the palms facing inward.
- Breathe out and bend your knees till your thighs are as close to the floor as you can.
- Your front torso will roughly create a right angle with the tops of your thighs as your knees extend over your feet and your trunk leans slightly forward over your thighs. Press the heads of your thigh bones down toward your heels while keeping your inner thighs parallel to one another.
- Press your shoulder blades firmly against your back. To maintain a long lower back, point your tailbone in the direction of your pubis and down toward the floor.
- Remain for 30 to 60 seconds. Breathe in, straighten your knees, and lift your arms firmly to exit this posture. Release your arms to your sides and exhale to perform Tadasana. Press the heads of your thigh bones down toward your heels while keeping your inner thighs parallel to one another.
- Press your shoulder blades firmly against your back. To maintain a long lower back, point your tailbone in the direction of your pubis and down toward the floor.
- Remain for 30 to 60 seconds. Breathe in, straighten your knees, and lift your arms firmly to exit this posture. Release your arms to your sides and exhale to perform Tadasana.
Virabhadrasana I (Warrior I)
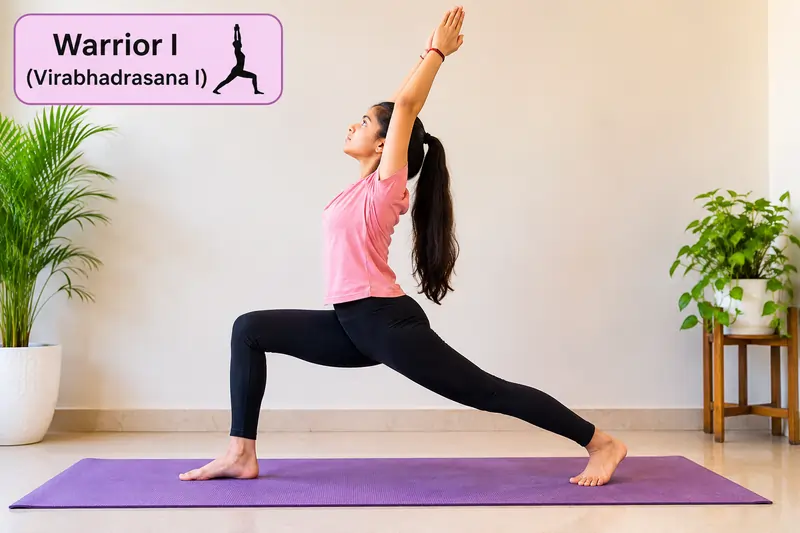
How to do
- Put the rear foot at a 45-degree angle from Tadasana. The heels are lined up. The alignment may be closer to hip-width apart for greater balance.
- Straighten the rear leg by grinding the outside edge of the back foot into the mat.
- Square your hips and chest forward and bend your front knee 90 degrees.
- With the palms facing or touching one another, extend your arms above.
- If it is comfortable for your neck, look up at your thumbs or forward.
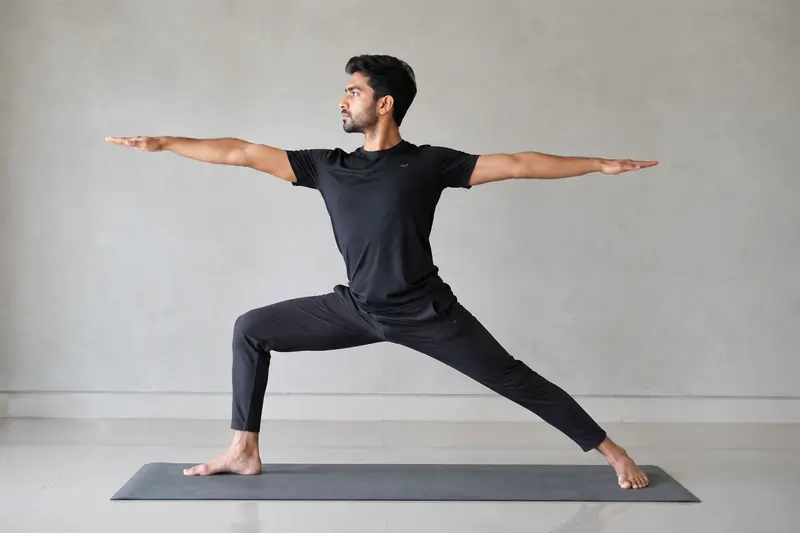
Virabhadrasana II (Warrior II)
How to do
- Open the rear foot to 90° after performing Virabhadrasana I. Continue driving the foot’s outside edge into the ground. The front knee is bent while the rear leg stays straight.
- The long end of the mat is facing the hips and chest. Keep the upper body directly above the pelvis and the sides of your torso of equal length.
- With your shoulders relaxed and your palms down, raise your arms parallel to the floor and aggressively extend them out to the sides.
- Look at the tip of your middle finger.
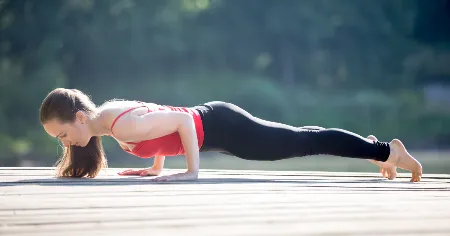
Chaturanga Dandasana (Four-Limbed Staff Pose)
How to do
- From Plank Pose, land on the balls of your feet with your shoulders slightly ahead of your wrists.
- In order to create a straight, tight line of energy from the crown of your head through your feet, push back through your heels to activate your quadriceps as you reach your sternum forward.
- Draw your shoulders and the tops of your thighs up and away from the floor as you inhale. Release your tailbone toward the floor after pulling your lower body up and in.
- As you exhale, bend your elbows and gradually lower your torso, maintaining it as straight as a wooden board, until your elbows are around 90 degrees. Keep your elbows pulled up toward your sides and precisely above your wrists. Firmly plant your hands on the ground.
- Lower yourself until your shoulders and elbows are at the same height by bringing your attention to the floor, about 6 inches in front of you.
- Do not forget to reach through your heels, sternum, and crown of your head while you breathe.
- Breathe out and either push back up to Plank posture or descend to your belly to exit the posture.
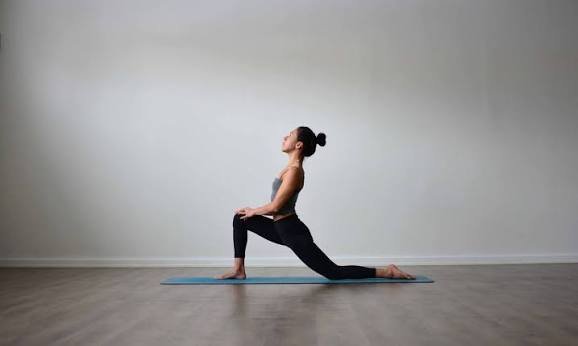
Anjaneyasana ( Low Lunge)
How to do
- Bend your knees, take a breath, and face forward from Padahastasana.
- Put your hands flat on the ground next to your feet.
- Breathe out and extend your right leg as far back as you can while keeping the ball of your foot on the ground. Bend the left knee simultaneously, maintaining the left foot on the ground, the thigh parallel to the floor, and the knee in the same position as the right ankle. Maintain a straight arm position.
- In the ultimate posture, both hands, the left foot, the right knee, and the right foot’s toes should support the body’s weight.
- The back should be arched, the head should be inclined back, and the inner gaze should be focused on the center of the eyebrows. Keep the back of the neck long, raise the chest, and lengthen the torso.
- The palms of the hands should first be flat on the ground in the final stance. More skilled practitioners could eventually become available.
- Weight should be distributed equally between the arms and thighs.
- Exhale, walk forward with the right foot, and return to Padahastasana to release.
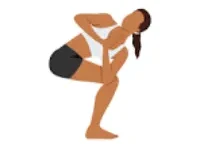
Parivrtta Utkatasana (Twisted Chair Pose)
How to do
- Begin in a standing stance.
- Twist deeply into your knees, raise your arms above your head, and align your feet such that your toes meet and your heels are slightly apart.
- Now maintain the Namaskar stance with your hands in front of your chest.
- Without shifting your hips or knees, turn from your shoulders to your right side.
- Bend your chest to the right while placing your left elbow on your right knee.
- For stability, press your two hands against one another.
- Now glance down and draw the corresponding leg back into your hip attachment if one of your knees is ahead of the other. Additionally, your knees should be just above your lower legs (ankles).
- Take a deep breath and raise your head.
- Draw your shoulder bones closer together and down your back by exhaling.
- For one to three minutes, try to stay in that posture.
- Breathe out and return to your starting posture.
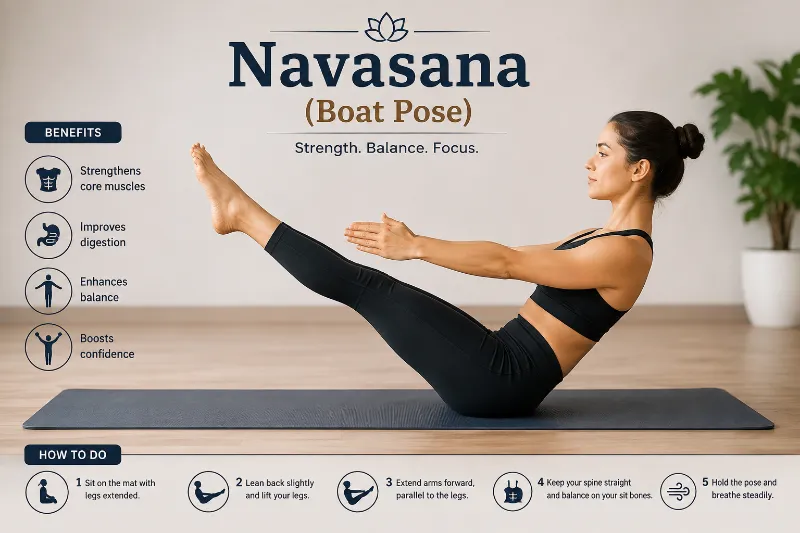
Navasana (Boat Pose)
How to do
- With your arms at your sides and your legs outstretched, take a seat in the center of the mat.
- You can put a block behind your lower back for extra support if it aches.
- Avoid rolling onto your tailbone and maintain a regular breathing pattern while you shift your body weight to the rear of your sitting bones. Core strength is useful in this situation.
- Make sure your back and head are positioned in a straight line but at an angle. Maintain a firm core while extending your legs and pointing your toes.
- Put your arms in front of you so that the boat will float on the waves. Make sure your fingers point in the same direction as your feet. Take a deep breath, lean slightly back, raise your legs off the mat, and stretch your arms until they are parallel to the mat. If at all feasible, try to straighten both legs in a full boat stance.
- After a few seconds of holding your breath in this posture, lower your legs to the ground and let out a deep breath.
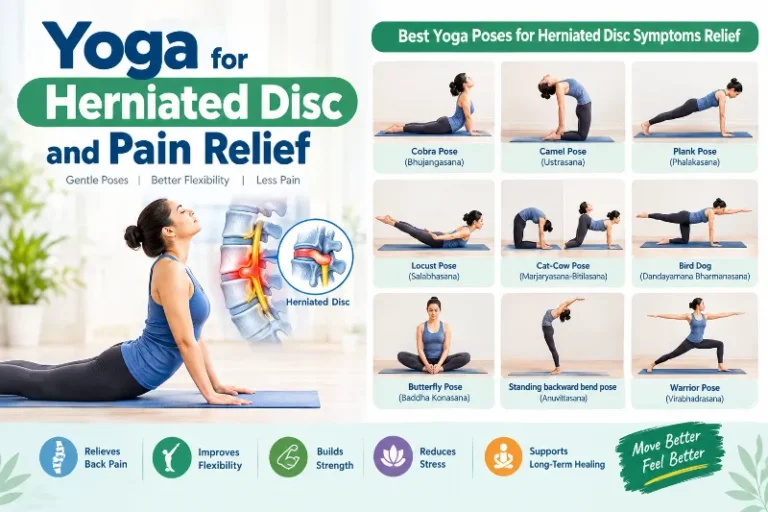
Bhujangasana (Cobra Pose)

How to do
- Place your palms flat on the mat, near your chest, and bend your elbows.
- Take a deep breath and gently raise your head, chest, and abdomen off the surface while maintaining your elbows close to your body. You should keep your navel on the floor.
- Press your pelvis and thighs hard into the floor while keeping your legs together. Look up.
- Maintain the final pose while holding your breath for six seconds.
- Release the position by softly exhaling and lowering your head, neck, and chest back to the mat.
- To increase spinal strength and flexibility, repeat the procedure several times. Recall that the proper execution of Bhujangasana is crucial to preventing harm and optimizing its advantages.
Common Mistakes to Avoid in Power Yoga
- Ignoring the Warm-Up
- Muscle tension can occur quickly if dynamic flows are entered without first warming up. Before increasing the intensity, perform moderate sun salutations, cat-cow motions, and gentle joint rotations for five minutes. Cold muscles are far more prone to damage and resist stretching.
- Maintaining Your Breath While in Poses
- Power yoga is powered by the breath. Most novices unintentionally hold their breath as the position becomes difficult, which increases stress and exhaustion. Practice breathing during opening motions and exhaling during exertion (folding into positions, descending into Chaturanga).
- Too Soon, Forcing Into Advanced Poses
- Power yoga develops in stages. Before developing core strength, attempting arm balances or deep backbends greatly increases the chance of injury. Have faith in the process; well-executed basic poses gradually provide the prerequisites for more complex practice.
- Unsafe Practice
- Six sessions per week for three weeks, followed by a total halt, will be outperformed by two sessions per week for six months. Weight-related objectives react to cumulative, steady effort over time. It doesn’t matter which postures you execute; what matters is the consistency gap.
Who Should Try Power Yoga for Weight Loss?
- New comers
- Every position in power yoga contains variations that are suitable for beginners. You can begin if you are able to move and breathe. Over time, adherence increases since the learning curve keeps you cognitively active rather than bored.
- Women
- Power yoga provides a particularly comprehensive strategy for women dealing with PCOS, hormonal imbalances, or stress-related weight gain. Along with regular practice, the combination of physical exertion and nervous system management may eventually maintain hormonal equilibrium.
- Senior Citizens
- Power yoga improves bone health, balance, and joint stability in older persons with the right adjustments. To lessen the burden, poses can be adjusted against walls or chairs. If you have any pre-existing joint or cardiovascular concerns, see your doctor before starting any new fitness regimen.
- Employed Professionals
- Power yoga helps those who spend a lot of time at a desk with certain side effects, such as tight hip flexors, rounded shoulders, a weak core, and weight gain brought on by stress. You may significantly change how your body feels during the workday with a 25-minute morning or evening session.
FAQs
The power yoga – what is that? Is it appropriate
Power yoga is a fast-paced, fitness-focused type of yoga that travels through position sequences with flow and energy. It emphasizes strength, endurance, and calorie expenditure in addition to flexibility and breath awareness, in contrast to restorative or gentle yoga. Though its sequencing is often less strict, it substantially borrows from Ashtanga yoga.
Is power yoga suitable for beginners as well?
Yes, if you make adjustments that are appropriate for beginners. You may modify the majority of power yoga postures to fit your current level of strength and flexibility. You can prevent injuries and learn proper alignment right away by beginning with a guided program
Can I do power yoga at home?
Of course. A yoga mat and ample floor space to stretch your arms and legs are the only tools needed for power yoga. Because practicing at home is more convenient and eliminates the largest obstacle to constant attendance, many people get greater outcomes.
How long will it take for power yoga to show results?
Within the first two to three weeks of regular practice, most people report better energy, posture, and sleep. After six to ten weeks of consistent sessions coupled with mindful eating practices, changes in body composition, such as decreased belly fat and increased muscle tone, usually become apparent. Consistency over time, not effort in a single session, is reflected in the results.
Does power yoga require any equipment?
You don’t need any equipment. The only worthwhile purchase is a high-quality non-slip yoga mat. Blocks and straps are completely optional, especially in the early stages of practice, although they might aid with some poses if you’re less flexible.
Reference
- Saniya Zehra. (2026). Power Yoga for Weight Loss: Benefits, Poses & Routine. Habuild Blogs. https://habuild.in/habitology/yoga/power-yoga-for-weight-loss
- Dr.Bhoomika Bariya. (2025). Yoga Exercise For Weight Loss – Samarpan Weight Loss Clinic. samarpanweightlossclinic.com. https://samarpanweightlossclinic.com/yoga-exercise-for-weight-loss/
- Rushali. (2026). Power Yoga Poses for Weight Loss, Strength & Flexibility. MyYogaTeacher. https://myyogateacher.com/articles/power-yoga-poses
- (n.d.). Bhujangasana – The Cobra Posture – The Yoga Institute. The Yoga Institute. https://theyogainstitute.org/bhujangasana-the-cobra-posture