Best Yoga Poses for Lower Back Pain
Introduction
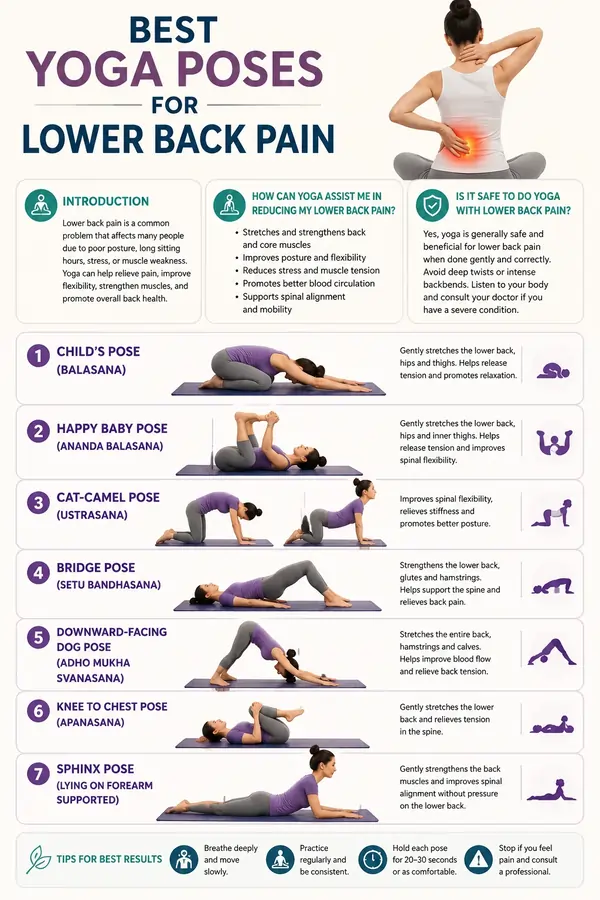
Lower back pain can make everyday activities like sitting, standing, or bending uncomfortable. Practicing the right yoga poses can help improve flexibility, strengthen the muscles that support the spine, reduce stiffness, and promote better posture.
- At some point in their lives, 80% of people will have low back pain. It is one of the most frequent causes of people going to the doctor or physiotherapist and missing work.
- Gentle stretches are a good approach to strengthening and relaxing your lower back muscles because lower back pain may be quite uncomfortable, and any quick movements can make it worse. For this reason, yoga is essential for the spine.
Common causes for lower back pain:
- Weak core
- Poor posture
- Poor ergonomics
- Shortened hip muscles
- Increased time sitting
And the list can go on. Determining the origin of lower back pain is crucial in order to treat it and keep it from becoming chronic.
How can yoga assist me in reducing my lower back pain?
- Static stretches in yoga assist in reducing back pain while increasing strength and mobility. Yoga combines breathing techniques, improves flexibility and core stability, and aids in posture correction.
- Your lower back pain shouldn’t get worse with yoga. It is crucial to listen to your body; if a stretch is unpleasant, then it is preferable to stop. When you pay attention to your body, doing yoga on a daily basis is generally safe. If it hurts, ease up on the stretch.
Is it safe to do yoga with lower back pain?
- When in doubt, it is preferable to see a Physiotherapist before conducting yoga. It is advised to contact a physical therapist before engaging in any kind of activity if you have a history of lower back injuries, neurological pain, or perhaps disc issues that last more than three days.
- If your lower back pain is more of a general soreness, achiness, or stiffness, then it is worth giving spinal yoga poses a try. Particular stretches are capable of helping you feel better because they improve the alignment of all of your back muscles.
Basic spinal yoga stretches for learners :
- Get started with five or six exercises.
- Hold each position for ten to sixty seconds.
- While holding the position, take deep breaths.
4. If you experience relief with those stretches, then you can progress to holding them up to 3 minutes - Start with the exercises a few times a week and work your way up to daily stretches.
- If your lower back is extremely stiff, staggered stretches are sometimes helpful.
Yoga pose:
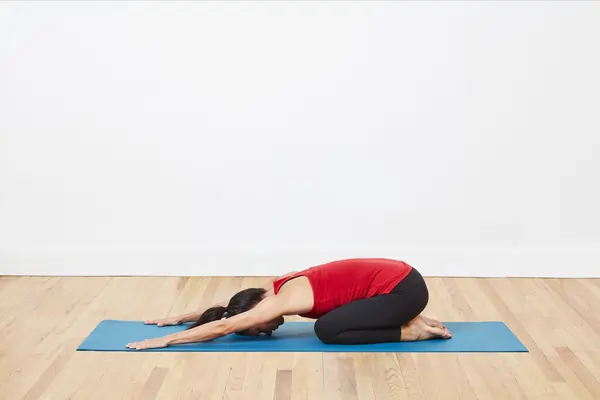
Child’s Pose or Balasana:
This stretch’s goal is to relieve pressure on your lower back by lengthening and straightening your spine, which in turn causes it to decompress.
How to do it:
- On your mat, bow.
- Breathe deeply.
- When you exhale, place your arms far in front of you on your mat and rest your chest over your thighs.
- Draw your ribs away from your tailbone and extend your neck onto the floor.
Hold the dosage for one to two minutes.
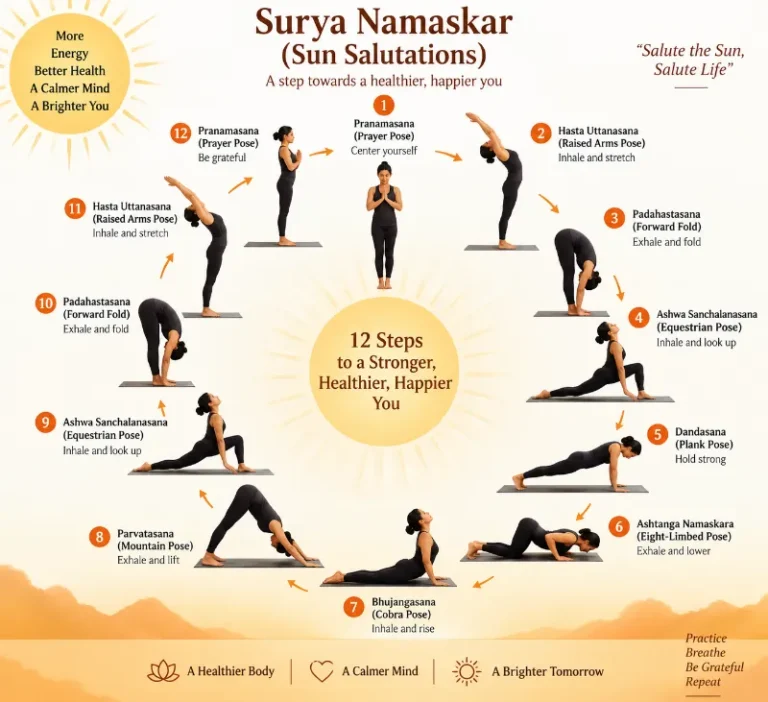
Bhujangasana (Cobra Pose)
This stretch activates the back muscles for support and is intended to relieve lower back pain caused by back flexion.
How to do it:
- Lay down on your stomach.
- Put both of your hands beneath your shoulders.
- Squeeze your shoulder blades, pull your shoulders back, tighten your core, and raise your head toward the ceiling.
- Dosage: Increase to one minute after holding for thirty seconds.
Happy Baby Pose or Ananda Balasana:
This yoga pose is used to relieve back pain and strengthen core muscles.
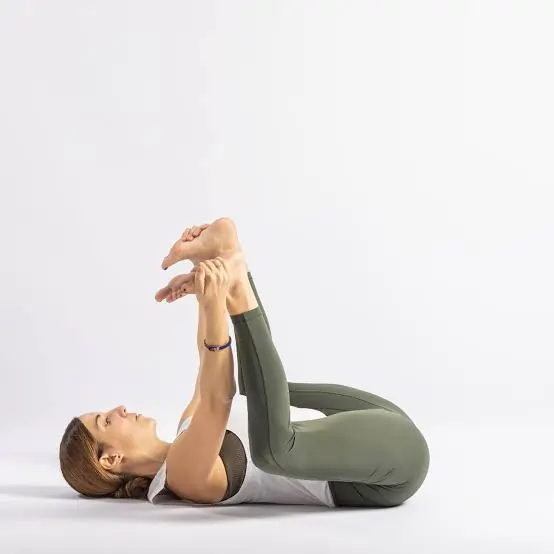
How to do it:
- Lie on your back.
- As far as you can, bend both knees.
- Let your knees drop to the floor and gently bring your feet to your chest.
- Hold a flat back on the ground.
Hold for one to two minutes.
Cat-Camel Pose or Ustrasana:
Most yoga routines use this pose, which is among the most common.
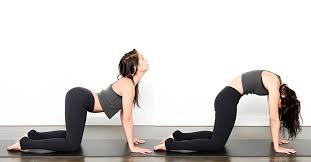
How to do it:
- Place yourself on your palms and knees.
- Breathe gently while slowly extending your neck upward and your tummy downward.
- To achieve the full cow stance, slightly arch your back and release all of your breath. Raising your spine and lowering your neck in line with your spine (without dropping your chin to your chest) can help you achieve a cat stance when you inhale.
Do each of these two exercises five times or more at a slow pace.
Bridge Pose or Setu Bandhasana:
This pose is used to enhance the muscles of the back and strengthen the back extensors
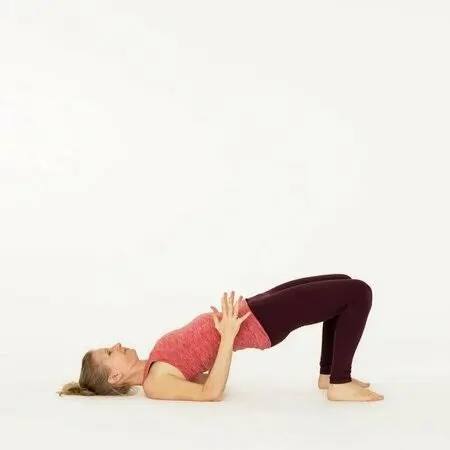
How to do it:
- Start by lying down on a mat or the ground.
- Keep your feet flat on the ground
- Keep your knees bent.
- Slowly raise the hip upwards.
- Lean into your shoulders and maintain a tight core.
- Raise your hips to a comfortable level.
- Try to tighten your core and glutes.
Hold for twenty to thirty seconds
Salabhasana (Locust Pose)
Weakness and lower back pain may be lessened with this mild backbend. It strengthens the arms, legs, and back.
To do this:
- Lie on your stomach.
- Keep your palms facing up and your arms close to your torso,
- Turn your heels to the side and touch your big toes together.
- Lightly touch your forehead to the ground.
- Partially, halfway, or fully raise your head, chest, and arms slowly.
- Lift your legs to deepen the position.
- As you extend the back of your neck, look either directly ahead or slightly up.
- Hold this position for a maximum of one minute.
- Before doing the pose again, take a break.
Downward-Facing Dog Pose:
This classic forward bend can be calming and revitalizing. Sciatica and back discomfort might be relieved by doing this pose.
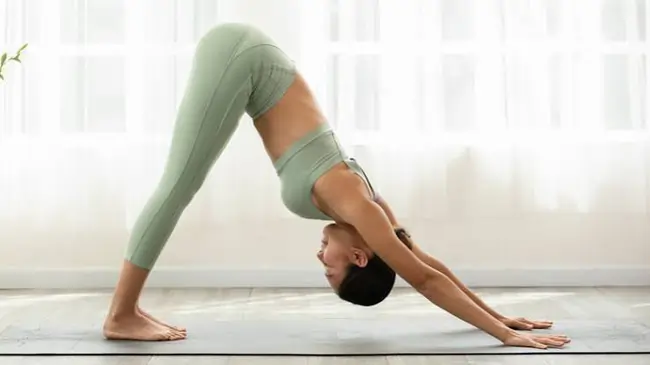
How to do it:
- Begin on your hands and knees.
- Place your hands at your wrists and your knees behind your hips.
- Lift your knees, tuck your toes under, and press into your hands.
- Raise your sitting bones toward the direction of the ceiling.
- Lengthen your tailbone and spine while maintaining a small bend in your knees.
- Maintain the position of elevation on your heels.
- Firmly press into your hands.
- Pay attention to how your shoulders and hips are positioned as you divide your weight equally between the two sides of your body.
- Keep your chin slightly tucked in or align your head with your upper arms.
Maintain this position for a maximum of one minute.
Knee to Chest Pose:
In addition to stretching the spine, this position gives your back a body-weighted massage.
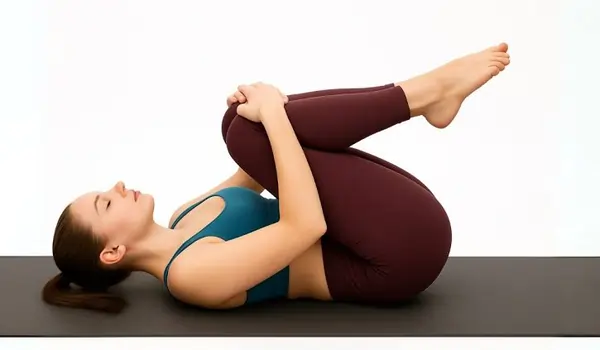
How to do it:
1. Place yourself on your back.
2. Bend your knees with your chest.
3. Rock your body slowly to the left and right.
Maintain this position for one to two minutes
Sphinx Pose (Lying on Forearm Supported):
Your abdomen, shoulders, and chest are all stretched. Your buttocks and spine get strengthened by this simple backbend. It might also help with stress relief.
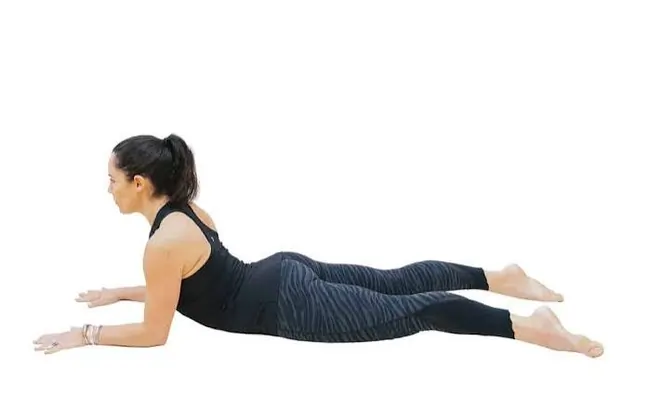
How to do it:
1. Stretch your legs behind you while lying on your stomach.
2. Stretch the muscles in your thighs, buttocks, and lower back.
3. With your hands facing down and your forearms on flat ground, place your elbows beneath your shoulders.
4 . Raise your head and upper body slowly.
5. Gently lift and engage your lower abdominals to support your back.
5. Be sure that rather than slumping into your lower back, you are raising through your spine and out through the crown of your head.
6. As you completely relax in this pose, keep your eyes forward while yet being active and involved.
Hold this position for a maximum of five minutes.
Figure Four Yoga Pose
This is an excellent stretch for beginners to relieve glute pain and address muscular imbalances caused by sitting. Stretching the piriformis muscle, a small gluteal muscle, can also relieve strain on the sciatic nerve.
How to Do Figure Four?
Lay down on your back. To create a figure-4 shape with your legs, raise your knees straight over your hips and cross your right ankle over your left thigh. Let your arms drop. Reach your toes toward your shin and flex your right foot to protect the right knee.
Behind your left thigh, interlace your fingers. Turn your inner thigh toward you by rotating your right hip outward. Pull your left leg gently in the direction of your chest. For a more intense stretch, squeeze your right glutes. Tuck your chin in and press your navel toward the floor to maintain a relaxed head, neck, and back on the ground. Breathe in while you hold the position, and out as you extend the stretch farther. On the opposite side, repeat.
Phalakasana (Plank Pose)
By strengthening the core, this exercise relieves pressure on the lower back and supports the spine.
How to do it:
- Lay down on your stomach.
- Put your toes beneath your ankles.
- Put your hands beneath your shoulders, contract your core, maintain a straight neck and spine, and extend your arms.
- Dosage: Proceed after holding for 30 seconds.
Parsva Balasana Asana (Thread the Needle pose)
This rotation promotes spinal range of motion while relaxing on the back.
How to do it:
- Place your hands beneath your shoulders and your knees beneath your hips as you begin on all fours.
- Place your shoulder on the ground and extend one arm beneath your torso in the other direction.
- Dosage: Repeat the stretch on the opposite side after holding it for a minute.
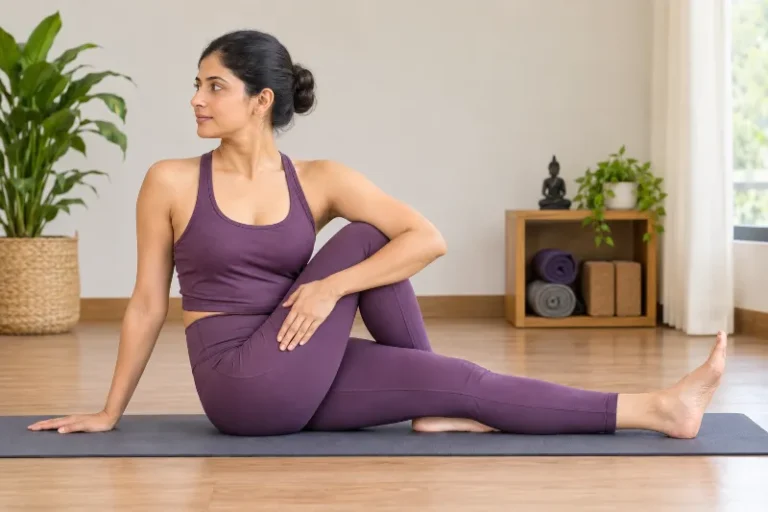
Supta Matsyendrasana Asana (Reclined Supine Twist)
Your lower back becomes relaxed after doing this stretch.
How to do it:
- Put yourself on your back.
- Put both of your knees to one side after bending them to a 90-degree angle.
- Turn your upper body and head in the opposite direction.
- Gently extend each arm onto the mat on the side of your body that you respect.
- Dosage: Switch sides after holding for 30 to 60 seconds.
Take note:
If you experience any pain or discomfort, stop right away.
Since this is not a full set of postures, try incorporating them into your practice multiple times a week and observe how your back tightness gradually changes. If something isn’t working for you, change it, replace it, or just get rid of it. Always discuss your plan with your Physiotherapist or physician.
All exercises were done using the proper method.
Is it actually helpful?
Over the course of a year, one short study from 2017 evaluated the impact of either physical therapy or yoga practice. The individuals with chronic back pain showed comparable improvements in both activity limitation and pain. After three months, the likelihood of both groups using painkillers decreased.
According to a separate study conducted in 2017, yoga practitioners experienced short-term, mild-to-moderate reductions in pain severity. Additionally, participants’ short- and long-term function was found to be modestly improved by practice.
Even though the data appears encouraging, more research is required to validate and build upon these conclusions.
Including Yoga in Your Practice for Long-Term Relief
You can get long-term relief from back pain by incorporating yoga into your daily practice. Consistency is essential to reaping the full benefits of yoga, even though it’s crucial to pay attention to your body and practice poses properly. The following advice can help you incorporate yoga into your everyday routine in a sustainable way:
- Take Your Time
Start with mild poses like Child’s Pose, Cat-Cow, and Sphinx Pose if you’re new to yoga or have significant back pain. As your strength and flexibility increase, gradually increase the intensity of your practice.
- Pay Attention to Alignment
In order to maximize the advantages of each position and avoid injuries, proper alignment is crucial. Think about enrolling in a yoga class with a qualified teacher who can assist you in improving your technique and posture.
- Take Mindful Breaths
An essential component of yoga is breathing. Breathing deeply and mindfully eases tension, helps you settle into each pose, and enhances your general wellbeing. Make an effort to time your breathing to your motions.
- If necessary, use props
You can adjust positions to fit your level of flexibility and avoid strain by using yoga blocks, straps, and bolsters. If you have restricted movement or tense muscles, props are very useful.
- Maintain Consistency
To fully benefit from yoga, consistency is essential. Even if you only practice for ten to fifteen minutes each day, try to practice multiple times a week. Your strength, flexibility, and pain threshold will all improve with time.
Safety Measures and Things to Think About
Although most individuals can safely practice yoga, there are a few things to be aware of, particularly if you have serious or chronic back pain:
Seek Medical Advice: Before beginning a yoga practice, seek medical advice if you have a severe back condition or injury. They can assist you in figuring out which poses are appropriate for your situation.
Prevent Overstretching: Excessive stretching can aggravate back pain or cause injury. Always take care of your body and avoid extra effort.
Adjust Poses to Your Needs: A lot of yoga poses may be altered to suit varying degrees of flexibility or pain points. Never be afraid to use supports or correct your posture when necessary.
Conclusion
Yoga may not be suitable for everyone, despite new research supporting its use as a treatment for back pain. Before beginning any new yoga or fitness regimen, make sure to see your physiotherapist or physician. They can assist you in tracking your development and identifying any possible risks.
You can begin practicing at home for as little as ten minutes each day. Your practice can be guided by books, articles, and online courses. You may naturally design your own sessions once you grasp the fundamentals.
You might want to enroll in classes in a studio if you want more experiential learning. Make sure you look for courses and instructors who can meet your individual needs.
FAQs
Will yoga fix lower back pain?
Yoga can help manage, lessen, and even eliminate lower back discomfort. It works by stretching tight muscles, increasing core and spinal strength to support your back, and improving posture.
Which yoga poses should be avoided with lower back pain?
If you have lower back pain, avoid any poses that strain your spine into deep forward flexion, aggressive spinal extension, or loaded rotation. Instead of treating the lower back, these asanas can easily compress intervertebral discs and pinch sensitive nerves.
Is yoga good for an L4-L5 disc bulge?
Yoga can be quite good for an L4-L5 disc bulge since it relieves strain and builds supportive core strength. However, you should avoid poses that require significant forward bending or twisting, as these can worsen the bulge. Always speak with a physical therapist before
What are the top 3 yoga poses for lower back pain?
A famous spine biomechanist devised the “Big 3” for lower back pain: the modified curl-up, the side plank (or side bridge), and the bird dog. These core-strengthening exercises are intended to support the spine while avoiding excessive tension or unpleasant movement.
How long until yoga relieves back pain?
You might expect to see noticeable improvements in back discomfort after 6 to 12 weeks of consistent practice. Significant pain reduction—often decreasing pain scores by half—requires frequent practice two to three times per week.
References:
- 13 yoga stretches to help relieve lower back pain. (2024, June 11). Dr. Mahesh Bagwe. https://www.drmaheshbagwe.com/blog/13-yoga-stretches-to-help-relieve-lower-back-pain/?bp=41182
- Cronkleton, E. (2020, August 25). The 10 best yoga poses for back pain. Healthline. https://www.healthline.com/health/fitness-exercise/yoga-for-back-pain#downward–facing-dog
- Yoga poses for lower back pain | National Spine Health Foundation. (2023, February 1). National Spine Health Foundation. https://spinehealth.org/article/yoga-poses-for-lower-back-pain/
- Cronkleton, E. (2020, August 25). The 10 best yoga poses for back pain. Healthline. https://www.healthline.com/health/fitness-exercise/yoga-for-back-pain