
Kurmasana (Tortoise Pose)
What is Kurmasana (Tortoise Pose)?
Kurmasana (Tortoise Pose) is a deep-seated yoga posture that promotes flexibility in the hips, hamstrings, shoulders, and lower back.
Another name for Kurmasana is Turtle Pose or Tortoise Pose. For intermediate to expert yoga practitioners with a great degree of mobility and flexibility, this vigorous forward-bending pose is appropriate while seated.
In this pose, you begin with a wide-legged sitting position, extend your spine, bend your knees, lower your upper body gradually toward the floor, and slide your arms beneath your knees.
Your spine, shoulders, hamstrings, and glutes will get more flexible the longer you can maintain this position.
Overview & Etymology
Kurmasana is derived from the Sanskrit terms “Asana,” which means stance or posture, and “Kurma,” which means turtle or tortoise.
Ancient Hatha yoga literature such as Ahirbudhnya Saṅhitā (7th century) and Sritattvanidhi and Jogapradipika (19th century) refer to this position as Uttana Kurmasana.
In his 1966 book Light on Yoga, B. K. S. Iyengar introduced the Tortoise posture as a contemporary yoga practice later in the 20th century. He dedicated this pose to Kurma, Lord Vishnu’s second avatar (incarnation), who is half human and half tortoise.
Kurmasana represents Pratyahara, Patanjali’s fifth component of the Ashtanga yoga sutras.
In the yoga stage known as Pratyahara, practitioners learn to shut down any distracting sensory stimuli and withdraw their senses from the material world, much like a tortoise does when it withdraws into its shell.
You can learn to take charge of your emotions and assist your brain in becoming more aware of the ultimate self by shutting off your material senses.
- Sanskrit Name: कूर्मासन
- Pronunciation: KOOR-MAH-SAH-NAH
- Pose Type: Seated, Forward Bending
- Also referred to as Turtle Pose or Tortoise Pose
- Strengthens: Back, Arms, and Spine
- Stretches the hamstrings, glutes, shoulders, and spine
Muscles Stretched
- Hamstrings
- Adductor muscles of the inner thighs
- Gluteal muscles
- Lower back muscles
- Hip flexors
- Shoulders
- Upper back
Health Benefits of Kurmasana
- Helps with posture.
- Increases metabolism.
- Minimizes insomnia.
- Tones the legs and core.
- Beneficial to the back.
- Improves one’s physical flexibility.
- Organs in the abdomen are activated.
- Enhances blood flow to the spine.
- Lengthens and rubs the lumbar area.
- Reduces mild sciatic nerve discomfort.
When to Avoid Performing Kurmasana
- Avoid when pregnant.
- Stay away if you have sciatica.
- Avoid if your disk is herniated.
- Stay away if you have chronic back pain.
- If you have knee arthritis, stay away.
- Avoid if you’re recovering from a recent operation or injury.
How to do Kurmasana (Tortoise Pose)
To assist you with beginning your Kurmasana practice, we have separated it into many stages.
Part 1 – Preparatory Poses for Kurmasana
An advanced yoga stance that calls for complete body activation is tortoise pose. To help you prepare, try these warm-up poses:
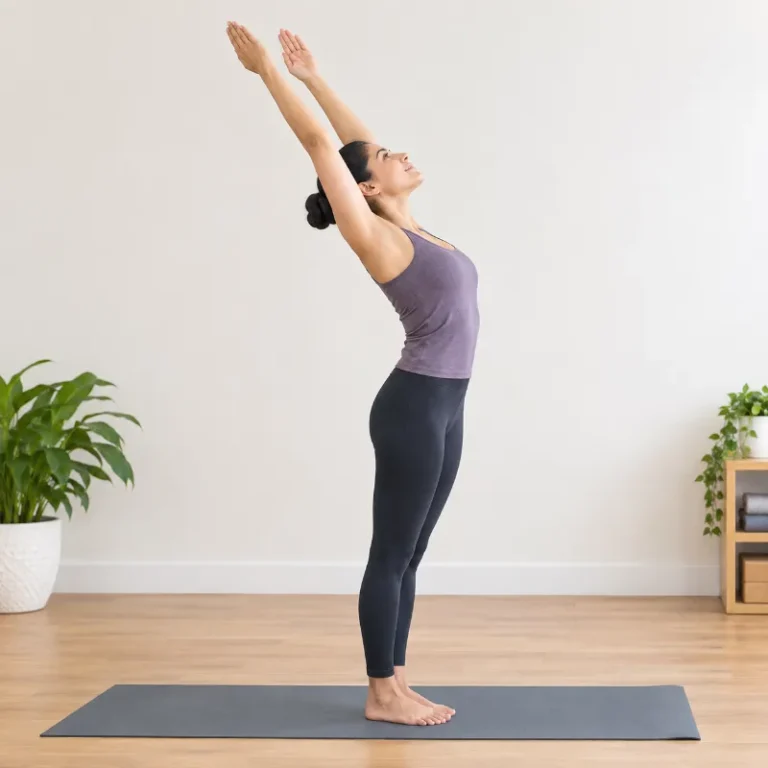
Uttanasana (Standing Forward Bend)
- Pose like a mountain to begin. To stretch your spine and stabilize your core, take a few breaths here. Holding your hands at the side of your waist and standing with your feet hip-width apart, take a breath.
Breathe out and begin to hinge your upper body forward. Raise your arms above your head and place them on the floor. Maintain this posture until your arms, shoulders, and spine feel more relaxed and flexible, and your hamstrings and glutes feel engaged.
Upavistha Konasana (Wide-Angle Seated Forward Bend)
- Spread your legs wide on each side as you sit on your mat. To stimulate your entire upper body, take a breath and flex your arms above for a few seconds.
Breathe out and begin to bend toward the floor. Your forehead, chest, core, and palms should all be fully resting on the ground. To increase blood flow to your shoulders, glutes, and spine, hold this pose for two to three minutes.
- To begin, stand on just one leg. Bend your left leg while crossing your right knee over your left kneecap. Make a full eagle legs formation by wrapping your left foot under your right calf muscle if your flexibility permits.
Lift your chest up to extend your spine while keeping your glutes in a neutral position.
Next, cross your elbows and raise your right arm over your left. Create the eagle arms pose by bringing the palms of your two arms together to securely grip each other.
Hold this stance for as long as it feels comfortable, keeping your elbows at shoulder level. Repeat on the opposite side after releasing. This is a fantastic method to increase your core and limb strength and flexibility.
Part 2: Step-by-Step Instructions to Perform Kurmasana
To perform tortoise or turtle position, follow these steps:
- Step 1: Take a seat to begin. Each leg should form a triangle with the ground when you bend and spread them out at the sides.
- Step 2: Bend from your low back to bring your torso forward and toward the ground. Avoid putting your head completely on the ground. For a little while, remain near the earth.
- Step 3: Raise your chest, twist your shoulders, and place each arm at your sides beneath your knees. Gently tuck your arms beneath your legs until your shoulders are directly beneath your knees.
- Step 4: Take a few breaths and maintain this semi-tortoise position. Retract all of your senses, release your breath, and then slowly bring your arms, legs, chest, and forehead all the way down to the floor.
- Step 5: Inhale deeply and concentrate on how your entire body feels stretched.
- Step 6: Take five to ten deep breaths, then release the stance gradually. In Seated Forward Bend, slightly bend your legs, let go of your arms beneath your legs, and unwind.
Breath Awareness:
- Take a breath while sitting with your legs outstretched.
- When your torso is leaning forward toward the floor, exhale.
- Inhale and exhale while maintaining the posture for a short while.
- Beginners’ Performance Duration: Hold Kurmasana for five to six deep breaths.
- Performance Duration for Advanced: Hold Kurmasana for as long as it feels comfortable, or for five to ten deep breaths.
Part 3: Things to Keep in Mind
It takes a great deal of mindfulness of all your senses to perform the tortoise stance. Here are some posture remedies to consider when doing Kurmasana because misalignment might have detrimental effects:
- Keep your knees from being strained: To flex your feet, do not lock your knee joints. Your knee joints may experience unneeded strain if you lock them while strengthening your legs. Your knees may sustain serious damage as a result of this. Keep your knees slightly bent and slowly lower your legs straight to the floor to avoid this.
- Release slowly: It’s crucial to pay attention to your technique when releasing this pose because your shoulders, neck, and spine are in a very vulnerable posture. Pay attention to your breathing and release the pose very slowly because releasing too hastily can increase your risk of injury.
Part 4: Relaxing Poses After Kurmasana
For a quicker recovery and a healthier spine, try these counter-yoga positions after your Tortoise pose practice.
- With your feet and legs together and your hands facing down on either side, lie on your back. Lift your legs up, then above your head, while applying pressure with your hands on the mat. Make sure your toes are touching the ground. Additionally, you can support your core by placing your hands on your low back.
Take a few breaths while you’re in this posture. In order to unroll your spine back onto the mat, finally release your breath while pressing your palms into the ground once more. Take a few moments to relax your entire body by lying in corpse pose. This will give your neck, shoulders, traps, and lower back some relief.
Ananda Balasana (Happy Baby Pose):
2. From the corpse position, proceed. As you lie on your back, make sure there is no space between your tailbone and the floor. Make a 90-degree angle with the ground by raising your legs. Bend your legs and grasp the outside borders of each foot.
Now line your knees with your armpits by pushing down toward the floor. Hold this position until your lower back and spine are at ease. For a quicker recovery, you can also gently rock back and forth, creating the ultimate Happy Baby stance.
Kurmasana Variations to Consider
Beginning and experienced yogis might try the following position changes when practicing tortoise pose:
Ardha Kurmasana (Half Tortoise Pose):
- This version of tortoise stance is ideal for beginners. Sit in the Vajrasana position to begin. Flex your arms and take a deep breath.
After that, exhale deeply, bend your upper body forward, and place your forehead and arms on the floor. For the primary position practice, this version will strengthen your legs and spine.
Kurmasana with arms at the back:
- Place yourself in the primary tortoise stance, pay attention to your breathing, and gradually extend your arms behind you until your hands are clasped together.
This variant, which is at an intermediate to advanced level, can help you improve the flexibility of your upper body, particularly your shoulders.
Supta Kurmasana (Reclining Turtle Pose):
- Take a few deep breaths and place yourself in the basic Kurmasana pose to prepare your entire body for this advanced form. Holding your palms behind your back, exhale.
Maintain your breathing, focus, and carefully wrap each foot around your neck, one leg at a time. Release this deep twisting variation after holding it for ten to thirty seconds.
After you’ve relaxed in the Seated Forward Bend, perform the exercise with a different leg position.
Beginners’ Modification
Kurmasana can be challenging for beginners. You can:
- Bend your knees gently.
- Underneath the hips, place a folded blanket.
- Do not attempt to fully straighten your legs.
- Before attempting to slide the arms underneath, practice with them next to the legs.
- When learning the entire pose, follow the instructions of a yoga instructor.
Common Mistakes
- Straightening your legs
- Overly rounding the lower back
- Aggressively pulling the arms beneath the thighs
- Keeping the breath in
- Attempting to get to the floor before the body is prepared
- Practicing the entire position without enough hamstring and hip flexibility
Precautions
Kurmasana should be performed progressively because it’s an advanced pose. If you have severe pain in your shoulders, lower back, knees, or hips, try not to force the posture. Before attempting the posture, people with serious hip, knee, shoulder, or back issues should consult a trained yoga practitioner.
Preparatory Poses
Before practicing Kurmasana, you can prepare the body with:
- Baddha Konasana
- Upavistha Konasana
- Paschimottanasana
- Janu Sirsasana
- Malasana
- Gentle hamstring and hip-opening stretches
Duration and Frequency
As their flexibility increases, beginners can progressively extend the length from 10 to 20 seconds. As long as they are able to maintain appropriate alignment and comfortable breathing, more seasoned practitioners can hold the position for 30 to 60 seconds.
FAQs
Can beginners perform Kurmasana?
Kurmasana should not be performed by beginners who are just beginning to practice. In order to improve their level of flexibility, novices can instead concentrate on their whole body flexibility and attempt to alter the tortoise stance using props.
What are the different preparatory poses in Kurmasana?
Kurmasana’s several preparatory positions include Eagle pose, Wide-Angle Seated Forward Bend, and Mountain pose Standing Forward Bend.
What are the benefits of Uttana Kurmasana?
The Upside-Down Tortoise pose, also known as Uttana Kurmasana, will massage your kidneys and reproductive organs, strengthen your legs, activate your core, relax your spine, and activate your adrenal glands.
What is Supta Kurmasana?
To achieve Supta Kurmasana, also known as Sleeping Tortoise pose, place yourself in the primary Tortoise position and hold it for five deep breaths to stabilize your body and mind. Next, try to bring your legs over your head by slowly rotating your hips externally. Keeping your breathing under control, place your hands behind your back.
What are the different variations in Kurmasana?
Three popular versions of Kurmasana are Half Tortoise stance, Sleeping Tortoise pose, and Upside-Down Tortoise pose.
Who should avoid performing Kurmasana?
The Kurmasana pose should be avoided by practitioners who have sciatica, inflammatory knee arthritis, herniated disks, or chronic low back pain. Additionally, pregnant or postpartum women should temporarily refrain from doing this.
References
- Allen, W. (2025k, August 26). Kurmasana (Tortoise pose). https://myyogateacher.com/yoga-asana/kurmasana
- Bisht, H. (2026, September 11). Benefits of Kurmasana (Tortoise Pose) and How to Do it by Dr. Himani Bisht. PharmEasy Blog. https://pharmeasy.in/blog/health-fitness-benefits-of-kurmasana-and-how-to-do-it/
- Giubilaro, G. (2022, April 15). Challenge Pose: 4 Steps to Master Tortoise Pose. Yoga Journal. https://www.yogajournal.com/poses/4-steps-master-tortoise-pose-kurmasana/